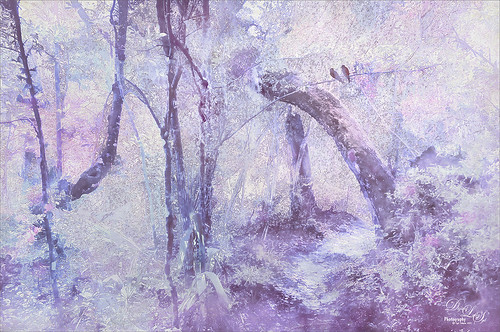
This image is another view of the trail at Ravine Gardens State Park in Palatka, Florida. This time it was given a frosty feel – just felt like doing something different with it. Topaz (see sidebar for website link) Studio’s preset Paint by Numbers was used to get this sort of half painted effect – and the original image was loaded over the effect using an Image Adjustment Layer. Back in PS Topaz ReStyle’s Snow Cover II preset was used to give the wintry look. The birds were added and a Pattern Fill Adjustment Layer was used to give the texture in them. ….. Digital Lady Syd
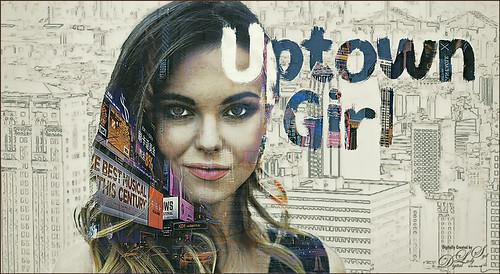
Just had some fun trying a couple new techniques that I learned this week. One involved using the Diffuse Filter to help blend in a composite object and the other was to use Content Aware Scale to put an image into portrait mode from landscape. Both new techniques worked pretty well. Also used the Topaz Studio Impression Adjustment to create an interesting painterly look. The font is Spring Vibes. Will be blogging on these techniques down the road. ……. Digital Lady Syd
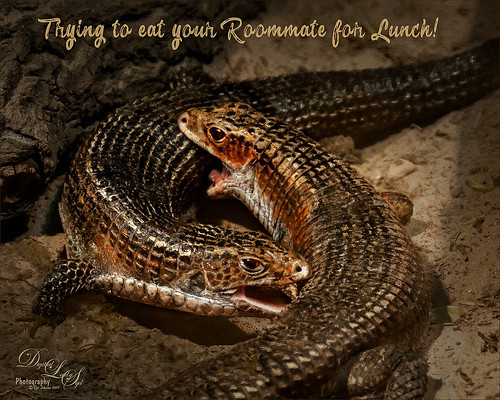
These two Western Plated Lizards at the Jacksonville Zoo Reptile House were having a great time trying to bite each other! I guess this is how lizards play? or maybe a little territory fighting? Anyway, it sure made for an interesting image. Changes were done in Lightroom – mainly the standard edits and a couple Adjustment Brushes were used to enhance their color and patterns. In Photoshop the Topaz (see sidebar for website link) Sharpening AI filter was applied using just the Stabilize setting at 70 with no noise reduction (see my Topaz Sharpen AI – Good or Bad? And Yes, Free Upgrade for Topaz Infocus Owners blog). Then just a little edge clean up, a spotlight effect put on their heads (see my How to Add a Spot of Light Effect blog), and the eyes were sharpened using the Exposure Adjustment Layer (see my The Eyes Have – How to Make Them Pop! blog). A vignette using a Levels Adjustment Layer was applied as a last step (see my Using a Levels Adjustment Layer for a Vignette blog). The text is called Chameleon. That was it!…..Digital Lady Syd
These beautiful Lantana flowers (which was the largest plant I have seen – this is just a little part of it) was being totally smothered by several different kinds of palm plants along a golf course hole in Florida. It created sort of an intriguing image. Since this is an old Android phone photo, it was not the sharpest, even after running it through the marvelous Topaz (see sidebar for website link) AI JPG to RAW. So I had to improvise if I wanted to use the image. Therefore, I first ran it through Topaz Studio’s AI Clear which helped quite a bit (used High Sharpness, Recover Detail 0.39, Exposure -0.17, and Clarity 0.67). Also in Studio the Edges Adjustment was used and set to Dark Tones at a Strength of 0.37 and the Impression Adjustment using the default setting with an Opacity of 0.74. Back in PS a Color Lookup Adjustment Layer was applied and set to the Crisp Warm preset. A little painting, some Nik Viveza 2, some lighten and darken curves for dodging and burning, a Blur Tool layer, and a Sharpen Tool layer were also used. Topaz Sharpen AI set to Stabilize and a Remove Blur Amount of 0.80 was used. Last step was to add a slight vignette using Unmesh Dinda’s technique. I was surprised I could use all the AI programs on the image and get a decent effect. ….. Digital Lady Syd
This image of the beautiful pink Azaleas in bloom at the Ravine Gardens State Park in Palatka, Florida, was pretty difficult to post-process. It was taken around 9 AM in the morning, which was still enough sun to cause shadow problems on a sunny day. Listened to Matt Kloskowsky’s video called Channel Masks and Spring Color where he adjusted a similar type image. It really helped cut down on the overall sharp shadow effect and brought in the colors nicely. I can also say I used several of my own tricks and tips from my recent blogs on Topaz (see sidebar for website link) Sharpen AI, dodging and burning, spotlight effects, and vignetting. This actually looks pretty close to what I was seeing. Amazing!…..Digital Lady Syd
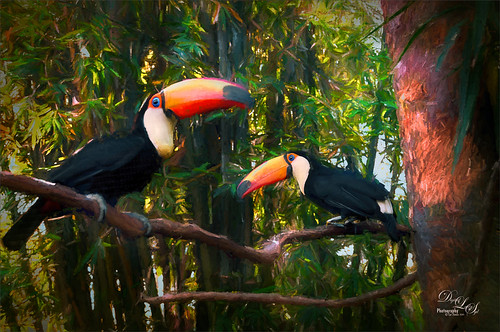
Yes, my friends at the St. Augustine Alligator Farm are making another appearance, this time showing off their painted jungle background. This is their favorite place to be. How did this happen? Well, if its a painted background, it is probably Topaz’s (see sidebar for website link) wonderful Impression plug-in, now in Topaz Studio. Yes, this time the Edward Hopper I preset was used and then the Toucans were painted out somewhat – left a few strokes around them. While in Studio, a Glow Adjustment using the Soft Liquid preset was applied and the Primary Glow was changed to 0.90 – used the same mask as in the Impression Adjustment so the birds were not affected. Also used AI Clear Adjustment to sharpen up their eyes and bodies. Several PS adjustment layers were used, a Clone Stamp layer to clean up the strokes, and Nik Viveza 2 to adjust the vignette effect. These birds are such happy creatures – no wonder they are the first exhibit you see when entering the Alligator Farm. ….. Digital Lady Syd
This Coquerel’s Sifaka monkey was having so much fun when I was at the Jacksonville Zoo recently – couldn’t help but smile and watch him. This image was done in blue tones first, and Topaz (see sidebar for website link) Studio’s Basic Adjustment and AI Clear were applied. Then the Impression Adjustment was added using the default settings and a mask to bring back the monkey and the netting above. An Image Adjustment was added and the original image was placed in the Background. A layer mask was used to paint the monkey back and the overall adjustment was set to 0.54. At this point the image was saved as a tiff and opened in Topaz AI Gigapixel as the size of the monkey was very small in the image – it was enlarged by 2 times. The Tiff file was then opened in PS and Topaz ReStyle plugin’s Grass Swing preset was selected to bring out all these beautiful fun colors. Quite a bit of clean up and painting was needed to get the final effect. Just had a lot of fun doing this image. …… Digital Lady Syd
The old Pine Cones were all having a giant convention underneath a couple of their favorite Pines trees. I decided to sneak up on them and get an image of part of this large group. Since I took this image with an older Android phone, it was not one of the best but I liked it. Therefore I ran the image through Topaz (see sidebar for website link) JPEG to Raw AI program which produced a Raw tiff file. (See my What Is Topaz’s New JPEG to RAW AI? blog.) Then the image was opened in Adobe Camera Raw and adjusted before going into Photoshop. The image was first run through Nik’s Color Efex Pro. Then a Saturation mask was created for a Hue/Saturation Adjustment Layer. Some spotlight effects were created on the cones. Then Topaz Studio was opened were AI Clear, HSL Color Tuning, and Impression’s default with Type 03 brush was applied. That was it. It was a lot of fun to post-process!…..Digital Lady Syd
I think this place is perfect for having a nice lunch on a warm sunny day. Scotland does not get days like this very often so these locals were enjoying themselves. I see the tourists coming up the block though. I have to be honest I am not totally sure what I did to create the look in this image. I like the final effect though. Topaz (see sidebar for website info) Studio’s AI Clear was applied. Then back in Photoshop Topaz Simplify was applied using the BuzSim preset. Then Topaz Sharpening AI set to Focus was used. A High Pass Filter was used to sharpen up some of the details. Then back into Topaz Studio where an Abstract Adjustment was applied and an AI ReMix Adjustment. In PS the Rough Pastels filter and the Dry Brush filter was applied. A Darken and Lighten Curves Adjustment Layers were applied. A Noise Gradient Map Adjustment Layer was applied and a Foggy Night preset in the Color Lookup was added. There were some painting layers and other things, and I think I was going nuts by the time I finished this. Anyway, I like the overall look but I don’t think I could reproduce the effect. ….. Digital Lady Syd
I had initially post-processed the Lemur as its own image. Then I ran across a nice video by Jesus Ramirez called The Best Way to Select and Mask Glass (or Transparent Objects in Photoshop. I had to try it and that is how my Lemur buddy ended up in a bottle. The original Ring-Tailed Lemur image was taken at the St. Augustine Alligator Farm in Florida. This image used a Noise Gradient Map Adjustment Layer (see my How to Randomize Some Color with the Gradient Map Adjustment Layer blog). The Lemur was selected out of my original image that I may post sometime and was run through the Select and Mask command before moving him into a glass bottle from Pixel Squid. The flying Canadian Geese are also from Pixel Squid. The background is one I painted in Corel Painter and the wood is a texture from Kelby One. Just a lot of fun to put together!…..Digital Lady Syd
Check out AI Gigapixel stand-alone software for upsizing your images. It’s incredible! And it can now be used as a plugin when in Photoshop. Also Topaz Labs Photo AI has some great sharpening and denoise tools along with Photo Video AI.
GRUT BRUSHES – Photoshop Brushes for Digital Artists
Click here to visit GrutBrushes.com
And be sure to check out his Free Brush of the Week and Brush Sampler! These are the best brushes you can find!
Topaz Studio 2 and Legacy Topaz Labs Filters
Unfortunately Topaz Studio 2 and other Topaz Lab filters are no longer available for sale as of 2020. If you had bought these filters and would like to put them back on, here is a link to the Legacy Apps where they can be downloaded again. Below is an example of the wonderful Remix AI Filter from Studio 2. The wonderful Impression still works fine in Photoshop right now along with Adjust (all versions), ReStyle, and even PhotoFXLab!
Please note that I do make a very small commission on purchases made if you click through to the websites using the links above – it helps me keep my site going. Thanks for clicking.