
Trans Siberian Orchestra in Concert
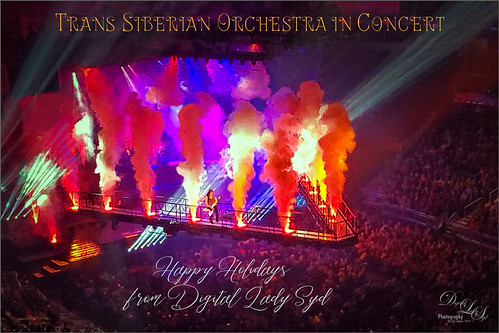
Hoping everyone is having a great holiday! This image was taken a week ago when they performed their Christmas show (hence the holiday card even though it is stretching it a bit) at the Amway Arena in Orlando. We were sitting pretty far away, but it was still awesome! Had to post a pix even if it is a bit crazy! I actually pulled this image out of a video, and then ran it through Skylum’s software Neo – used a lot of different effect before I liked it. Used Viveza to tweak it a little more and finally painted in a few areas to remove lines holding the hanging contraption. This is pretty much how the color was, which is what I remember most. Anyway, it definitely shows the scope of the color effects from the show! See ya next year!…..Digital Lady Syd
The Grace of Rhododendrons
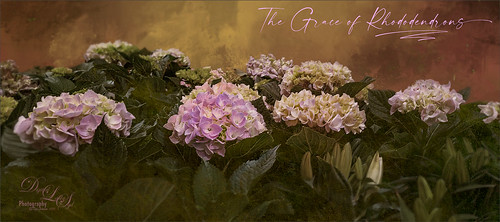
Found these rhododendrons growing in a local Lowes Home and Garden Store and thought I would give my Android phone a spin by capturing a RAW image. I was overall pretty pleased with it. Topaz (see sidebar for website link) Sharpen was used to sharpen it up a little in PS – the background showing the store was removed and a texture from Daily Textures called Explorations 6 was added. A Color Lookup Adjustment Layer was applied using one of my favorite presets (from Photofocus’s Landscape presets) called Africa at 87% layer opacity. Flypaper’s Adriana texture was added on top and set to Pin Light at 73% layer opacity. One of the coolest trick I learned from Karen Alsop and that is to paint over the far edges of items to soften the effect and draw attention away from that part of the image. Just use a soft round 25 pixel brush with only Smoothing on and set the Opacity to 12% and Flow to 24% – then just sample the background color and paint on the edges on a new layer. Can adjust the layer opacity as needed. The font is called Modernline by Ef Studio. Really love these flowers!…..Digital Lady Syd
Seasons Greetings from Me and My Cat Sophie!

Sophie and I are wishing you a wonderful Holiday Time. She is my fairly new member of my household – she found us in September at the Flagler Humane Society, who rescued her from some terrible accident where she lost her tail. Still healing from the wound, but she is a real trouper and doing well. And I have to give major cu-does to the Shelter employees – the staff is a fabulous group of people that work very hard to help orphaned pets. If you are looking for a pet, go check out your local Society. You will not regret it – I know we don’t!
And about Sophie – she is roughly 3 years old and I think she is part Chartreux since she has the beautiful amber eyes and gray tones on her fur. She talks to me all day – not loud meowing, just sort of gurgles. I always feel bad when I am not sure what she is trying to say. We have a lot of fun. I am trying to teach her to walk on the treadmill with me, but so far she is reluctant! Merry Christmas!!!!!…..Digital Lady Syd
Introducing the Magnificent Great Orange Tip Butterfly

Yes, brought in all the way from Japan is this little beauty, one of many exotic butterfly species that were entertaining visitors at the Florida Museum’s Butterfly Rainforest exhibit in Gainesville, Florida. She was totally enjoying all the bright colored flowers as she zoomed around the exhibit. I did use a free Lightroom preset, which I do not usually do, to get the really darkened down effect – it was called KP01-Lone Pine from the Explorer Pack at Adobe, then added a bit of Texture and Clarity to it. Very little was done to this image other than sharpen it up a little – used both Topaz Sharpen AI and Luminar Flex to do this. (see sidebar for links to both of their websites.) The Spot Healing brush and a soft round brush at 30% opacity was used to clean up a few rough edges and halos on the foreground yellow flowers. Otherwise that was it. I love combining two of my favorite subjects – butterflies and flowers – in one image!…..Digital Lady Syd
Just Gulliver Saying Hi

Gulliver is a Coquerel’s Sifaka, a medium-sized Lemur. What a character – I could hang out with Gulliver all day at the Jacksonville Zoo. Not a lot was done to the image – it just looked better in black and white to me. Used Topaz (see sidebar for website link) Sharpen AI first, then painted some of his hairs a little darker using some of the brushes noted in my recent blog called Getting the Joel Sartore Look on Your Zoo Images. Little bit of Spotlight Effect on his face and that was about it. He is so photogenic and seems to love to have his picture taken. Go visit him if you get a chance to go the Jacksonville Zoo – he will put on a little show for you……Digital Lady Syd
Museum of Natural History
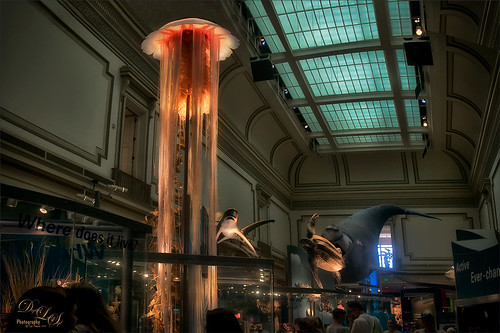
This image was take on the second floor looking down on one of the newly renovated areas of the Smithsonian National Museum of Natural History. There is a lot to see in the Museum. And don’t forget, when in DC all the Smithsonian Museums are free to the public! The image was really hard to get straight and looking good. (Thank you Topaz AI Sharpen – see sidebar for website link.) Used about everything in my workflow but it was worth it. I love this image!…..Digital Lady Syd
How Did This Happen?
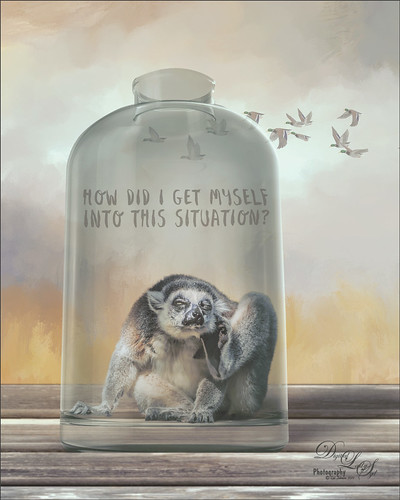
I had initially post-processed the Lemur as its own image. Then I ran across a nice video by Jesus Ramirez called The Best Way to Select and Mask Glass (or Transparent Objects in Photoshop. I had to try it and that is how my Lemur buddy ended up in a bottle. The original Ring-Tailed Lemur image was taken at the St. Augustine Alligator Farm in Florida. This image used a Noise Gradient Map Adjustment Layer (see my How to Randomize Some Color with the Gradient Map Adjustment Layer blog). The Lemur was selected out of my original image that I may post sometime and was run through the Select and Mask command before moving him into a glass bottle from Pixel Squid. The flying Canadian Geese are also from Pixel Squid. The background is one I painted in Corel Painter and the wood is a texture from Kelby One. Just a lot of fun to put together!…..Digital Lady Syd
Double Rainbow
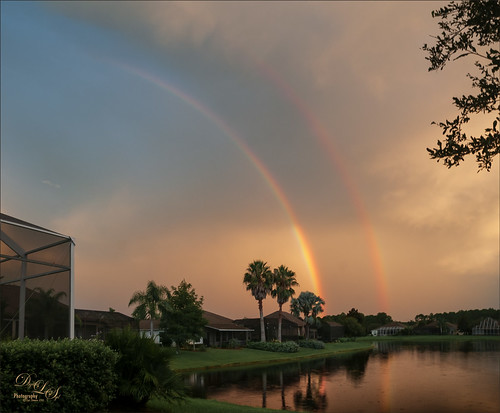
Totally enjoyed watching a regular rainbow turn into this gorgeous double rainbow as the clouds rolled in and the sun went down (image shot just before 8:00 PM). I do not think I have ever seen one here in Florida before. Very little post-processing was done other than the Adaptive Wide Angle filter was used to straighten the lines a little since I shot at 10 mm using my Nikor 10-24 mm lens to get the whole rainbow in the image. (Other settings were F/8.0, 1/15 sec, ISO 200, and -1/2 EV.) The clouds also were lit with the same beautiful sunset light. Hope I get to see some more of these in the future! …..Digital Lady Syd
The Mighty Ant
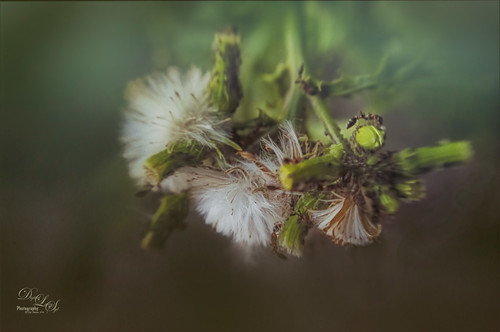
For some reason, this dandelion weed has grown to some humongous size by my front door in this major hot summer we are having and the ants are having a ball tromping all over it! I decided to pull out my old Lensbaby Composer set it to F/4 and Macro +4 lens to get this guy doing some kind of balancing act on a bud. This pretty much is how the image looked out of camera. I love the soft DOF you get with the Lensbaby. On a duplicate layer the now free Nik Color Efex Pro 4 was opened. The Detail Extractor was applied to mainly just the ant and a little bit of the foreground to give it a little more sharpness, and the Vignette Filter was used where a darker green color was sampled from the image to soften the bottom. Back in PS, Topaz (see sidebar for website link) Texture Effects’s Crisp Morning Run preset was applied (removed Adjustments, and added Diffusion panel, changed the Blur to 0.42, then painted back the ants, then set Strength 0.58, Softness 1.00) to get the beautiful turquoise effect in the background. I had not used this lens in a long time so it was a lot of fun to use!…..Digital Lady Syd
Birding at Viera Wetlands

This man is taking photos at the Ritch Grissom Viera Wetlands which is in Brevard County, Florida. It was a beautiful day to see the birds in their natural habitats and this guy had this huge lens – he was actually shooting to an equivalent of 1400 mm! Totally amazing! This image used 2 Lil’ Owls Studio’s (see sidebar for website link) Matte Glam 17 preset in Lightroom along with a Gradient Filter to increase the blue color slightly in the upper water. Brought the image into Photoshop and ran Topaz (see sidebar for website link) Detail 3 to slightly sharpen the overall image using my Little Med Large Detail preset – (Set to Overall, Medium Details 0.38, Large Details 0.16, and Tone Contrast 0.30). Created a duplicate layer and created a Smart Object where the Liquify Filter was used to slightly slim the man down. A Curves Adjustment Layer was applied and the Layer Mask was filled with black. Just the water area was painted back to give the background a little more contrast that I wanted. That was it. Wish I had a lens like that!!!!!…..Digital Lady Syd
Spring Flowers
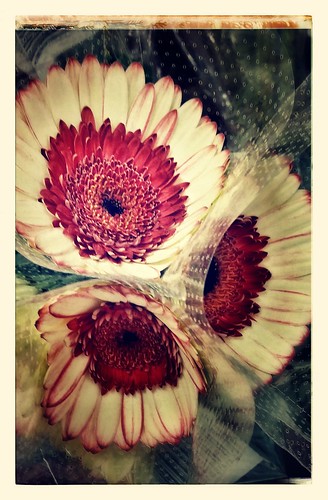
More beautiful and unusual flowers at my local grocery. This time they were post-processed on my phone using Nik’s Snapseed App which produces wonderful results. For this image these tools were used: Crop first, Drama Filter Structure +59 and Saturation +20; Grunge Saturation +24, Texture +60, Center Size +50, Style +60, and Brightness 0; Center Focus Blur +72, Outer Blur -72, Inner Blur +29, Weak circle, and focus control point placed on the top flower; and Frame-Frame 11 tapped three times. Once again, this app creates some beautiful results!…..Digital Lady Syd
Digital Lady Syd Related Blogs:
How to Use Nik’s Snapseed Photo App on Your Smart Phone
Adding Snapseed to a Regular Photo
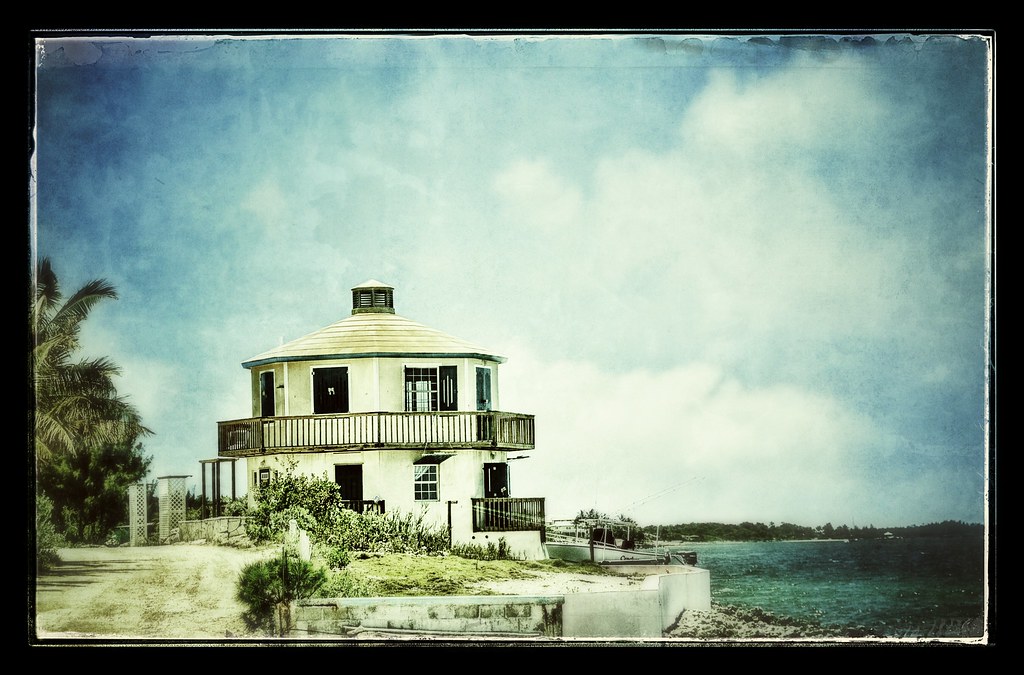 Another example of what Nik’s Snapseed phone app can do to an image. This is an image I took in Marsh Harbour in the Bahamas several years ago and put in my photo gallery on my Android phone. Since I have been learning how to use Snapseed (see How to Use Nik’s Snapseed Photo App on Your Smart Phone), I decided to try it on one of my already processed images just to see what would happen. Wow – I loved the results. These are the settings I used to get this result: Tune Image Brightness -9, Ambience +79, Contrast +9, Saturation +37, Shadows +16, and Warmth +35; Vintage Style 3 and Texture 1, Brightness +23, Saturation +15, Texture Strength +70, Center Size +19, and Style Strength +60; Grunge Style 292, Texture 1, Brightness +48, Contrast 0, Texture Strength +17, and Selection control point covering the whole image; Focus Center Bur +97, Outer Brightness -14, and Inner Brightness -44; and Frames – Frame 19. This app is great fun to play with on your phone and you can get some really surprising results!…..Digital Lady Syd
Total Eclipse of the Moon!
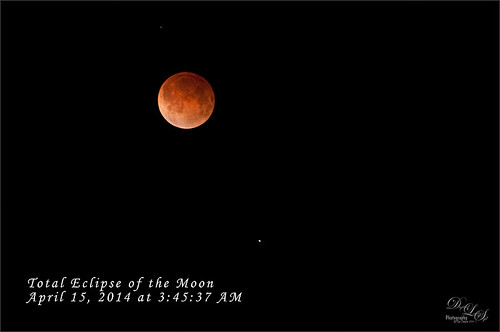
Image of lunar eclipse taken on April 15, 2014 at 03:45:37 AM from northeastern Florida showing what was considered totality according to Astronomy Magazine. Image was shot with my AF-S Nikkor 70-300 mm 1:4.5-5.6 G lens set to aperture priority mode at F/5.6, 300 mm focal length (with crop factor 450 mm), and ISO 1600, with a resulting shutter speed of 2.0 sec. My Nikon D300 was set up on a tripod with a shutter release cord to get the sharpest results. Unfortunately the sky was not all that clear when the photos were being shot and my equipment is not the latest, but all in all, I think it did a fair job of getting a beautiful lunar eclipse shot. No post-processing in Lightroom – just did not help. Took image into Photoshop and used Topaz (see sidebar for website link) DeNoise (Overall 10, Shadows 34), then applied a black layer mask and just painted in a few areas that really needed it – really not too much adjustment here even though my camera does not handle ISO 1600 real well. Topaz Detail 3 was applied (here are the settings: Small Details 0.28, Small Details Boost -0.02, Medium Details 0.55, Medium Details Boost 0.15, Large Details 0.61, and Large Details Boost -0.29 – best plug-in around for this type of detail work) and once again a black layer mask was applied and just a few areas were added back to get more detail in the moon surface. The text font is Monotype Corsive at 38 points. That was it! It was so much fun to go out and shoot at night. Also check out my blog of a lunar eclipse taken on 12/21/10 called Shooting a Lunar Eclipse for more info. Have a great day!…..Digital Lady Syd
Aliona’s Birthday

Thought I would do a quick Lightroom post of an image I did of my very photogenic daughter-in-law on her birthday. She does not love this image, but I really love the vintage treatment. To begin the process, Matt Kloskowsky’s That 70’s Look preset was applied (the new version for Lightroom 4 is in the NAPP preset group but I am not sure where I found it). Three Adjustment Brushes were used on her face: 1) on eye iris the Exposure, Clarity and Sharpness were increased to make them pop a little; 2) the whites of her eyes were painted and the Saturation set to -52 to whiten a little; and 3) her lip color was changed to match her dress by using a little clarity and sharpness and a sampled pink color. In Photoshop all that was done was a little Liquify filter was used to adjust the dress folds. That was it – quick and easy and a beautiful look!…..Digital Lady Syd
My Parisian Violets!

These beautiful violets I recently bought at Wal-Mart and they are so pretty. They really like the filtered light from my south facing window in my kitchen. I used my handy, dandy 60 mm Nikkor macro lens at F/4.8, 1/90 sec, and ISO 200. A Bower 0.5 x High Resolution Digital Lens with Macro was added to the lens. In Lightroom 4 I just followed my workflow in my blog How to Use Adobe Camera Raw (ACR) or Lightroom 4 Quickly. I painted over the center of the flower using an Adjustment Brush set to a high sharpening and just a little Clarity. In Photoshop a Curves Adjustment Layer was used to selectively remove a shadow behind the front flower (see my Using Curves Adjustment Layers to Get Rid of Shadows and Highlights blog). Painted Textures Seafoam textures was added and just the flower lightly painted back using a white layer mask and painting in black. Next 2 Lil’ Owls Affetto Grunge Mosaic texture (see sidebar for website link) was added and the center painted out so only the darkened edges remained on most of the image. French Kiss’s Vintage French Brush No. 2 set -Dec 1924 was placed on the left side of the image and set to 89% opacity. A Layer Style was opened on this overlay layer. A dark Stroke set to 3 pixels inside was added, a Pattern Overlay using that wonderful default Photoshop pattern Bubbles was checked to add some variation in the text (I think this is the first time I have ever used it!), and an Outer Glow at 39% opacity was used. A Color Fill Adjustment Layer was clipped to the overlay and set to a light blue color. On the upper right French Kiss’s Vintage French Brush 1903 (same link as above) writing was applied and another Color Fill Adjustment Layer was clipped using the purple color from the flower. That was it! Lots of fun to do!…..Digital Lady Syd
Digital Lady Syd’s Rule No. 9: Get the Shot!

I took this beautiful little rose at Lowe’s with my inexpensive Kodak C1450 14-mp point-and-shoot camera and it turned out very nice! These little cameras really do a great job for those unexpected shots! Since most people have decent cameras on their phones (mine is still a 2 megapixel so I carry this camera), there really is no reason not to get the shot. It just may not be quite as sharp or colorful as your good camera, but at least you get the shot, the memory, and something you can work with in Photoshop. That is what I did with this rose – it was a little soft except where it was focused, but the colors were still beautiful and overall, not that bad an image.
One of the issues I had with this image is that it is a JPG and there was a lot of Chromatic Aberration in the image – I tried to remove it in Lightroom, but it still looked rather bad so I treated it with a soft texture treatment to blend in the petals where the bleeding was bad. Some noiseware was also applied. Two gorgeous textures were stacked from French Kiss Textures – Artiste Fantasie at 80% opacity and Artiste LaDanse set to 68% opacity and her Spatter Brushes were used over the rose. Following Dave Cross’s path tutorial from his Photoshop CS5 Finishing Touches for Photographers class at Kelby Training (but it is also in his really good Photoshop Finishing Touches book), I created a fancy edge around the flower. Dave’s book was published a while back, but most of the tutorials work fine in CS6.
So get the shot, even if you do not have your best equipment with you – it may be a great image anyway!…..Digital Lady Syd
Butterfly Beauty!

Today I had a chance to get some wonderful shots of one of the beautiful butterflies that are flying all around my neighborhood. This is a female Palamedes Swallowtail Butterfly and she is loving the pink pentas in my front yard (the males are smaller and more black in color). I was so surprised that she stayed around while I shot several pictures. The trick to getting the shot since her wings are flapping like crazy – set your ISO to 1600 and shot at F11 and higher. I was able to get many very clear shots. Three textures were applied using Russell Brown’s Paper Texture Panel: ShadowHouse Creations Scratched Overlay set to Hard Light blend mode at 100% layer opacity and Softly Blurred Edges set to Overlayat 100% opacity (see sidebar for website link), and Gavin Hoey’s Grunge Border set to Overlay at 100%. All had layer mask applied and the butterfly was painted out completely using a black brush in the mask. A Curves Adjustment Layer was created to adjust just the blue channel curve to bring out her blue spots, then the mask was filled with black (with white Foreground color, CTRL+BACKSPACE to fill with mask with black). Just painted back in the blue dots in the Curves Layer Mask with a white brush. That is all that was done to the image – what a showgirl!……Digital Lady Syd
Digital Lady Syd’s Related Blogs:
Digital Lady Syd’s Rule No. 5: Just Step Outside and Look Around!
The Old Course at St. Andrews

In honor of the British Open being played this week in Lytham St. Annes, England, I am posting one of my favorite images from my trip to Scotland. It was a real thrill to actually walk on The Old Course at St. Andrews. Wish I could have played a round. To be honest, I processed this image so long ago that I am not sure what all the steps were. It was not originally an HDR though…..Digital Lady Syd
Some Beach Fun!

Thought I would put up an image I created a couple years ago of Ormond Beach, Florida, where Granada Boulevard runs into the Atlantic Ocean – it is a beautiful stretch of beach if you are in the area. The old Hotel Ormond, a large 300-bed hotel that was built in 1887, was located near this beach. This was one of my first attempts at adding a texture to an image – not sure what texture this is, but it definitely is a watercolor texture that goes from a yellow tone on top to blues on the bottom – the layer was set to a Color Dodge Blend Mode at 30% opacity.
The image below is also of the same stretch of beach but from 1903 – there were beautiful houses instead of high-rises overlooking the ocean. In this winter image, the sails helped move the bikes on the hard sand beach coasting at up to speeds of 20-25 mph. The image is from Shorpy Historical Photo Archive – a great site to follow on a daily basis if you love American history like me as they post a new image every day from the past. To see this image in high resolution on their site, just click on it – and click here for a similar lower resolution shot of the same bikes racing a car. This beach is where the first official automobile race was held in 1903 and the town of Ormond Beach is still known as the “Birthplace of Speed.”

I hope to shoot more local images in the near future – it is fun to live in an area that has some great local historical interest. In the meantime, try out some textures to add a little interest and fun to your own images……Digital Lady Syd
Digital Lady Syd’s Related Blogs:
Where Am I?
Getting That Vintage Look!
Russell Brown’s Paper Texture Panel Updated!
Beautiful Soft Flowers

Just loved the pink hyacinths I bought – hope they will come back next year! This image was taken with my Micro Nikkor 60 mm f/2.8 lens at f/9.5. Used Mike Moats workflow (see info on this in related blogs below) with Color Efex Pro 4 (stacking Tonal Contrast, Darken/Lighten Center, and Vignette filters) added first and then Viveza 2 to make the details sharp. OnOne PhotoFrame napp_frame_12 (see website link in sidebar) was added. Final result – beautiful!…..Digital Lady Syd
Digital Lady Syd Related Blogs:
Using NIK’s Color Efex Pro 4 and Viveza Together
Nik’s Viveza 2 Plug-In – A Hidden Gem!
The Macro Shot
Aerial Shot Using a Point-And-Shoot Camera! Not Bad!

Thought I would show you what results you can get even when shooting with an inexpensive point-and-shoot camera. I got several wonderful images from the air, but this one of the Rockies was my favorite. (For a nice read on aerial photography, see Julieanne Kost’s book “Window Seat – The Art of Digital Photography & Creative Thinking.”) My little Canon PowerShot A1000 died last month so I had to quickly purchase another small camera. I wanted one that runs on batteries so I do not have to charge it all the time (since I do not use it that much) and I wanted something fairly cheap. I got a Kodak EasyShare 14 mp camera with a 5X zoom for $49 and it gets better pictures than my Canon did! This an example of what it can do. There was more noise in the JPEG image, but that is to be expected with a cheaper lens, and it definitely needed processing in Lightroom and Photoshop. In Photoshop, Adobe Camera Raw sliders were applied including the Noise Reduction sliders; then Nik’s plug-ins Color Efex Pro 4 (stacked filters Vignette: Lens, Detail Extractor, and Skylight Filters) and Viveza 2 (to even out the saturation in the corners) were used. This has been a great surprise to me. Definitely not as good as my Nikon DSLR, but not bad for a inexpensive point-and-shoot camera.
I guess this goes to show that even if you do not have the best camera, it sure beats missing the shot altogether, and you can get a really nice image!…..Digital Lady Syd
Lunchtime atop a Skyscraper – What a Story!
Recently the Daytona News Journal ran an article on Charlie Ebbets (no link since the article is now archived and there is a charge to read it now), the photographer who took the very famous photo called “Lunchtime atop a Skyscraper” which was taken on the 69th floor during construction of the old RCA Building in 1932. His wife, Joyce Ebbets, still lives in the Ormond Beach area. It was not discovered until 2003 that Ebbets had photographed this image. Apparently a movie is being considered based around this image that will follow some of the people on the beam and how the depression had hit New York City back in 1930’s. His daughter has a wonderful website on his life at Ebbets Photo-Graphics with slideshows and images from throughout his life. When he died in 1978, he had more than 300 published photographs.
To see several of the photos he took during the construction of this part of Rockefeller Center, see the short U-Tube video called “In the Heights – Tribute to Charles Ebbets.” There are some other great photos from Mr. Ebbets collection and a quote from La Fototeca: History of Photography on the Mr. Ebbets life: “Ebbets was born in 1905 Gadsden, Alabama. He bought his first camera at the age of eight by charging it to his mother’s account at a local drugstore. By the 1930s Ebbets was a well known photographer and had work published in the major newspapers across the nation including the New York Times. In 1932, he was appointed photographic director for the Rockefeller Center, which was under construction in New York. In September of that year, he would take the photo which would later define his work, Lunchtime atop a Skyscraper. In 1933 Ebbets moved back to Florida where he was to live and work for the rest of his life. In 1935, Ebbets became the first official Associated Press photographer in the state. During this era, he also founded the Miami Press Photographers Association and was its first President.”
One of my personal favorite images is called “Tee Time” since I love golf. I had never heard of this image before and that is amazing with all the golf paraphernalia everywhere…..Digital Lady Syd
The Macro Shot

Recently I have been working on my Macro photography, especially since I have had some beautiful flowers on my porch due to the warm winter we are having in Florida this year. One of my favorite blogs is by Mike Moats called Tiny Landscapes where he gives some great advice on taking and processing macro images. A few things I am starting to try and the above chrysanthemums are the result of one of my efforts. A 60 mm Nikkor macro lens was used at F/19 at 1/20 to 1/350 sec. A Bower 0.5 x High Resolution Digital Lens with Macro was added to the lens. I created an HDR image from five shots which is how I got the large dynamic range in the photo. After that the processing was in Nik Color Efex Pro 4 using Tonal Contrast, Detail Extractor and High Key filter effects and Viveza 2. This is the basic workflow Mike Moats uses and it works very well on macro photos. My original shot was taken with a white background but I just did not like the way it looked. Mike says if you do not like the background feel, crop tight, which is what I did. I hope to try out some of his other tips in the near future – it is a lot of fun to take those close up shots…..Digital Lady Syd
Just a Pretty Red Flower

I really liked how the background blurred in this photograph of a red carnation I took on my back porch. I used a 60 mm AF Nikkor Micro lens at F/3.2, 1/300 second, ISO 200 at -1 Exposure Compensation. It was processed in the new Lightroom 4 Beta version setting (Highlights to -100, Shadows +100, White +27, Blacks -29, and Clarity +100; then the Exposure and Contrast) before taking the photo into Photoshop where a Sharpen Tool layer, Curves Adjustment Layer, and OnOne PhotoFrame acid burn controlled 12 were applied. A Layer Style including a stroke and inner glow in gold was the last step. Very little processing and it turned out beautifully.
It just goes to prove that if you get a good shot, it does not take much post processing – the image looks great to begin with. It also is nice to have a good lens and this is one of my favorites……Digital Lady Syd


