
Spring Colors for this Flower

Had some fun with this phone image of a beautiful spring flower. Not sure what type it is, but it is gorgeous. Actually post-processed a very normal image, but I decided to try an alternate version. In this case Topaz Studio 2 was opened and just a vignette and AI ReMix filters were applied. Remix was set to Abstract Swirl Style using only 0.17 opacity and Sat set 0.75 (other were default settings). It applied these beautiful brush effects to the petals which is what you see above. I am still mourning the fact this filter studio is no long available from Topaz. Some Gaussian Blur was added to the background as it was pretty busy. I used a new technique learned from PS Guru Corey Barker – instead of using a brush to even out the shadows, the Gradient Tool was selected with default black to white colors set in the color swatches. In the Options Bar, the gradient will now show black to clear – set to radial gradient at 48% opacity used on the petals. On a New Layer set to Overlay blend mode, drag a very small amount to get a very small black effect which can be pinpointed very closely to where it needs to be added. Really nice technique, and different colors can also be selected along with white. This flower was really fun to do!….Digital Lady Syd
Lunch at Its Best

I think this place is perfect for having a nice lunch on a warm sunny day. Scotland does not get days like this very often so these locals were enjoying themselves. I see the tourists coming up the block though. I have to be honest I am not totally sure what I did to create the look in this image. I like the final effect though. Topaz (see sidebar for website info) Studio’s AI Clear was applied. Then back in Photoshop Topaz Simplify was applied using the BuzSim preset. Then Topaz Sharpening AI set to Focus was used. A High Pass Filter was used to sharpen up some of the details. Then back into Topaz Studio where an Abstract Adjustment was applied and an AI ReMix Adjustment. In PS the Rough Pastels filter and the Dry Brush filter was applied. A Darken and Lighten Curves Adjustment Layers were applied. A Noise Gradient Map Adjustment Layer was applied and a Foggy Night preset in the Color Lookup was added. There were some painting layers and other things, and I think I was going nuts by the time I finished this. Anyway, I like the overall look but I don’t think I could reproduce the effect. ….. Digital Lady Syd
Best Friends
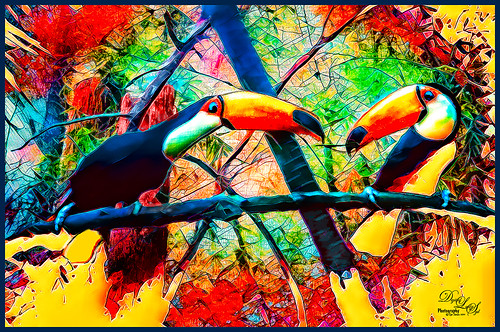
Just went a little crazy here and had a bunch of fun in Topaz (see sidebar for website link) Studio! My recent trip to the St. Augustine Alligator Farm was a lot of fun but my pix of these two characters did not come out well. (They reminded me of Heckle & Jeckle from cartoon days past.) So I decided to improvise using a lot of adjustments to get this colorful Toucan image. Used AI Clear, Ai ReMix twice, Edge and HSL Color Tuning – threw them all into a preset and put it up in the Community called SJ AI ReMix Cartoon Look if you want to give it a try. Back in PS just cleaned up the image a little, and added an Exposure Adjustment Layer on the eyes (yep, use it even on cartoon looks). This was a lot of fun to create. …..Digital Lady Syd
Happy Valentines Day
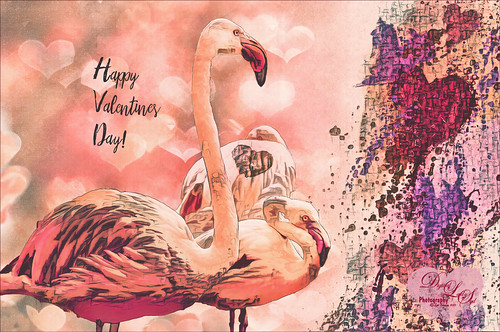
These beautiful birds, the Greater Flamingos which are not real bright pink like the American Flamingos, are enjoying the holiday – here they are observing some rather tree-like hearts in the pen. Since it is a holiday, I will not go into major detail on how I created this effect – it was a major trial-and-error in this case. The hearts are all from Julia Mead, a really great scrapbook object creator. The texture is called Imperfect Heart Soft Pink by Evelyn Flint (can’t find a link but it was in her Flickr feed at one time), and the font is Antalia Script. The rest is my own doing. Used so many different filters: Topaz AI Clear and AI ReMix, Luminar, and Nik Viveza 2 and Color Efex Pro 4. Lots of clean up layers and adjustment layers. Lots of fun to do. Everyone have a very Happy Valentine’s Day…..Digital Lady Syd
Happy New Year!
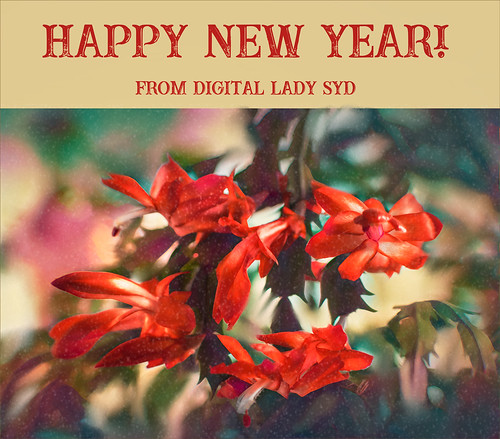
Happy New Year to everyone – thanks for visiting my blog when you get a chance. This image is of my Christmas Cactus that was in full bloom for my holiday this year. To get the soft background, used Topaz (see sidebar for website link) AI Remix (A Neon Rose preset with the leaves brushed out at 50%). Painted some texture and snow on the image. Last step was to add Nik Viveza 2 to sharpen up the petals a little. The font is called Buffalo Inline 2 Grunge. Looking forward to have a wonderful 2019!…..Digital Lady Syd
Happy Place for a Hornbill
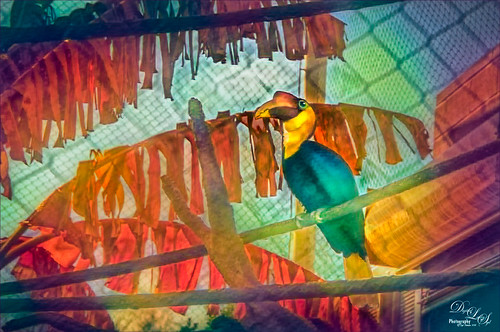
Love this guy! This Hornbill is definitely in charge of his domain and seems to blend right into it. This image is exactly why I love Topaz (for website link see sidebar) – this Studio Adjustment called AI ReMix never ceases to amaze me. The original image was not good and I had basically decided this Hornbill would never be used. But I am finding AI ReMix is a game-changer for me – this guy turned out pretty nice! (The Studio settings were: AI Clear – Remove Noise Medium and Sharpen High; and AI ReMix: Desert Prism at 65% opacity, Low Style Strength and Brightness -0.35, Contrast 1.04 and Sat 0.75.) Back in Photoshop, a little spotlight effect with a white brush was used to brighten up the tree fronds to get a bit of a translucent effect. It took a little clean up to get the final, but overall, this plugin saved an image…..Digital Lady Syd
Colorful Queen Emma Lily
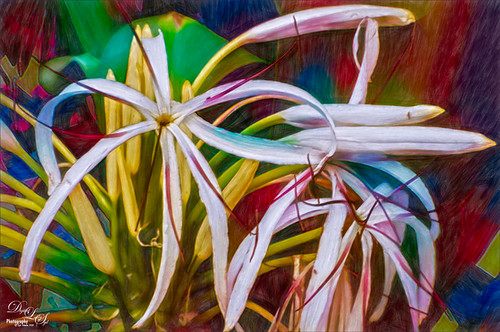
Enjoyed post-processing this Queen Emma Lily growing in my front yard (they bloom all year long). I was mainly experimenting more with Topaz (see sidebar for website link) Studio AI ReMix. This time used the Neon Rise Style set to Linear Light blend mode and added Impression’s default settings except for Paint Opacity at 0.05 and Precision Detail. Back in Photoshop, added Nik Viveza 2 to sharpen up the center of the flower for focus and that was it. I just love the colorful results! For more on AI ReMix, check out my Topaz ReMix – Update and Better than Ever! blog for more information.
Pink Carnation
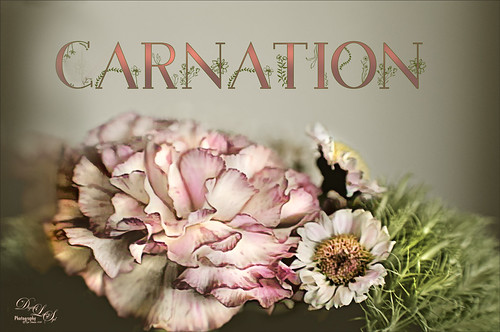
Image taken from a grouping I received for my birthday. I love carnations and they photograph so beautifully. Not much done with this image – used On1 Photo Raw 2018 (see sidebar for website link) Effects default settings for the Dynamic Contrast and the Sharpening effects. Then on a stamped layer Topaz Studio (see sidebar for website link) AI ReMix Adjustment was applied using the Parting Ways swatch and set to an opacity of 0.64. On another stamped layer, a Dodge Brush set to Range Highlights and Exposure 33% and just the light areas were dabbed – it gives a very natural effect. A spotlight effect layer was created to just emphasize the whites. My favorite thing about this image is the free font by Blossom by Chimerique. A Layer Style using the Stroke set to a green and 3 pixels, and an Outer Glow set to the same green color and Opacity of 86%. The text layer was duplicated and rasterized (right click and select Rasterize Text (not Rasterize Layer Style). Then with the same Dodge brush, the tops of the text were painted to lighten a little – really cool subtle effect. This was a lot of fun to do!…..Digital Lady Syd
Teacher and Student
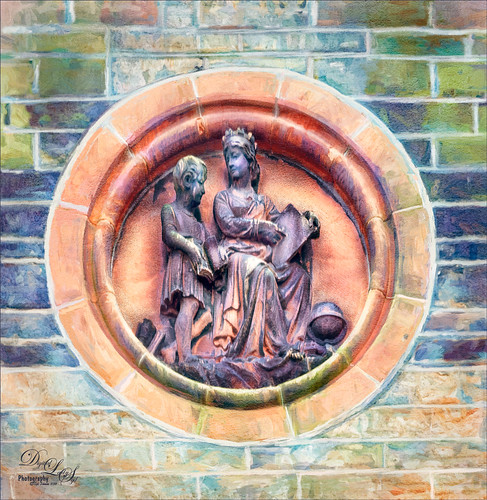
Am planning on taking a few weeks off from blogging to get some things done around the home – blogging takes up a lot time, so this will be it for a few! This image is of some architectural sculpture associated with the “Castle School” building connected to the Camera Obscura building in Edinburgh, Scotland, near the castle. I thought the sculpture was really charming of a teacher and her student. In LR the image used a Profile by VoxColor called NC to get the interesting tones. In Photoshop just did some normal clean up, used a Black and White Adjustment Layer, a Curves Adjustment Layer, and a Dodge and Burn layer. On a stamped layer, opened up Topaz Studio (see sidebar for website link) and applied the Impression Adjustment and Topaz AI ReMix Adjustment at 0.14 to add some painterly effect into the image. Then added several painting layers using my SJ Pastel 3 brushes (see my How to Create my Favorite Brush Blog and my Painting Fun in Photoshop Blog) to smooth out some of the paint strokes from the Impression filter. A New Layer set to Overlay was used to add a little spotlight effect on the figures. French Kiss (see sidebar for website link) Solstice Initiation texture was set to Color Burn blend mode at 59%. A Hue/Saturation Adjustment Layer was clipped to it and the Saturation was reduced to -43 to reduce the color effect of the texture. Finished off with Nik Viveza 2 to draw focus a little more into the sculpture. Last step was to create a vignette using Matt Kloskowski’s technique (see my How to Create a Subtle Vignette blog). That was it – lots of fun here! Will try to add some more blogs as time allows!…..Digital Lady Syd
Beautiful Hibiscus
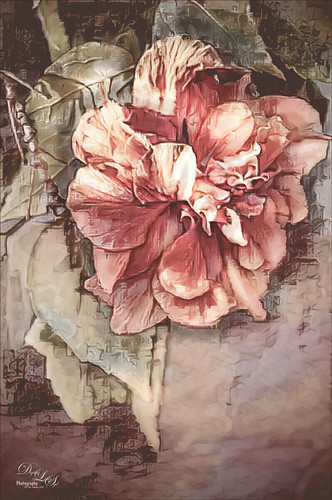
Had fun with this image. This is one of my peach hibiscus that I turned into a beautiful coral color. Used On1 (see sidebar for website link) Photo Raw 2018 Effects Dynamic Contrast on parts of the image by using the filter’s mask, and Sharpening filter. In Photoshop painted on the layer to fill in areas that were blown out. Added a Texture from Melissa Gallo Paints called Garden Canvas (from her Painting with Photoshop Workshop – excellent course and comes with some great brushes) at 26% layer opacity. Duplicated it and set Blend If Underlying Layer white tab split to 30/60. Three colored spotlight effects were painted on the petals. On a stamped layer, Topaz (see sidebar for website link) Studio was opened and the AI ReMix adjustment applied twice and Dehaze adjustment once. The image had a really bright red and orange effect color. Nik Viveza was opened to add some focus. Then applied my SJ Nastalgia profile (from a preset) in Camera Raw Filter. (See my How to Create Profiles in ACR from LR Presets and some PS LUT Files blog for info on this.) Now the colors are this pretty pink color. A couple layer of painting and burning and that was it. …..Digital Lady Syd


