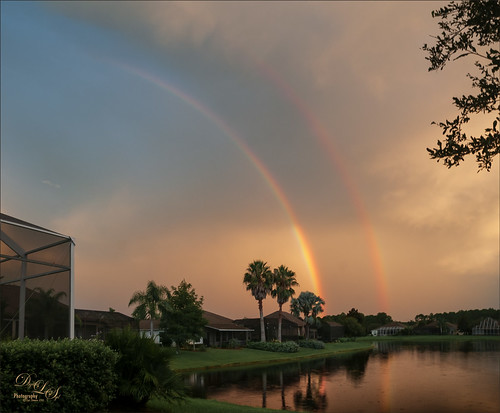
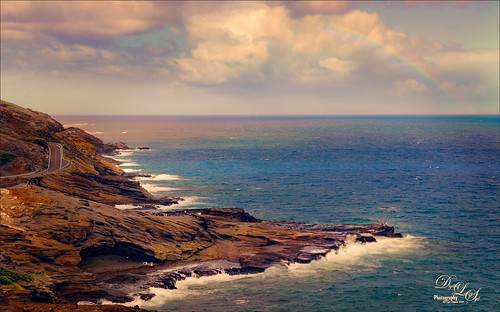
Totally enjoyed watching a regular rainbow turn into this gorgeous double rainbow as the clouds rolled in and the sun went down (image shot just before 8:00 PM). I do not think I have ever seen one here in Florida before. Very little post-processing was done other than the Adaptive Wide Angle filter was used to straighten the lines a little since I shot at 10 mm using my Nikor 10-24 mm lens to get the whole rainbow in the image. (Other settings were F/8.0, 1/15 sec, ISO 200, and -1/2 EV.) The clouds also were lit with the same beautiful sunset light. Hope I get to see some more of these in the future! …..Digital Lady Syd

Latest
Tiny Bubbles
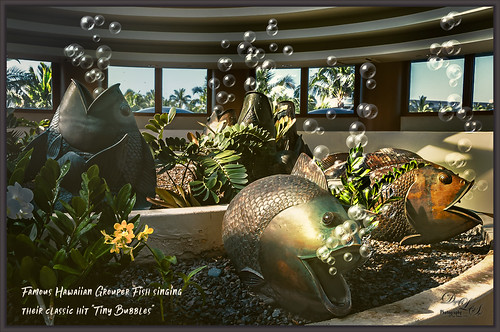
Been thinking about Hawaii’s Big Island getting hit by a hurricane and knowing how awful that is. Decided to post an image taken at the Hilton Waikoloa Village a while back at the Waters Edge Breakfast Buffet. These bubble blowers may not be grouper fish, but they are pretty close. It was a lot of fun to a do something with a little humor in it. This image was post processed using On1 (see sidebar for website link) Photo Raw 2018 Effects using the Dynamic Contrast, Sharpening, HDR Look, and Color Enhancer filters – I can really see improvements with this program. Some bubbles were created using a Lisa Cagney trick. Nik Viveza 2 was used so all the bubbles would show up. PS Color Lookup Table using the Foggy Night preset at 33% layer opacity was applied. Then a Gradient Fill Adjustment Layer beige to tan gradient at 36% layer opacity was applied. A couple Spotlight Effect layers were used to apply a little lightening and darkening effect. The text is Soak Up the Sun Script Bold. That was it. These guys always made me smile when we went to breakfast!…..Digital Lady Syd
Umbrellas Galore!
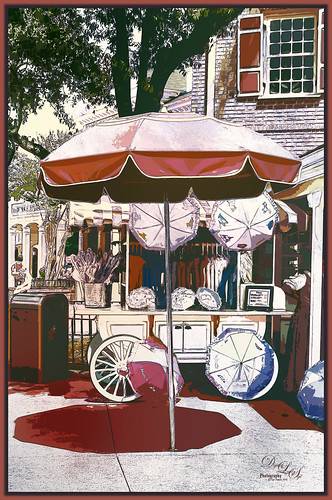
Love the color at the Magic Kingdom – total “eye candy” for the camera! This is one of my favorite images of the Umbrella Cart on Mainstreet USA. This time a sketch effect was added. I am one of those people that really like the sketch look. And although I have a couple actions and Topaz Simplify has some very good outline programs, it is hard to find one that fits all images. This technique did not work well on all my images, but for bright non-people images, it seems to be perfect. I learned this technique from a recent video called Creating a Realistic Pencil Sketch Effect in Photoshop at Davrophotofx. It was done using Elements, but it works fine in regular Photoshop since the filters are all the same. Biggest problem I had was that the Photo Copy Filter was not working correctly until I realized I had the foreground swatch set to white – it should be at the default black and white to look correct. Otherwise very simple steps. A couple of my textures were added and Nik Viveza 2 was used to adjust the color somewhat. Used a layer style for the border and that was it. Lots of fun to do this kind of image …..Digital Lady Syd
Pretty as a Postcard
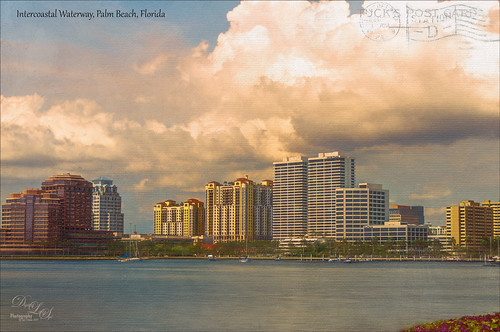
This is the Intracoastal Waterway (ICW) in Palm Beach, Florida. The skies were rather spectacular this day. Lucis Pro (now available for purchase again – see my Lucis Pro is Back!!!!! blog) was used on this image first. Then Photoshop’s Motion Blur Filter was opened and set to a Distance of 2000 pixels – once applied the far right icon on the layer was clicked and set to 63% opacity. A Selective Color Adjustment layer was applied to adjust the colors. On a stamped layer, Topaz Lens Effects (see sidebar for website link) Motion Blur was opened and 12.68 pixels was applied. Back in PS only the water was allowed to be visible in the layer mask so water looks smooth. The font Gabriola was used next. French Kiss (see sidebar for website link) Tableau Chateau was used to add texture to the image – this was done by clipping a Hue/Saturation Adjustment Layer to the image and setting the Saturation to -100. The texture was set to Hard Light at 15% layer opacity. Finally a Levels Adjustment Layer was also clipped to the texture to get the nice vintage postcard look. Nik Viveza 2 was added to add some emphasis to the buildings and a stamp from 2 Little Owls (see sidebar for website link) was added to further enhance the old look. I was love Palm Beach! …..Digital Lady Syd
Backwater in St. Augustine
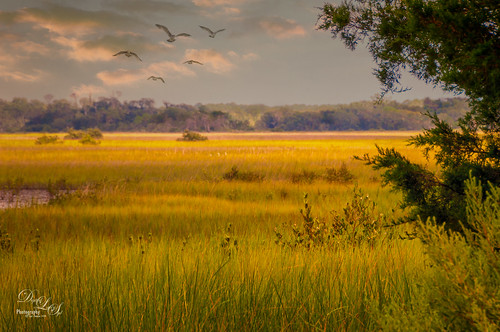
This is an image of the backwater area behind the ICW (Intracoastal Waterway) in St. Augustine and taken from the back side of Camachee Cove. Just had fun creating this image. Added a new sky from KelbyOne to the plain sky and a Curve Adjustment Layer to get the lighting just right. Also added some seagulls birds from a Pixabay image and softened them so they were not so sharp edged using the Blur Tool set to 30% Strength. Two Curves Adjustment Layers were added – one for darkening and one for lightening the image (filled masks with black and painted back where it needed to be adjusted). On a New Layer added a yellow light effect by setting the layer to Overlay blend mode and brush to 9% opacity. On a stamped layer (CTRL+ALT+SHIFT+E) applied Nik Analog Efex Pro 2 (Basic Adjustment, Lens Vignette, and Levels & Curves, especially the Luminosity Curve. It was set to 59%. The last step was to use Nik Viveza 2 to further sharpen the focal point of the flower-weeds sticking up. I love the warm feeling of this image…..Digital Lady Syd
Beautiful Blue Door

Just felt like doing a digital painting. This image was created using an image on Unsplash by Luca Bravo in Arles, France (unable to find link as it was downloaded 10 months ago). The original image is in beige tones and the door is more turquoise. Several of my Faye Sirkis mixer brushes along with some erodible mixer brushes from Photoshop were used for painting. Used different layers to create underpainting, more detailed layer, and fine details. The colors were changed using Topaz (see sidebar for website link) ReStyle’s Dull Cornflower preset. Five textures were layered : 3 from 2 Lil Owls Studio (see sidebar for website link) and 2 of mine using different blend modes and layer masks to fine tune the effects. A Curves Adjustment Layer was placed on top. That was it! It is so relaxing to paint!…..Digital Lady Syd
Just Another Beautiful Hawaiian View
Just thought I would post another beautiful view taken on Maui in the Hawaiian Islands. There are several people in this image, especially a couple guys fishing out on the point. I actually added a little saturation this image to make it pop some. Topaz (see sidebar for website link) ReStyle’s Zambezi Zest preset was used to get the colors – this is one of my favorite presets for landscapes. The Spotlight Effect was used to lighten up some of the rocks out toward the fishermen. Otherwise just a pretty standard image…..Digital Lady Syd
Camachee Cove Yacht Harbor
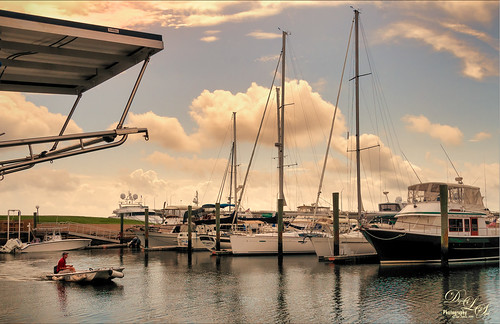
One of my favorite places to visit and take photos is at Camachee Cove Yacht Harbor in St. Augustine, Florida. If you’re a sailor, this is one of the best places to keep your boat along the whole East Coast of the U.S. Anyway, just wanted to prove that you can take a good image even in really bright light. This image was taken at around 11:00 AM and it was just fine. I know, it does not happen all the time, but it does happen! Not a lot needed to be done to it either. In Lightroom a Crisp Warm Soft profile was used from the free Matt Kloskowski Profile Sampler (same settings as the LUT file in Photoshop). Then just the same Basic slider changes. In Photoshop, Luminar 2018 (see sidebar for website link) was applied using just the AI Filter and the Brilliance/Warmth Filter – that was all and it looked incredible! Next my favorite Nik Viveza 2 was opened and the focal point was sharpened a bit – the guy in the boat and back of the boats. There was a blown out spot that was colored (yes you can do this in Viveza) to color in the effect. The last step was a Curves Adjustment Layer where just a small S-curve was used. That was it. What a beautiful day it was!…..Digital Lady Syd
Distant View of a St. Andrews Golf Course
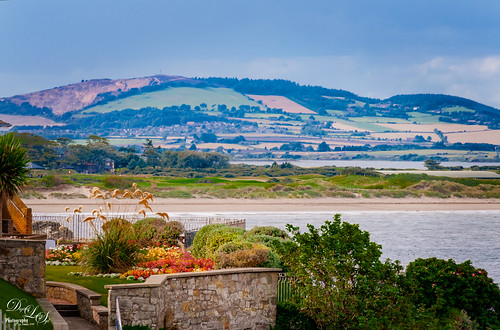
Wish I was at Carnoustie in Scotland to see the British Open, but at least I did have a chance to go to St. Andrews several years ago. (There are seven courses at St. Andrews now and this one is probably showing the Castle Course, but I am not sure.) Would love to live in this house! Not much done to this image – just some adjustments in Lightroom (used the Modern 07 profile) before doing clean up in Photoshop. Some spotlight effect on the flowers and a little darkening in the bushes. Used Nik Viveza to draw focus to the flowers and emphasize the plants sticking up. Added a slight vignette and that was it! Love Scotland in the summer!…..Digital Lady Syd
Fireworks at Epcot
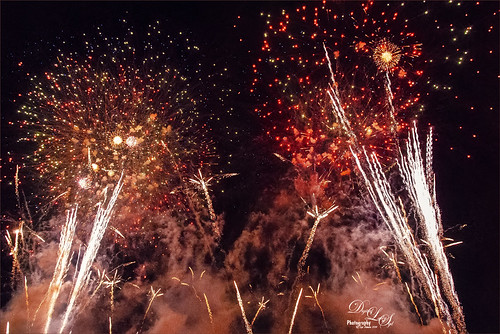
Did not get to a fireworks celebration this past July 4th, but still always enjoy my images from an Epcot nightly fireworks event at Disney World, Orlando, Florida. Not sure if they still are using real fireworks as this shot was taken a while back. In ACR used Adobe Vivid profile and made a few basic adjustments. On a duplicate rasterized layer, Luminar 2018 was opened and two filters were applied: Structure and AI Filter. Some Noise Removal was done due to the smoke noise created by the fireworks in the dark background areas only. Last step used the Color Lookup Adjustment Layer and set to Foggy Night preset at 24% layer opacity. Pretty simple – even though this is not the traditional fireworks image, it really reminds me of all the craziness going on at the fireworks!…..Digital Lady Syd
Topaz Labs AI Gigapixel
Check out AI Gigapixel stand-alone software for upsizing your images. It’s incredible! And it can now be used as a plugin when in Photoshop. Also Topaz Labs Photo AI has some great sharpening and denoise tools along with Photo Video AI.

Luminar Neo
Click here to visit Luminar for more info and check out their new AI Filters.

GRUT BRUSHES – Photoshop Brushes for Digital Artists
Click here to visit GrutBrushes.com
And be sure to check out his Free Brush of the Week and Brush Sampler! These are the best brushes you can find!

Topaz Studio 2 and Legacy Topaz Labs Filters
Unfortunately Topaz Studio 2 and other Topaz Lab filters are no longer available for sale as of 2020. If you had bought these filters and would like to put them back on, here is a link to the Legacy Apps where they can be downloaded again. Below is an example of the wonderful Remix AI Filter from Studio 2. The wonderful Impression still works fine in Photoshop right now along with Adjust (all versions), ReStyle, and even PhotoFXLab!

On1 Photo Raw
Wonderful software to use as a substitute for or plugin with Photoshop. Many great filter effects and lots of AI capabilities!
