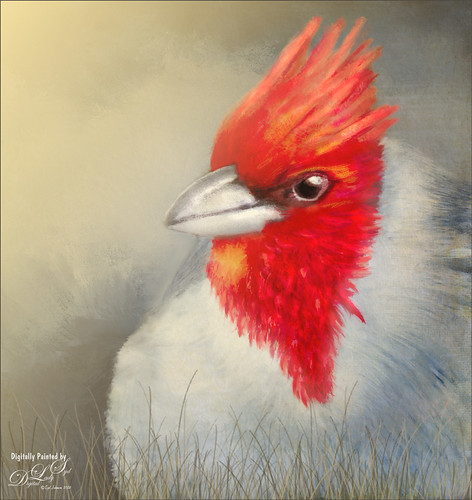
This guy is a Red Crested Cardinal and is not related to the beautiful red cardinals in the US. Although not native to Hawaii either (his image was taken at a park in Oahu), they are quite common. He was not very large in my image so the image was cropped in closely and run through my new favorite program, Topaz (see sidebar for website link) AI Gigapixel. Then I had a great image to work with. In Photoshop the same basic steps were followed that I did with my Wolf and Fox images completed recently. (See my Learning to Draw a Wolf! blog and Introducing the Beautiful Fox blog.) Since the image could be used as a guideline, I first started by sketching on a New Layer called Rough Drawing. Local Color, Shadows, Highlights, and Detail layers were added before working on the fur, textures, and overall lighting effects. Lots of layers, brushes, and time. Need to check out Aaron Blaise’s videos (links in Wolf blog) to learn the workflow. Anyway, I find it very relaxing to paint my bird buddies…..Digital Lady Syd

Latest
Viewing the Moon from a Scary Place

Just having fun with this crazy image of a guy hanging from the moon. Got part of the idea from Chris Spooner’s tutorial called How to Create 80’s Style Retrowave in Adobe Photoshop. Added several objects and blended in them using blend modes and opacity. Items included: Milky Way background image, White and Black Mountain image, Wireframe Vectors 30 by Designer Candies, Valentine by Julie Mead Valentine Gift6 to add some background fog, Wikimedia Commons Full Moon 2010, LifeLine by Gamarai Urb Brushes for the person and cityscape, Obsidian Dawn’s Space brushes for the comets, galaxy, and dust. The font is called Clip. After this just added a few adjustment layers: Darken Curve, Lighten Curve, and Color Balance. That was it. Sometimes it is just fun to create something different!…..Digital Lady Syd
Chatting with the Ladies on the Bridge
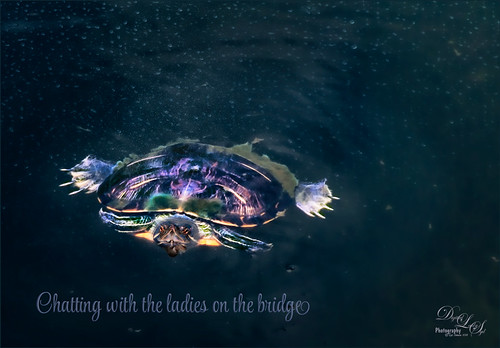
This was a fairly large sized turtle that was hanging around the bridge platform where I was talking with a few other ladies – he seemed totally enthralled with our conversation. Something tells me he was looking for a hand-out. Lucis Pro was added to sharpen him up a little first. Then Topaz (see sidebar for website link) Studio Texture Effects filter (started with Earthy Cat and Window Gaze preset – only used these adjustments: Blurs, Basic Adjustment, Texture and set the Opacity to 0.30 – used as it gave a natural looking interest in the water; added Dehaze Adj – 0.72 opacity and Strength 0.91 and Suppress Artifacts 0.73 – gave water a darker richer color; next added Radiance Adj – 0.97 opacity, Overlay bm, Radiance Type Light, Strength 0.53, Width 0.16, Length -0.28, Curl 0, Suppress Weak 0.01, Effect Coverage 1.00, Fade 0.13, and Sat 0.63 – in mask painted around turtle with small brush which lightened it up around turtle, then used the Adjust settings and set the Density and Contrast to blend the color into the water color – gave a very soft edge around the turtle; the Glow filter was added last – Opacity 0.58, Overlay bm, Primary Glow Type 0.10, Primary Effect Sharpness 0.74, Primary Electrify 0.23, Primary Simplify Details 0.87, Primary Edge Color 0.17, Primary Detail Strength -0.40, Primary Detail Size 0.20, Primary Brightness 0.37, Primary Contrast 0.98, Primary Sat 0.23, Primary Line Rotation 0, Primary Glow Spread 0.08, Coverage Transition 0.31 and Sharp Radius 0.10). In Photoshop a Vignette was created using Matt K’s technique (see my How to Create a Subtle Vignette blog). The font is called Style Casual, one of my favorites. ….. Digital Lady Syd
Emily the Pig
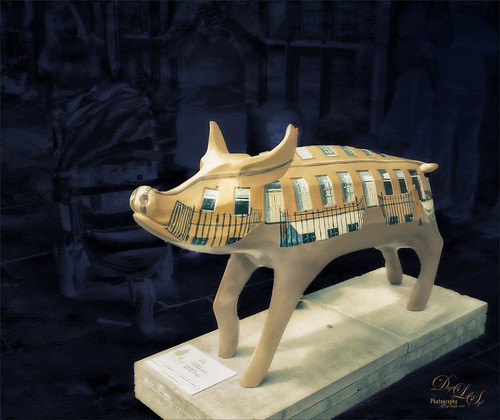
This little pig has the same story as another pig image I took way back in 2008 when the Town of Bath in England was having a public art event to celebrate Bath’s origins and artists. (See my King Bladud’s Pig blog.) King Bladud’s (cc 863 BC) pig, named Emily and painted by Charlotte Moore, is one of 106 pigs that were on display all over the city (I only saw a few) and they were sold at auction to raise money for the benefit of Bath’s Two Tunnels Project. Not a lot was done with this image. The pig was selected and a texture was placed behind her and set to Difference blend mode – that is why you can see the people behind her but not real clearly. Then Luminar was opened and one of my favorite presets by Joel Grimes was applied (Soft and Desaturated) – these preset can still be downloaded from Luminar for free from inside the program. Back in Photoshop a New Layer was opened and just a bit of black was added to darken the bright areas a little more. Last step used Nik Viveza 2 to emphasis the focal point a little more. That was it!…..Digital Lady Syd
Oahu Landscape
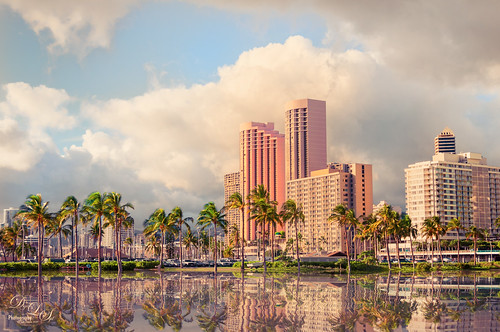
Had some fun with this image of some of the hotels and buildings along the beach of Waikiki. This image actually has a big pool of water in front with a large sandy beach and people swimming. Instead I added the Flaming Pear’s Flood Filter to create a beautiful reflection of the palm trees along the edge of the original water. A Channel Mixer Adjustment Layer was added to brighten up the colors – ran a free action by Sparklestock called Ultimate Vibrance. In a black layer mask the buildings and trees were painted back. On a stamped layer Nik Viveza 2 was applied to sharpen up the hotel fronts and add a subtle vignette around the edges. The last step involved going into the PS Camera Raw and applying a favorite preset from David duChemin’s older “Refining Your Vision in Adobe Photoshop Lightroom” book (all his books are great) named Classic India Split Tone (here are the very simple settings: use Split Toning section either in Lightroom or Camera Raw and set Highlights Hue to 50, Sat 60, Balance 0, Shadows Hue 266, and Sat 35). That was it. I loved the pinkish tones which this preset brings out…..Digital Lady Syd
Leaf Waterfall in a Rain Forest
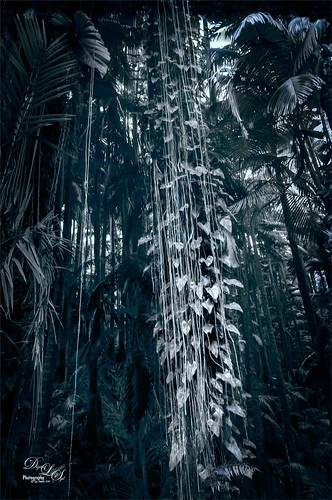
Image was taken at the Hawaii Tropical Botanical Garden on the Big Island near Hilo. This is a wonderful place to visit if you get on the island. Everything grows in giant size here including these philodendrons on a vine around the tree trunk – it really did look like a waterfall made of leaves. I created the image as a black and white and decided I liked having the dark green blue color in the image as it looked more natural to me. To change the color, Topaz (see sidebar for website link) ReStyle was used by applying the Midnight on Swan Lake preset. A Matt K vignette was created (see my How to Create a Subtle Vignette blog) and that that was about it.
Introducing the Beautiful Fox
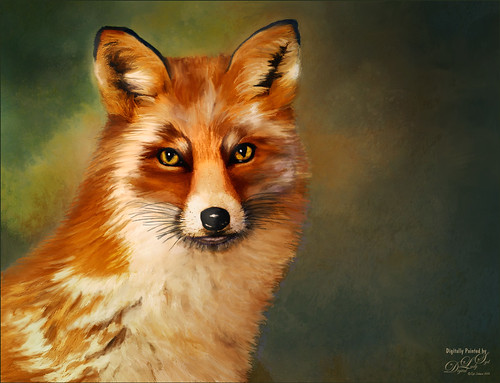
Enjoyed painting this beautiful fox – used Unsplash image by Linnea Sandbakk as a base for the painting. This follows pretty much the same painting process as used in my Wolf image except the body was not sketched first. This image contains 64 layers, so it took quite a bit of effort to get this result. Three textures were used to get the result and numerous brushes. I would go into more detail, but it is basically just finding a workflow and some brushes that work, and then painting. This is really so relaxing and fun to do!…..Digital Lady Syd
Girl Playing Erhu
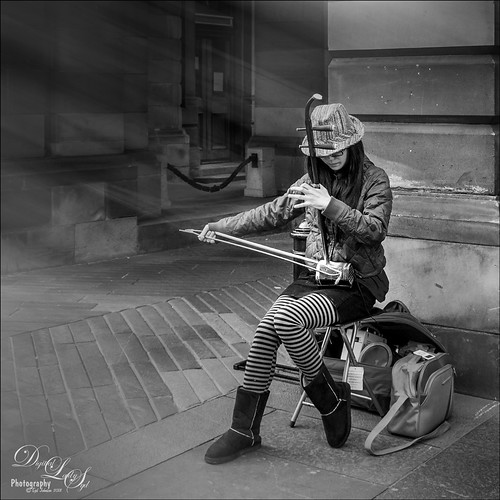
This is an image of a girl playing an Erhu, a traditional Chinese musical instrument from the Song Dynasty dating back to 1104 AD. She was playing along the Royal Mile, the main road through the historic district of Edinburgh, Scotland. This instrument has a very lovely sound and I actually bought a CD from her called Erhu by Yan Shi (unable to find a link for it as it is written mainly in Chinese). This image just seemed to need a black and white treatment so in Lightroom, one of Sergi Ramelli’s presets in his B&W pack called AA Drama Radial Circle Dark was applied and adjusted to fit. Then in Photoshop, Topaz (see sidebar for website link) Lens Effects was applied using the Streak Filter. I have never used this before, but I love the way it gave just a little light effect and added a motion feel to the bow. On a stamped layer, Nik Viveza 2 was applied to adjust the focus on her face and hand. That was basically all that was done. I wish had more images like this one. …..Digital Lady Syd
A Miniature Horse
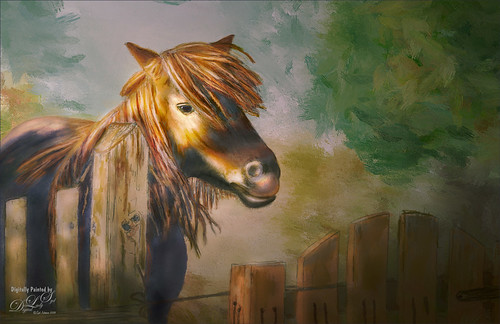
Doing a little more drawing and painting practice. This was a little miniature horse whose image was taken outside Minsk in Belarus. He was totally adorable. I decided he would make a good subject to paint. This time I did cheat a little on the rough drawing – used Topaz Simplify to create a very loose outline of the image and then removed the white using Select -> Color Range using the Shadows in the drop down. Then the Refined Drawing was done from this. After that the Local Color was added, Shadows and Highlights, and finally the texture was added to the horse, fence and gate. It is essentially the same workflow as was used in my Wolf drawing – see my Learning to Draw a Wolf! blog. Follow the links in my wolf blog for the great video by Aaron Blaise on how to do this. The background is one I created in Corel Painter a while ago and just seemed to fit this wonderful little guy. I am really enjoying trying out this new painting style in Photoshop. …..Digital Lady Syd
Trafalgar Square Fun!
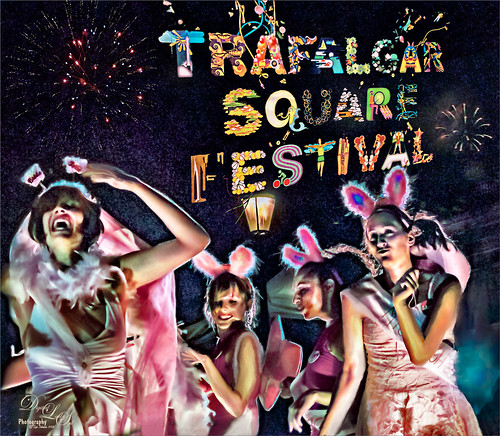
I am not sure why I did this image except that it was just fun to put together some older images I liked but were not that great to post as is. This is a composite using some of the girls that were in a nighttime show called Fashion Bus on the Square Show (a comedy fashion and dance show) at Trafalgar Square in London where it was pretty dark and crowded. The lettering was a banner at Trafalgar Square and the fireworks were added separately from my own sources. It ended up being a high-key image that looks pretty much how it did at the time of the event. The girl image was taken into Luminar 2018 (see sidebar for website link) where Joel Grimes Portrait Pop the Blues preset was applied (check to see if they are still available as a free preset from Luminar when in the software). Then it was mainly just a major clean up effort using clone stamps and mixer brushes. It was fun to try something kind of different. …..Digital Lady Syd
Topaz Labs AI Gigapixel
Check out AI Gigapixel stand-alone software for upsizing your images. It’s incredible! And it can now be used as a plugin when in Photoshop. Also Topaz Labs Photo AI has some great sharpening and denoise tools along with Photo Video AI.

Luminar Neo
Click here to visit Luminar for more info and check out their new AI Filters.

GRUT BRUSHES – Photoshop Brushes for Digital Artists
Click here to visit GrutBrushes.com
And be sure to check out his Free Brush of the Week and Brush Sampler! These are the best brushes you can find!

Topaz Studio 2 and Legacy Topaz Labs Filters
Unfortunately Topaz Studio 2 and other Topaz Lab filters are no longer available for sale as of 2020. If you had bought these filters and would like to put them back on, here is a link to the Legacy Apps where they can be downloaded again. Below is an example of the wonderful Remix AI Filter from Studio 2. The wonderful Impression still works fine in Photoshop right now along with Adjust (all versions), ReStyle, and even PhotoFXLab!

On1 Photo Raw
Wonderful software to use as a substitute for or plugin with Photoshop. Many great filter effects and lots of AI capabilities!
