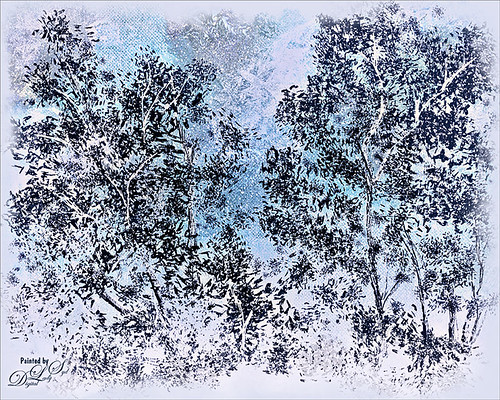
I have finally found someone who can relate to me exactly how to get a beautiful painterly look in Photoshop. This image was made following one of the many videos that Melissa Gallo at Painted Textures created for her Painting with Photoshop Workshop. After painting the trees, one of the provided textures for the workshop, Sea Storm Canvas, was set to Pin Light at 73% opacity and my SJ Snow1 Overlay was added. Now, I attempted to apply a little Digital Lady Syd on the image by taking a stamped layers (CTRL+ALT+SHIFT+E) into Topaz (see sidebar for website link) ReStyle and applied the Peppermint Gray preset to adjust the colors a little. (ReStyle settings: Set ReStyle section blend mode to Color; Texture Strength to 1.00; Basic section blend mode to Multiply; Color Temp -1.00, Tint 0.38, and White -0.56; Tone Black Level -1.00, Midtones 0.42, and White Level -0.56; and Detail Structure 0.97 and Sharpness -0.30.) Then added my watercolor border with color sampled from the image in a clipped Color Fill Adjustment Layer. Last step was to take the whole image into the Camera Raw Filter and add the radial filter for some saturation and clarity to draw the eye to the center of the image. If you are interested in learning painting techniques like this, look into getting her workshop. These are some of the best Photoshop videos I have followed. This is nothing but fun! — and that is what it is all about!…..Digital Lady Syd

Latest
Where Can You Find the Cutest Lion?
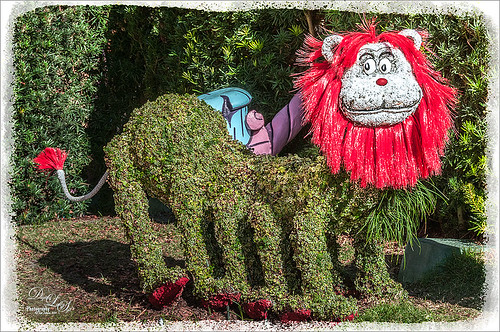
This little guy that was standing on the side in Dr. Seuss Landing at Universal Studios Islands of Adventure has got to rank right up there for cuteness! I loved the topiaries in this area – Universal did a great job on them. Very little processing was done to this guy. In Lightroom just the Basic slider adjustments and cropping. Used an Adjustment Brush to even out some of the shadows on the lion’s body and Dave Delnea’s Backlight Horizontal Right preset was applied to even out the light a little. In Photoshop just a little basic clean up in the top corner where a branch was showing. Next the High Pass filter set to 6 and Overlay Blend Mode was used to sharpen just the face and edges of his red mane by adding a black layer mask to the filter and painting back those areas. A painted frame was added as a border and an Adjustment Layer to add just a little overall contrast. That was it! Just love this shot!…..Digital Lady Syd
Fire Brigade Bike
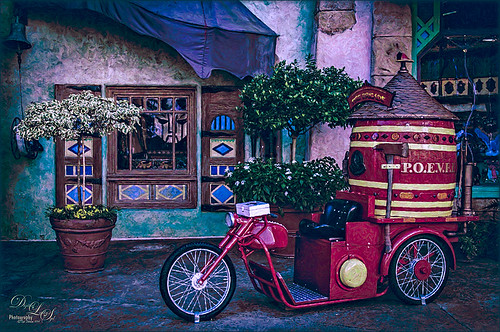
Finally got to see Universal Studios Islands of Adventure section in Orlando, Florida. This image of a Fire Brigade bicycle was one of the first things I saw – very unusual item so had to take a picture. Had to get a little creative though since that is what I do! This time Trey Radcliff’s Biting Icecream preset was applied in Lightroom along with some basic slider adjustments. In Photoshop Topaz (see sidebar for website link) Adjust 5’s Photo Pop preset was added next. Then just a bit of sharpening using Topaz Detail 3 was. Probably did not need it since next I went into Alien Skin’s Snap Art 4 and added the Factory Default settings from Snap Art 3 (which I manually created) and added a little more saturation – no mask layers. Back in Photoshop Topaz ReStyle was opened up and the bright oranges and reds were swapped out for blues and darker reds. I just liked theses colors better so that is what you see. Last step added a slight dark vignette around image using a Curves Adjustment Layer. This was such a nice colorful picture and the nice thing – no people around! Anyway, lots of fun to process using my favorite plug-ins…..Digital Lady Syd
Digital Lady Syd’s Favorite Preset for Nik’s Analog Efex Pro
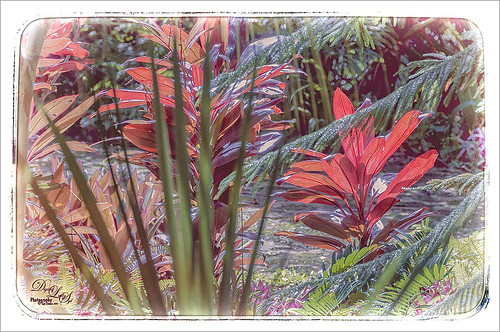
Just another example of what Nik’s Analog Efex Pro can do. Used Topaz (see sidebar for website link) ReStyle’s Shaded Subways preset (with these changes: Color Style Lum Secondary 0.07, Third -0.48, and Fourth 0.34; Texture Strength 1.00; and Sharpness 0.84.) Once again used my favorite settings for the plug-in. And that was it. I love the results – using ReStyle with Analog Efex Pro is a really nice combination. Since I am using this preset so much and find it really easy to adjust, I thought I would share the settings with anyone that would like to get a similar effect. Just tune out if you do not want them.
The preset was named SJ Favorite preset. The settings for each section used in the image above are as follows: Basic Adjustments – Detail Extraction 65%, Brightness 14%, Contrast -36%, and Saturation 13; Light Leaks – Strength slider 50%, set to Soft, and selected third row over and fifth row down (a reddish triangle coming from the left and the center point in the middle lower left (this can be adjusted depending on your image); Lens Vignette – Amount 78%, slider moved all the way right under Rectangle, and Size 44% with the center point in the middle of the image; Film Type – Subtle selected using the third row over and fourth row down film, Neutral to Faded slider placed just a little to right of middle, Strength 70%, Grain per pixel 400, and Soft to Hard slider in the middle; Frames – selected White in drop-down and used the first column fourth row down frame – I believe I clicked the Vary button a couple times here but not much difference occurred; and Levels & Curves – this is a little tricky but it makes all the difference in the preset. This is a 16 X 16 grid, so set the points where noted. For the Luminosity Channel, create a curve that starts with a point at 0,0, then one at 8.5, 8, and the last one goes up to the top with a small straight line to the top right corner so use this point 14, 16 – you may want to adjust this the way you want but it really pops my image by adjusting this curve – all other curve lines are left alone. You can go to the Camera Kit and add in other effects to get a little different look – I do this all the time.
The second image in my Photoshop With Corel Painter for Texture blog shows this same preset. Hope you will give it a try – Nik’s Analog Efex Pro is really a lot of fun!…..Digital Lady Syd
Four Picture Triptych with Topaz ReStyle
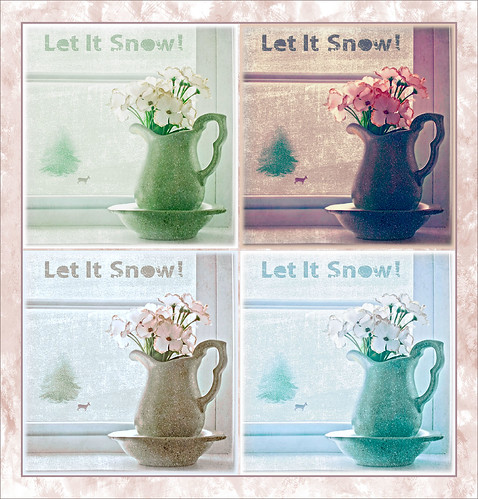
Well everyone probably knows by now that I love this little Photoshop plug-in from Topaz (see sidebar for website link). The original image was a low resolution Shutterstock stock photo (I could not find it on the website anymore) from Advanced Photoshop Magazine No. 25 CD from many years ago (not one to use stock photos but I loved this pitcher and flowers image). I actually did quite a bit to the original image – expanded it using Content-Aware Scale so there was more space on the left side, added my little tree I created in Corel Painter (it is getting a lot of use this season) and set it to Darken so the white background did not show up, added Shadowhouse Creations Tree Brushes Set #2 deer, and added Kim Klassen‘s beautiful Maybe and Peace Textures both set to Soft Light. My free SJ Snow 2 Overlay slight blur was applied at 79% opacity to just the pitcher to give it a ceramic dotted look. Next Kim’s Overlay 1 brush was used so it could be seen only in the window panes by using a layer mask. The font was Tramyad set to 40% layer opacity with an Inner Glow layer style added. Next a Levels Adjustment Layer was added to bring back contrast to the image and a High Pass Filter was used to add localized sharpening to the flowers only in a black layer mask. That was when the upper left green image was saved. The next three images all used different presets in Topaz ReStyle with some minor changes. I would list the presets, but two of them are from presets I used on other images. The frame texture is one I created in Corel Painter and added a Hue/Sat Adjustment Layer to it for the soft tan color. I love all four image effects! This is the biggest problem I have with ReStyle! Decisions, decisions! If you have not tried out this wonderful plug-in, download the trial and see what you think! Lots of fun!…..Digital Lady Syd
Digital Lady Syd Related Blogs:
Digital Lady Syd Reviews Topaz ReStyle
Using a Tych Panel to Show Off Your Images
Visiting the Country
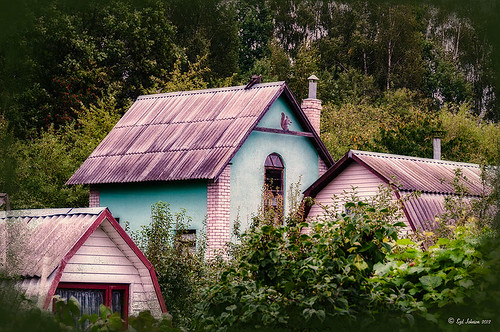
This is an image of several dachas in the countryside outside the City of Minsk in Belarus. This image had very little processing done to it – just three filters stacked in Nik Color Efex Pro 4 (Brilliance/Warmth, Midnight using the Neutral Color Set, and Detail Extractor). A Curves Adjustment Layer was added and several power lines were removed following my Get Rid of Those Power Lines Fast – with Paths and Spot Healing Tool! blog. The overlay is the same one created for the top image in the blog linked below, and was added with a dark green Color Fill Layer clipped (ALT+click between the layers) to it so it looks dark. See my How to Create an Overlay Out of a Texture blog on how to create this overlay. I like the soft diffused effect the filters created…..Digital Lady Syd
What a Dolling Picture!
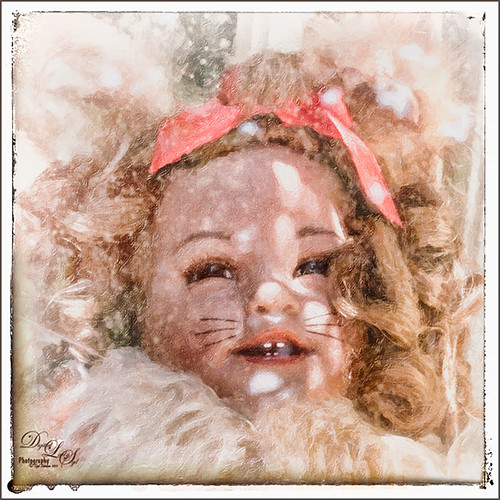
This is a rather crazy image of a doll in a lion outfit that I decided to do some processing on. The RAW image had a lot of window reflection, but for some reason I just liked the way the sun lit up the doll and hair on the right side. I do not even mind the white blown out spectral spots – it sort of added to the wintry old feel. In the original file had a lot of spectral highlights that looked like snow. Alien Skin Snap Art 4 was applied in Photoshop using the Impasto Detailed preset and two Detail Masks to bring in the facial features. Then I added my free SJ Snow2 slight blur overlay set to 34% layer opacity. A Solid Color Fill Adjustment Layer was clipped (ALT+click between layers) to the overlay to give a little light peach color to the snow. Nik Analog Efex Pro was applied for a little vintage feel. The last step was to add a Curves Adjustment Layer to add contrast to the image. That was it – for some reason I really like this image!…..Digital Lady Syd
Bamboo Forest Abstract
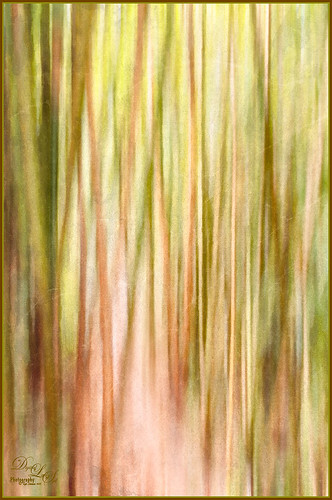
Got inspired by a short tutorial called Dustin Abbott’s Autumn Abstract with Snap Art 4 on Alien Skin’s website where he created this really interesting abstract painting. The image above is of a bamboo forest on the Big Island in Hawaii. I wanted a little less abstraction so some of the bamboo could be seen but the beautiful Hawaiian forest colors were the main interest. Therefore, I only used a Motion Blur Distance of 594 pixels. Next in Snap Art 4 Dustin Abbott’s Autumn Abstract preset (he graciously lets you download the preset in the tutorial link above) was applied. Back in Photoshop a layer mask was added where a few of the trees were painted back softly just to exaggerate the foreground tree shapes. Next Topaz ReStyle (see sidebar for website link) plug-in was added. (Started with Olivine Pastures preset to keep the Hawaiian green and pink colors intact. Color Style Hue Third -0.14, Sat Primary -0.28, Third 0.20, and Fifth -0.17, and Lum Third 0.63 and Fifth 0.59; Texture Strength 1.00; Basic Opacity 62%, Blend Mode Screen, Color Tint 0.16 and Sat 0.20; and Detail Structure 0.31.) The last step involved adding another of my favorite plug-ins, Nik Analog Efex Pro. (Used these filter settings: Basic Adjustments with Sat at 24%; Dirt & Scratches 82% using the last Organic thumbnail; Photo Plate Corroded – 2nd down 2nd over – at 20% Strength; and Levels & Curves with RGB and Luminosity Curves pulled just a little down and over at 81% Strength.) I think the image depicts exactly what I wanted to express – mainly emphasizing the gorgeous colors and the soft vertical feel of the forest. Give this technique a try and see what you can do……Digital Lady Syd
Digital Lady Syd Related Blogs:
Digital Lady Syd Reviews Alien Skin Snap Art 4
Happy New Year!

Happy New Year! Hope you all have some New Year’s Resolutions for next year, or at least one like me. I do not do well with this sort of thing so I try to keep myself focused on maybe just one or two goals for each year. This year my major digital goal is to learn Corel Painter better and try to understand the program so I can pop in and out of it like I do Photoshop. Above is just a little image I created in Corel Painter and Photoshop wishing you the best of times for the coming year. It was a lot of fun to create. The path, trees, and much of the snow were all painted in Painter using several of Karen Bonaker’s various snow brushes and David Gel’s Snow Time 2009 brushes (both of them have all kinds of fabulous free brushes). Then I popped into Photoshop and created layers for each of the following image elements. The cabin, foreground trees, deer and moose were all from my favorite Shadowhouse Creations Rural Objects and Tree Brush Set 2 – I use them all the time! Kim Klassen‘s Let Go texture was set to Darker Color to get a more textured and nicer color of green for the background color. Also my free SJ Snow 2 Overlay slight blur was added at 86% layer opacity. The font is Tramyad. Once again, I hope you all have a great New Year!…..Digital Lady Syd
Wintry Dahlia

Loved how this beautiful white dahlia bloom came out – and once again it used two of my favorite Photoshop plug-ins. First applied Trey Radcliff’s Yesterepoch preset to flower in Lightroom. In Photoshop sharpened up the image using Topaz (see sidebar for website link) Detail 3 using these settings: Detail Panel: Highlight – Small Details 0.42, Small Details Boost 0.45, Medium Details 0.54, Medium Details Boost 0.40, Large Details 0.48, and Large Details Boost 0.44. Back in Photoshop filled a layer mask with black and painted back just the edges of the flower that I wanted emphasized – this kept the petals in back less in focus. Added one of my textures that I made in Corel Painter with a layer mask so the flower did not have texture applied, and set the layer to 32% layer opacity. Next opened Nik’s Analog Efex Pro plug-in and used a preset I created called Very Basic Set up. It contains just the Basic Adjustments panel (Detail Extraction 30%, Brightness 35%, Contrast 25% and Saturation -30%), Bokeh filter (Blur Strength 24%, Boost Highlights 94%, and centered on middle of flower), and Lens Vignette filter (Amount -33%, slider set under R in Rectangle, Size 77%, and also centered on flower middle). Back in Photoshop added a Levels Adjustment Layer to give just a little more contrast. I really liked the soft textured feel to the flower…..Digital Lady Syd
Topaz Labs AI Gigapixel
Check out AI Gigapixel stand-alone software for upsizing your images. It’s incredible! And it can now be used as a plugin when in Photoshop. Also Topaz Labs Photo AI has some great sharpening and denoise tools along with Photo Video AI.
Luminar Neo
Click here to visit Luminar for more info and check out their new AI Filters.

GRUT BRUSHES – Photoshop Brushes for Digital Artists
Click here to visit GrutBrushes.com
And be sure to check out his Free Brush of the Week and Brush Sampler! These are the best brushes you can find!

Topaz Studio 2 and Legacy Topaz Labs Filters
Unfortunately Topaz Studio 2 and other Topaz Lab filters are no longer available for sale as of 2020. If you had bought these filters and would like to put them back on, here is a link to the Legacy Apps where they can be downloaded again. Below is an example of the wonderful Remix AI Filter from Studio 2. The wonderful Impression still works fine in Photoshop right now along with Adjust (all versions), ReStyle, and even PhotoFXLab!
On1 Photo Raw
Wonderful software to use as a substitute for or plugin with Photoshop. Many great filter effects and lots of AI capabilities!
