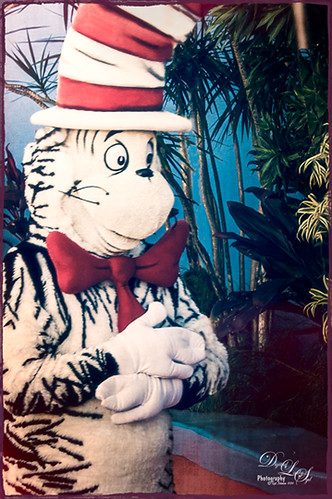
This fun shot is of the Cat in the Hat character in Dr. Seuss Land at Universal Studios Orlando. (Title quote from The Cat in the Hat book.) In Lightroom Seim Effects (see sidebar for website link) Super HDR X and Dave Delnea‘s Backlit Vertical Left presets were applied – these are probably the best sets of Lightroom presets I own! In Photoshop some basic clean up was done before OnOne’s (see sidebar for website link) Perfect Effects 8 plug-in was opened and Jacob Lucas Old Mans Chair preset (supplied by OnOne and one of my favorite Perfect Effects presets) was applied. Back in Photoshop the Sharpen Tool was used on the eyes and hands. Last a basic thin grunge border was applied using a dark purple Color Fill Adjustment Layer clipped to it (ALT+click between the layers to clip). That was it! Such a cute character in this fun part of the theme park……Digital Lady Syd

Latest
Where Am I?

OK – the owls in the birdcages should be the big clue if you are a Harry Potter fan! Just another shot taken at the Wizarding World of Harry Potter in Universal Studios Orlando, Florida. Even though this window shot of the owl and school supply store was not the greatest, I really liked it. Some of the reflections in the panes actually show the high tops of the buildings on the other side of the street – so Harry Potterish! Felt this image needed a quick fix with the newly updated Nik Analog Efex Pro 2 since the whole Harry Potter feel is rather dark and vintage. In Lightroom just some basic adjustments and Seim Effects PW4 (see sidebar for website link) Sampler Magic Shade Fixer preset – a free download of some marvelous presets. Since I was going to use the Adaptive Wide Angle Filter in Photoshop, the Lens Profile was turned off. In Photoshop my go-to filter, Topaz (see sidebar for website link) Detail 3 was used and then the Adaptive Wide Angle filter was opened to straighten up all the unsquare window panes – did a pretty good job I think. Next Nik’s Analog Efex Pro 2 was applied using Basic Adjustments, Light Leaks, Lens Vignette, Film Type, Frames, and Levels & Curves which really gave the image the real vintage feel. Back in Photoshop a vignette was created by using a Curves Adjustment Layer to darken the image overall and then paint back with a large soft white brush the lower center focal point to direct the eye. The last step involved using the Sharpen Tool on a New Layer to sharpen up the owls just a little. Done! Love this new update from Nik!…..Digital Lady Syd
Digital Lady Syd Related Blogs:
How to Use the Adaptive Wide Angle Filter
How About That Update to Nik Analog Efex Pro 2?
The Candy Store Staircase

Just had to give a painterly look to this cute pink spiral stairway in a candy store in Harry Potter Land at Universal Studios Orlando. The original was not that great an image – not real sharp and or straight. I really liked the shot though so by adding Alien Skin Snap Art 4 plug-in and the Pastel preset on it, it became a really nice image. To be honest, this image took a long time to get the effect I wanted even with this great filter effect. The Camera Raw Filter’s Radial Filter was added to the light in upper left to make it the focal point and lighten it up a little more. Several Curve, Levels, and Selective Color Adjustments Layers were added. Several clean up and painted layers were added and even my Snow Overlay-slight blur was added at 6% layer opacity to add in a little white canvas feel. The last step was adding a simple painted border that I created in Painter. I have to say that Snap Art really does a pretty good job of painting…..Digital Lady Syd
Digital Lady Syd Related Blogs:
Digital Lady Syd Review Alien Skin Snap Art 4
Digital Lady Syd Reviews Alien Skin Snap Art 3
A Blast from the Past!
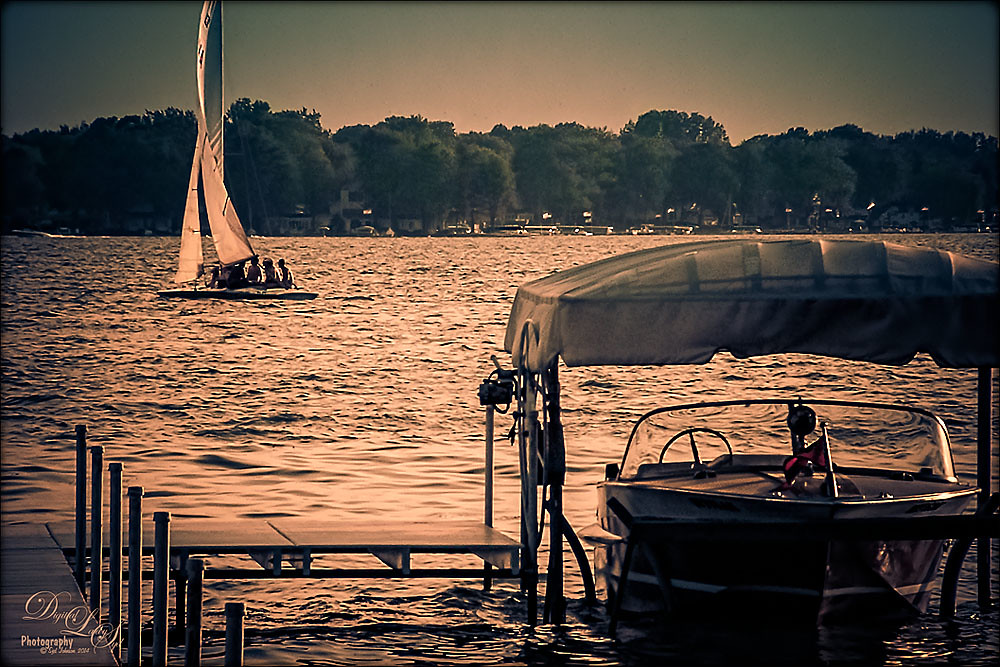
Got an E-mail from an old lake friend yesterday so I thought I would post this shot for him and my old “lake” family of a place I will always remember as “home.” If you are in the vicinity in Indiana, check out Lake Wawasee – a beautiful fresh water lake. This image was taken with my old 2 mg Casio QV-2900 UX Digital Camera – my first digital camera. It actually did a pretty good job. Trey Radcliff’s Friday Night of Regrets Lightroom preset was applied first before opening Photoshop. Topaz (see sidebar for website link) Detail 3’s Feature Enhancement II was applied next. A Selective Color Adjustment was used to add a little more green color into the background trees that look washed out. The mask was filled with black and just the trees painted back with a very low opacity brush. Two New Layers were created and both set to Overlay blend mode. The tree edges were painted in the dark areas with a black brush on one layer and a white brush was used to paint in tree highlights on the other layer using a brushes set to 12% layer opacity. The layer opacities were then lowered. The Sharpen Tool was used on the houses on the shoreline and a Curves Layer Adjustment Layer was added and set to 50% layer opacity. Probably more info than you ever wanted to know, but it is nice to see that some of the newer Photoshop technology and tricks can perk up those older digital photos!…..Digital Lady Syd
Digital Lady Syd Related Blogs:
The Best Dodging and Burning Technique!
Turning the Old into the New
Beware of Snoozing Cat!
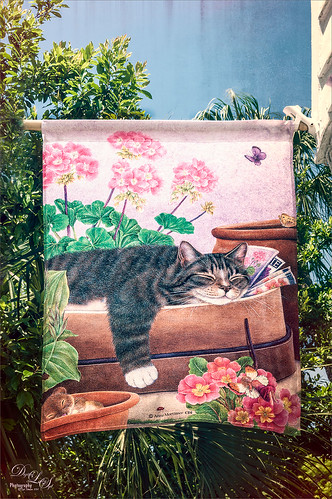
Loved this banner by Anne Mortimer CDI (she does great cat images) outside a darling upstairs cat boutique in St. Augustine, Florida, called City Cat County Cat. (No website so here is their store address: 72B St. George Street, St. Augustine, FL 32084 – definitely worth a stop if you love cats!) If I had a cat, I would buy this! Just basic changes in Lightroom before going into Photoshop. This time I used the Adaptive Lens Filter to straighten up the edges of the banner just a little. On a duplicate layer, OnOne (see sidebar for website link) Perfect Effects was opened and Jason Lucas’ preset Old Man’s Chair (from an OnOne give-away set when you own the suite) was applied and the top Texturizer layer’s opacity was reduced for less Light Leak effect. A Detail Adjustment Layer was added on top in the plug-in and just the cat’s face was sharpened. Back in Photoshop the layer opacity was set to 73%. I created a stamped or composite layer on top (CTRL+ALT+SHIFT+E) and the Sharpen Tool was used just a little bit on the cat’s face and the mouse. That was it – very simple and I really like the preset by Jason – gave a great vintage effect!…..Digital Lady Syd
Digital Lady Syd Related Blogs:
How to Use the Adaptive Wide Angle Lens Filter
Vase of Spring Flowers
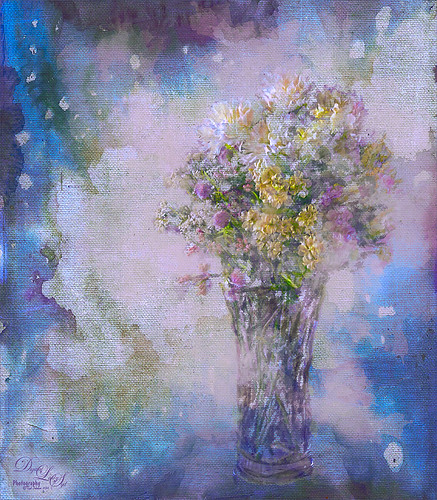
Just a vase of spring flowers that I decided to paint using Photoshop’s mixer brushes. I first increased the contrast of the flowers so they showed up sharp using Topaz (see sidebar for website link) Detail 3 – I do this a lot when I want a nice overall sharpness to an image. Also used a Curves Adjustment Layer to add some contrast to the image. 2 Lil’ Owls Stained Glass 25 (see sidebar for website link) was added on top and the flowers painted back in a layer mask. Next a new layer was added where some soft pink color was lightly brushed onto the layer to add a little more color around the flowers. The last major step was going into Topaz ReStyle and using the Light Pastel Daisies preset which changed the texture color from turquoise to more bluish tones. Love the result. …..Digital Lady Syd
Where Am I?
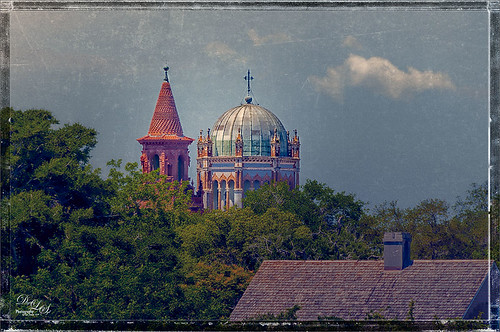
This beautiful skyline image was taken from the Castillo de San Marcos National Monument in St. Augustine, Florida. This is a spire from Flagler College (the old Ponce de Leon Hotel) and the cupola on the Flagler Memorial Presbyterian Church. In Lightroom did just basic changes and sharpened up the spire and cupola slightly. In Photoshop the first thing I did, and do a lot, is go into Topaz (see sidebar for website link) Detail 3- this time applied the Soft and Dreamy III preset to smooth out the leaves that were overly sharp and to reduce the detail in the close up roof. I changed the Cyan-Red, Magenta-Green and Yellow-Blue sliders (similar to the Color Balance Adjustment Layer) to get better colors. Some of my clouds (see my free Cloud Brushes) were added softly in the sky at 69% layer opacity. Kim Klassen Cloth & Paper Reign texture was used to add interest in the sky. Next Topaz ReStyle’s Warm Sand Dune Wash preset was applied to pop the colors a little. On a stamped layer (CTLR+ALT+SHIFT+E) the Camera Raw filter ‘s Radial Filter was applied to focus in on the spire and cupola. On another stamped layer OnOne (see sidebar for website link) Perfect Effects 8 was opened and a Blue-Yellow Split Tone set to a Balance of 81 was added, some detail painted back on the spire and cupola, and the Martha Border was the last step before saving back in Photoshop. I love beautiful St. Augustine!…..Digital Lady Syd
Digital Lady Syd Related Blogs:
OnOne’s Perfect Mask Works Great!
Some of My Favorite Plug-Ins
Loving Both Filters!
Spring Flowers
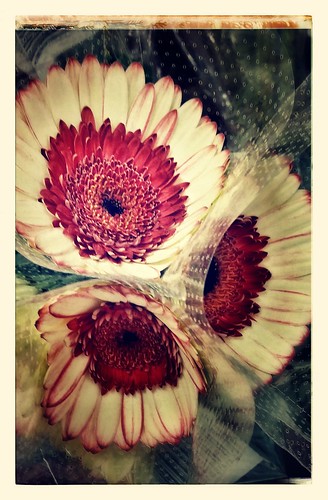
More beautiful and unusual flowers at my local grocery. This time they were post-processed on my phone using Nik’s Snapseed App which produces wonderful results. For this image these tools were used: Crop first, Drama Filter Structure +59 and Saturation +20; Grunge Saturation +24, Texture +60, Center Size +50, Style +60, and Brightness 0; Center Focus Blur +72, Outer Blur -72, Inner Blur +29, Weak circle, and focus control point placed on the top flower; and Frame-Frame 11 tapped three times. Once again, this app creates some beautiful results!…..Digital Lady Syd
Digital Lady Syd Related Blogs:
How to Use Nik’s Snapseed Photo App on Your Smart Phone
A Little Layer Style Fun
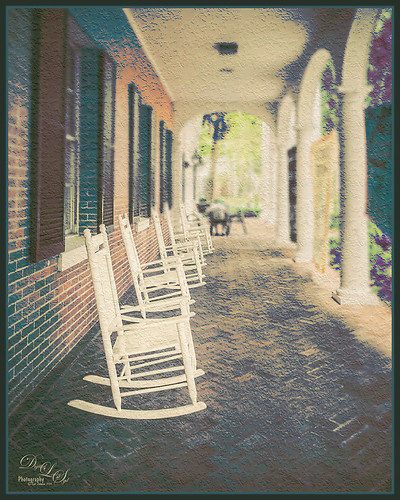
These are some of the rocking chairs that Stetson University in DeLand, Florida, offers students to use for resting or studying on the campus. I really liked the way they have them located throughout this small beautiful campus. One effect I did use on this image was the Blur Gallery in Photoshop so that the end of the walkway was definitely not too clear but the rockers up front are seen clearly. The other was to use Jack Davis’ Layer Styles called Stucco which adds a Pattern Overlay using one of his patterns to give a very textured surface. I changed the opacity from 25% to 19% and the scale to 203% from 61% which gave a very different look. Try playing around with this layer style using one of your favorite textured patterns and see what you get. Lots of fun!…..Digital Lady Syd
Dahlia Flowers Chatting with the New BLooms

Just a couple of pretty dahlias growing in my front yard. I really loved the nice spring colors. This time I created a selection of the flowers and added French Kiss Tableaux Madeleine texture behind them. French Kiss Tableaux Halcyon was added on top and the flowers painted back with a large soft brush so most of the image was revealed – just the edges and some of the stems were not completely revealed. A new layer was placed on top and the Mixer Brush was used to blend the flower petals to give a slightly painterly feel to them. French Kiss Studio 3 White Wash texture was added on top and set to 13% opacity. A layer mask was added and the darker flower was painted back very softly to help draw the eye there subtly. On a composite layer on top (CTRL+ALT+SHIFT+E) Topaz (see sidebar for website link) ReStyle’s Cream and Plum preset (one of my favorites in the filter) was applied to give a little more purple color to the image. This filter can really give a better color palette and there are so many choices it was heard to choose one. A frame I had created in Corel Painter was placed on top as a last step. Lots of fun to created!…..Digital Lady Syd
Topaz Labs AI Gigapixel
Check out AI Gigapixel stand-alone software for upsizing your images. It’s incredible! And it can now be used as a plugin when in Photoshop. Also Topaz Labs Photo AI has some great sharpening and denoise tools along with Photo Video AI.

Luminar Neo
Click here to visit Luminar for more info and check out their new AI Filters.

GRUT BRUSHES – Photoshop Brushes for Digital Artists
Click here to visit GrutBrushes.com
And be sure to check out his Free Brush of the Week and Brush Sampler! These are the best brushes you can find!

Topaz Studio 2 and Legacy Topaz Labs Filters
Unfortunately Topaz Studio 2 and other Topaz Lab filters are no longer available for sale as of 2020. If you had bought these filters and would like to put them back on, here is a link to the Legacy Apps where they can be downloaded again. Below is an example of the wonderful Remix AI Filter from Studio 2. The wonderful Impression still works fine in Photoshop right now along with Adjust (all versions), ReStyle, and even PhotoFXLab!

On1 Photo Raw
Wonderful software to use as a substitute for or plugin with Photoshop. Many great filter effects and lots of AI capabilities!
