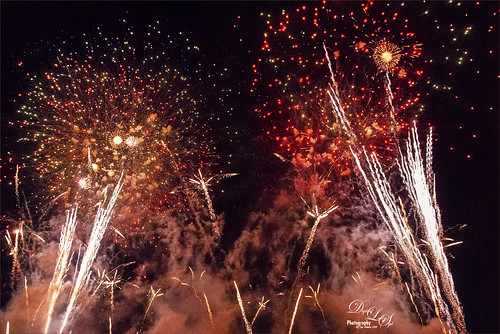
Just wishing everyone a very Happy 4th of July here in the US! Have a great time celebrating!….Digital Lady Syd

Just wishing everyone a very Happy 4th of July here in the US! Have a great time celebrating!….Digital Lady Syd

This interesting stamen was part of a huge Hibiscus flower at the Harry P. Leu Gardens in Orlando, Florida. Luminar (see sidebar for website link) Flex was used to sharpen up a stacked macro image. Then PS mixer Flat Blender was used to paint and add texture into the strokes. A variation was created to add color using the same brush. One of my Corel Painter Textures was added on top – the Blend If sliders were used to add a little more texture effect in the background. It took a while to finish up, but it was a lot of fun to create!…..Digital Lady Syd

This macro image was taken with my 60 mm Nikor Lens at F/2.8 with a Bower 0.5 x High Resolution Digital Lens with Macro added to the lens. This leaf image taken at the Harry P. Leu Gardens in Orlando, Florida, was actually turned into black and white in Lightroom before bringing it into Photoshop. In the Camera Raw Filter a profile called Underworld was added to turn it more of a dark blue and white which was really kind of nice. Viveza 2 was used to emphasize certain leaf parts and a Gradient Map was used to turn the color to green and white. I thought it looked more natural in green. Some clean up was done along with Darken and Lighten Curves Adjustment Layers. A Color Balance Adjustment Layer finally adjusted out the tones. A slight vignette was added to finish up!…..Digital Lady Syd
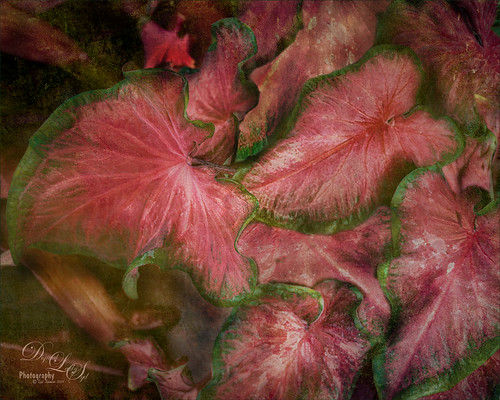
Every time I look at these leaves all I can think about is watermelon! These plants are really beautiful and I always have to stop and take images of them. The Harry P. Leu Gardens has several varieties and I could have spent all my time photographing just the various types. Not much was done to this image other than a little leaf fill-in. Three textures were added set at various blend modes. Luminar (see sidebar for website link) Flex was used to adjust the color tone (HSL, Image Radiance, and Vignette filters). Viveza 2 was used to adjust focus. Finished with some dodging and burning using a Darken and Lighten spotlight effect layers. ……Digital Lady Syd

This funny Green Tree Snake at the St. Augustine Alligator Farm was showing off one of his many tricks in his exhibit. He loves it when people stop by – very friendly! Not much was done on this image as he was perfectly lighted in his exhibit – apparently he likes it very warm. Topaz (see sidebar for website link)k DeNoise AI was used along with Aurora 2019. A Look Up Table Adjustment Layer and Viveza 2 was used. A Charming Font is the text font. I love this entertaining guy!…..Digital Lady Syd

This little beauty was on display at the Harry P. Leu Gardens in Orlando, Florida – most of the flowers were not in great shape but there were a few that looked very pretty. A Hue/Saturation Adjustment Layer was used. Topaz (see sidebar for website link) DeNoise AI was also applied and lots of painting layers to even out the edges. Viveza 2 was added along with some lighten and darken Curves Adjustment Layers. The texture is from Adobe Paper Texture Pro’s panel called Brushed Rose. It was set to Hard Light blend mode, 74% layer opacity and a Properties Density of 36. That was it. Roses are so pretty to photograph!…..Digital Lady Syd

The Harry P. Leu Gardens has a large row of these gigantic yellow flowers – totally get your attention! They look a bit like, I hate to say it, a large yellow weed. Anyway, since I totally love the color yellow, I had to figure out a way to show them in good form. The image actually took a very long time to put together since the background had to be totally removed and replaced with a painted one I did in Corel Painter previously. I won’t go through all the steps, but Luminar (see sidebar for website link) Flex was used to get the sharpness and colors and on a second layer in Flex, Sunrays filter was used – this gives the soft sky effect. (See my Luminar Flex – Exactly What is This? blog.) Viveza 2 was used to get the sharpness on the petals correct and what really created the beautiful color look was using Topaz (see sidebar for website link) ReStyle which gave me a better color palette. Lots going on here but these unusual beauties deserved it!…..Digital Lady Syd

This Pink Pineapple Plant was really not sweating, it was being watered to keep it from getting too hot on a very hot day at the Harry P. Leu Gardens in Orlando, Florida. The water drops were quite stunning. There is a pineapple attached on the lower left. This plant image was very simple to post process – used a little of the new Texture slider in Lightroom before going to Photoshop. Then used Luminar Flex (see my Luminar Flex – Exactly What is This? blog) – this time just Accent AI Filter, Advanced Contrast and just Shadows slider, and Details Enhancer where it was only applied to the edges with a mask where the water drops are. Back in PS just used Viveza 2, one of my Lookup Tables set to 44%, and a Spotlight Effect on the center of the plant. What a little beauty hidden in this gigantic garden!…..Digital Lady Syd

Had some fun with these beautiful white day lilies taken in the bright sunshine at the Harry P. Leu Gardens in Orlando, Florida. To get the golden color in the flowers, one of Serge Ramelli’s LR presets, Safari Warm Dramatic Strong, was used and then just some basic changes were done. In PS a High Pass layer was created to sharpen the image. Then Lighten and Darken Curves Adjustment Layers were used. A Color Lookup Adjustment Layer using Kodak 5218 Kodak 2395 preset was applied at 55% layer opacity. Then a Gradient Layer Adjustment Layer selecting Sepia 5 as a gradient was added next and set to Soft Light blend mode and 57% layer opacity. Viveza 2 was used to finish up. I like the surreal candle effect. …..Digital Lady Syd

This was one of many lovely Monarch and other types of butterflies that were very busy spreading the magic dust to the beautiful flowers that were in bloom at the Harry P. Leu Gardens in Orlando, Florida. This image took me forever to decide what to do with it! It had a really distracting background with all the crazy leaves going all over the place – it was a hard image to capture as the butterflies were going crazy on the hot day I visited. In Photoshop Luminar’s (see sidebar for website link) Flex was used to calm it down some and add some structure to the butterfly, then Viveza 2 twice to try and soften the background, before using Topaz (see sidebar for website link) ReStyle to get the final color palette. That’s along with some painting, spotlight effect, and Red Channel Curves Adjustment Layer. I think I finally got the mystical magical effect I was trying to create……Digital Lady Syd
Check out AI Gigapixel stand-alone software for upsizing your images. It’s incredible! And it can now be used as a plugin when in Photoshop. Also Topaz Labs Photo AI has some great sharpening and denoise tools along with Photo Video AI.

Click here to visit Luminar for more info and check out their new AI Filters.

Click here to visit GrutBrushes.com
And be sure to check out his Free Brush of the Week and Brush Sampler! These are the best brushes you can find!

Unfortunately Topaz Studio 2 and other Topaz Lab filters are no longer available for sale as of 2020. If you had bought these filters and would like to put them back on, here is a link to the Legacy Apps where they can be downloaded again. Below is an example of the wonderful Remix AI Filter from Studio 2. The wonderful Impression still works fine in Photoshop right now along with Adjust (all versions), ReStyle, and even PhotoFXLab!

Wonderful software to use as a substitute for or plugin with Photoshop. Many great filter effects and lots of AI capabilities!
