
Sailor Selfie
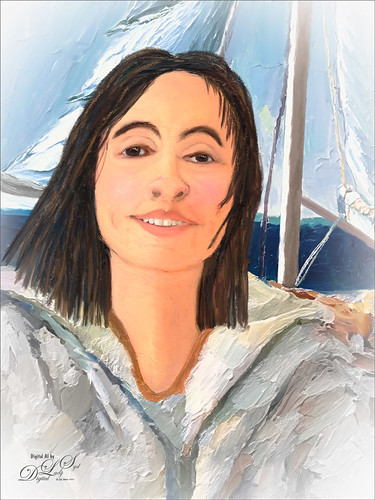
Just a quick blog here to show you how to get more of a realistic AI result as your subject, me in this case, and get a nice interesting background. The original is still the one of me in the car from the other pictures, except this time used both the 65% Brightness for one image, and 55% Brightness for the HSB setting for another image. By stacking the two Apply Images (see my blog Placing Any Photoshop Generative Fill Variation on a Layer Easily) from each Generative Fill layer, I was able to use a layer mask leaving the coat from the 65% layer and painting in the face from the 55% layer. Used an “Oil Painting” prompt for both layers. Created a stamped layer on top and selected the Subject in the Contextual Task Bar, which once the subject is selected turns into the Generative Fill command – must click the inverse icon to run Generative Fill to select the background. In this case the prompt was “Oil Painting small sailboat background” – it did not turn out great – no sails, just the sailboat lines. So had to select certain areas and run Gen Fill two more times for the white sails. Then lots of clean up layers which is what it often takes with the PS AI generation. Also lots of painting layers – had to use my nose, mouth and eyes from the original again – PS just is not doing that great a job with face details in my opinion. (See my blog Being One with Nature on how to do this.) And the Liquify filter and Luminar’s Neo filter were used. This may be the closest I can get to my selfie – hmmm…..Digital Lady Syd


Pingback: A FEW NEW SELFIE AI TRICKS | Digital Lady Syd's Fun Photoshop Blog
Pingback: PLACING ANY PHOTOSHOP GENERATIVE FILL VARIATION ON A LAYER EASILY | Digital Lady Syd's Fun Photoshop Blog
Pingback: » Skiing Selfie Digital Lady Syd's Tidbits Blog