
The Worker Bee
Here is another member of my Selfie Family – this time in a work environment. Tried out some new brushes and thought I would share what they are. To get the texture in her jacket, used Kyle’s Bruno Brush from his Spring 2022 set (go to Brush Settings pop-out at top right and select Get More Brushes and go to the set to download – double-click the file to load once downloaded). In the Brush Settings Panel, turned off the Scattering settings and set the Options Bar Opacity to 40% – but also liked it at 80%. The texture looks very painterly in this brush. For her face and cheek coloring, used an Airbrush (which means buildup is turned on either in the Brush Settings Panel or clicking on the Airbrush icon in the Options Bar). To make this brush, download Kyle’s Real Watercolor brushes from Photoshop (as discussed above – they are a separate group in this list). Choose Kyle’s Square Simple brush and in the Brush Settings Panel set Shape Dynamics to Size Jitter Control: Pen Pressure, Transfer to Opacity Jitter of 92% and Opacity Jitter Control to Pen Pressure, Buildup checked on, and Smoothing checked on. Put the Flow to 18% in the Options Bar. The hair was painted using Zummerfish Blending Brushes – Sampled Brush 43 2 for the curls. The last brush used was one I have mentioned before and really like – Kyle’s Fall 2023 (another set to download like above) Great Paint (changed Flow to 54% and Smoothing to 12% in the Options Bar) – used small size for detail brush and larger to paint in solid colors. Selected the background area and ran Generative Fill with prompt Acrylic office interior for this image – the Oil Painting Interior results did not look good. Also used my original selfie nose again, but this time ran another Generative Fill (Oil Painting Nose) to get a better result than from the total subject fill. That’s it – the new brushes actually worked out really well!…..Digital Lady Syd
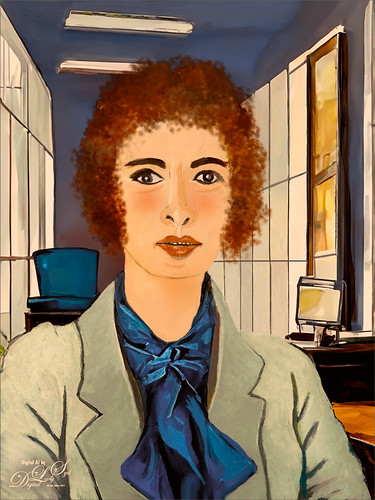
A Sophisticated Model

Thought I would put up another Photoshop Generative Fill variation from my selfie – this time a more sophisticated looking person selfie image (used Dave Kelly’s free Gen Fill Photo Painting Action set to GF Painting 40 before running Generative Fill). Had fun painting her as the Oil Painting prompt was too much for the overall image, but looked good in her hair. Used the same brushes that were used in my Fun Photoshop Placing any Photoshop Generative Fill Variation on a Layer Easily Blog. The main difference here is that Rebelle, a really nice and pretty inexpensive painting program, was used to smooth out the thick paint background and created a beautiful backdrop. Just took the PSD file into Rebelle and made some changes to the Oil & Acrylic Brushes -> Round -> Rough Oil Brush – changed the Loading to 100 and the Size to 50 – just sampled colors and painted softly around the subject. Pretty simple and easy to do. Oh yes, I didn’t like her nose so I copied my from the original selfie layer into the image and blended it in. It was in the right place at least!…..Digital Lady Syd
Another Selfie???

Used the same selfie from my Creating an AI Selfie? Fun Photoshop Blog using a different variation this time selfie image (used Dave Kelly’s free Gen Fill Photo Painting Action set to GF Painting 40 and Generative Fill Prompt: Oil Painting). Really liked the way the hair was done by Photoshop’s Generative Fill command and the background texture was really nice. Lots of clean up on the original was done due to the many messed up areas (like the earrings did not match up, her face look chopped up, etc.) that AI often seems to create. And a lot of time was spent cleaning up the image with Photoshop’s Mixer brushes – ended up using some old Picasso Mixer brushes made by Fay Sirkis. The key was to find the right brush dab to get a somewhat closely matched up painterly stroke to the AI effect and didn’t smooth things out too much – this to me is the biggest problem with PS’s Mixers. Fay’s Picasso brushes used a Bristle Brush as the foundation for her mixers. Guess that is what is important – finding the right brush for the image!…..Digital Lady Syd
The Mighty Eagle

I am a huge Eagle fan (not the football team!) and am always checking in on Web Cams when the nesting season comes along. This guy is an injured Eagle that resides at the Jacksonville Zoo – I feel sorry for him since he is unable to fly the sky like his relatives. He is still a beautiful specimen and seems to enjoy people stopping by when visiting the Zoo. This image involved only a little AI to Expand the right side a bit to balance out his position in the photo and that is all. The rest was just my regular workflow: a Curves Adjustment Layer, two Hue/Saturation Adjustment Layers, Viveza 2 to pop the color of his feathers, Topaz Sharpen AI to sharpen up the feathers using Too Soft, a dodge and burn layer, an Exposure Adjustment Layer for the eyes, and a clean up layer. It felt good to get back to my regular post processing!…..Digital Lady Syd


