Humorous Shots Are Sometimes the Best

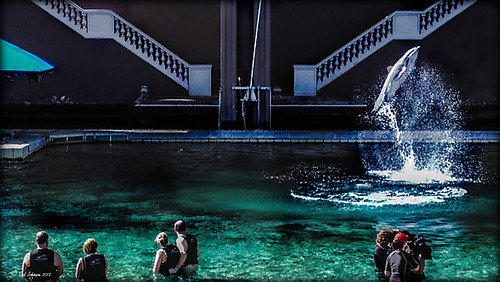
This image is one I found in my video I took while watching the dolphin program at the Dolphin Learning Center, one of the activities offered at the Hilton Waikoloa Village on the Big Island in Hawaii. When I processed this image, it seemed no one was paying any attention to the dolphin that is flying out of the water. Really struck me as a very funny shot! Anyway, thought I would share it.
The image was processed using two Virtual Copies of the image in Lightroom, one enhancing the water and dolphin and the other the people and pool. I selected the two Virtual Copies, right clicked and chose Edit In -> Open as Layers In Photoshop. This stacked the two Virtual Copies as layers in Photoshop. The one version layer created for the dolphin was masked out using a black layer mask. Then with a very low opacity white brush, the areas I liked from that version were painted back in on the black layer mask to give a little more contrast to the image. Really liked the result. This is a great way to pull detail out of a single image…..Digital Lady Syd
Topaz Lens Effect’s Artistic Flair!

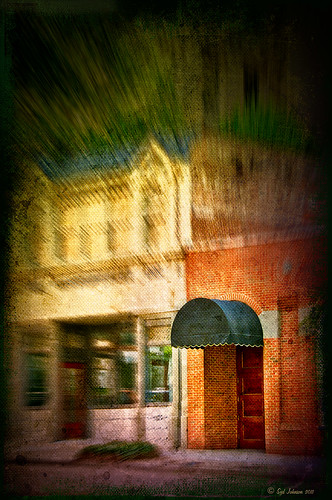
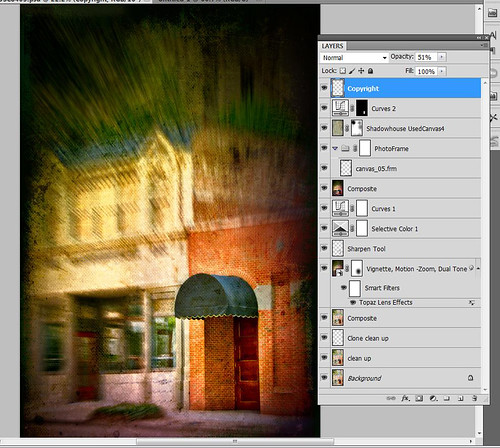
This is a real Tidbit – just playing around in Topaz Lens Effects. I have not used this plug-in as much as I thought I would so I decided to try some things on a so-so image. Overall I am really happy with the results from using this plug-in. Three Lens Effects were applied in this order: Vignette with a lighter dark edge centered on the blue cover over the door; Lens – Motion using Zoom in the Motion Blur section – centered again on the top of the door and the Motion Amount adjusted from there; and Filter – Dual Tone with the Region A having a fairly strong Yellow Cast and Region B using a small Magenta Cast (you can see this in the image), and adjusting the image Contrast and Saturation sliders. Back in Photoshop, a layer mask was added to the Lens Effects layer and black painted in to bring back the clean lines of of the door area – the Sharpen Tool was then applied. The orange brick and blue canvas awning were brought out using a Selective Color Adjustment Layer and a Curves Adjustment Layer. An OnOne PhotoFrame was added (see sidebar for website link). A Shadowhouse Creations Used Canvas 4 texture was added to give it the darker canvas feel (check out the textures at this site – they are all free and great!). A final Curves Adjustment Layer was added and the layer mask converted to black (highlight mask and press CTRL + I) and white painted to increase contrast on the door area.
Here are the layers I used to create this image to help you see how it all goes together.

I really loved the final result – but definitely it has more of an artistic feel than realistic. Try this plug-in and see if you can get some interesting results too……Digital Lady Syd
See related Digital Lady Syd’s blogs on Topaz Lens Effects:
Little Nighttime Fun from Topaz!
Topaz Lens Effects Plug-in


