Heathcliff in Toon Lagoon
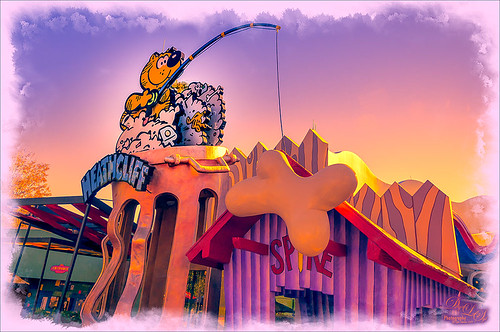
Just a funny picture comic character Heathcliff the Cat from Toon Lagoon at Universal Studios, Orlando, Florida. Just had fun doing this one. Actually used Topaz (see sidebar for website link) photoFXlab’s Instatone tool to get the really pretty sunset looking sky – it was really a bright blue sky and the middle of a sunny day. Created a watercolor border frame by painting around the edges of a New Layer on top and with a light purple color Solid Color Fill Adjustment Layer, the color was clipped to the frame (ALT+click between the two layers to clip). The Camera Raw Filter’s Radial filter was applied to try to draw the focus of the image to Heathcliff. Overall a pretty striking image that I would never have gotten without Instatone. Lots of fun to do!…..Digital Lady Syd
Digital Lady Syd Related Blogs:
InstaTone in photoFXlabs – Great Fun and Great Results!
Digital Lady Syd’s Review of Topaz photoFXlab v1.1
InstaTone Sunset
InstaTone Sunset
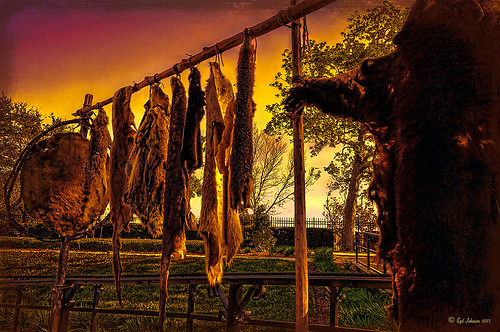
Wanted to change up the look of all the 24th Annual Native American Festival images I took so using Topaz (see sidebar for website link) photoFXlab’s InstaTone feature, I got this beautiful sunset look. Basically I went into the InstaTone tab’s 500 px website and applied a beautiful yellow and gold tone from Men on Fire image by Uwe Braun at 68% layer opacity. Then a preset I created using Topaz Adjust’s Spicify was applied that gives a slight illustrated look. (Here are the settings if you want them: Adapt exp +.30/25/-0.71/-0.76/0.02/0.04; Details +1.24/1.15/ 0.12/24.67/1.98; Color +0.33/10/0.89/1.92/0.00; and Noise +1.47/0.22.) Next I cleaned up signs and spots in the image (should have done this first but oh well!). 2 Lil’ Owls Enchanted texture 4 (see sidebar for website link) was added from their Texture Workshop E-Book bundle was applied as a PNG file frame next and a dark brown Color Adjustment Layer was clipped to the frame to apply it. I had to paint in a few areas around the trees that were too light on a separate layer using a low opacity brush and sampling from the near colors. Took awhile to complete but really like the changed look. I can imagine this image at an Indian campsite in the past…..Digital Lady Syd
Digital Lady Syd’s Related Blogs:
InstaTone in photoFXlabs – Great Fun and Great Results!
Topaz DeNoise 5 and InstaTone
Topaz DeNoise 5 and InstaTone
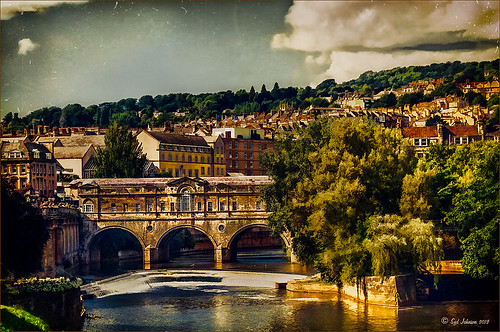
This image had an ISO of 2500 – that is really high for me but I actually took this shot from a moving tour bus – it is the Pulteney Bridge over the Avon River near Bath in England. The basic workflow involved running Topaz (see sidebar for website link) DeNoise first – must be sure that the Sharpening and Noise Reduction sliders are set to 0 in Lightroom or Adobe Camera Raw so you are not applying noise correction twice. I usually apply DeNoise on it’s own layer – that way it can be selectively removed if it is too soft in some places. The Overall Strength was set to 17. Topaz cautions about overdoing this or it will lose detail and edges will be soft. The Detail Recovery slider was set to 19. That was all that was needed. In Topaz photoFXlab, the new plug-in interface, the InstaTone tab was selected and the tones from a 500 px image called Nobody by shachar levcovich turned this image into an old English look. Topaz Simplify 4 was added and my BuzSim Modified preset was applied – this is one I had created in Simplify 3 but I still love it. (Selected BuzSim and changed: Simplify panel – Simplify Size to .15, and Edges panel: Edge Type Color Edge Fine and Edge Strength to 1.50.) Back in Photoshop a vignette was added to focus on the bridge and ShadowHouse Creations Scratch Overlay Texture set to Overlay with the center painted out in black in the layer mask so the texture basically frames the image. Now I have a beautiful vintage feel but not overly painterly. I can imagine the beautiful bridge looking like this a long time ago. Beautiful place!…..Digital Lady Syd
Digital Lady Syd Related Blogs:
Digital Lady Syd Reviews Topaz DeNoise 5
InstaTone in photoFXlabs – Great Fun and Great Results!
Digital Lady Syd’s Review of Topaz photoFXlab v1.1
Digital Lady Syd Reviews Topaz Simplify 4
Red Hibiscus + Textures = Beautiful Picture!
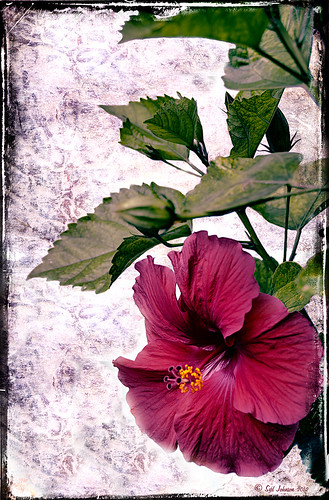
Since I did a recent Fun Photoshop Blog on Creating That Vintage Texture Feel, I thought I would display another one of my compositions using Sarah Gardner’s pointers from her new book Art Beyond the Lens: Working with Digital Textures. This red hibiscus from my front yard was first taken into Topaz photoFXlabs (see sidebar for website link) and on a duplicate layer inside the plug-in, the InstaTone tab using 500 px “Bright Spot” photo was used for the tonal effect. Adjustment tab settings of Exposure -.21, Contrast 4, and Dynamics 35 were applied to the layer. While in this interface, ShadowHouse Creations Entropy 2 texture was added as a new layer and set to Linear Light at 94% opacity, and these settings were applied from the Adjustment Tab to get the beautiful color in the texture: Temp 0, Tint 15, Sat 0, Dynamics 22, Sharpness -9, and Shadows 1. Back in Photoshop, ShadowHouse Creations Vintage Film 6 texture (gives the great framing edge) was applied using Hard Light blend mode at 100% opacity. The last step was to add a Curves Adjustment Layer to increase the contrast a little and that was it. Textures and flowers look so great together!…..Digital Lady Syd
Digital Lady Syd’s Related Blogs:
InstaTone in photoFXlabs – Great Fun and Great Results!
Using photoFXlab v1.1
Using Topaz photoFXlab to Replace Skies
Digital Lady Syd’s Review of Topaz photoFXlab v1.1

