Checking his World

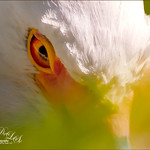
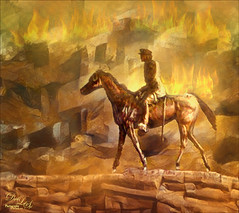
Had some fun doing creating this Rainbow Lorikeet parrot image. Once again, Matt Kloskowski has created a YouTube video called The Photoshop Technique You Didn’t Know Your Needed on blending textures with subjects. Love Matt’s tutorials as they are always very informative and not rushed at all. Already had a really nice bird image taken at the Jacksonville Zoo.
In Photoshop duplicated the background layer with the bird and then selected the bird. Added a layer mask – the bird appears in white in the mask. Replaced the bottom bird background layer with Jai Johnson Soulful Sea Breeze texture bought in 2015 (could not find it now) – her textures are great for wildlife photos. Then added on top her older freebie Wispy Clouds 2 set to Hard Light blend mode at 61% layer opacity – this brightened up the whole image. A layer mask was added and the corners were painted out slightly where it did not look right. On top of this texture another Soulful Sea Breeze texture was set to Soft Light to add strength to the colors – in a layer mask painted with black where it was too strong around the bird’s head. Selected the bird layer on top and blended the edges in using a very soft round brush set to a Flow of 10% very softly building up a nice effect. Last steps were: a stamped layer (CTRL+ALT+SHIFT+E) for use with the Camera Raw filter where Texture and a new Profile were added; back in PS an Exposure Adjustment Layer was used to sharpen the eye a little bit; and a Vignette was created using a Curves Adjustment Layer set to Multiply – dragged down the top right side to 50 to make a darker image – just paint a large black circle in the layer mask with a very big soft round brush and set the layer opacity to 30%. The blending takes a little time but overall it was a lot fun…..Digital Lady Syd
The Lioness

This drawing is one created by following the great Disney drawer Aaron Blaise’s tutorial on creating Lion Heads in his How to Draw Big Cats set. He provides a head skull drawing to use as a template to draw the actual structure of the head for eye, jaw, cheek, and ear placement. Fabulous technique! He also gives lots of tips about the actual animal and its traits. The background was created using three different textures: the bottom one was just a middle gray color; the one on top was one I had previously created in his Wildlife Painting Bundle – Lion Painting Tutorial (87% layer opacity); and the top used one of the free Japanese textures (to convert to pattern go to Edit -> Define a Pattern) from Resource Boy at DealJumbo (Pat 268 rev at 10.23 Angle and 297% Scale) – it was converted into a pattern. To get the pretty orange and turquoise colors in the background a Color Lookup Adjustment Layer using SparkleStock Clover 3DLUT file SS Sham Rocker 02.cube (link for the free ones but can’t fine direct line to the free Clover LUTs) with the Table Order set to RGB (was set to BGR), Lighter Color blend mode, and Layer Opacity of 88%. A couple other adjustment layers and a Camera Raw filter for a slight vignette were added to finish up. I totally love Aaron’s drawing tutorials and all the great tips he gives you!…..Digital Lady Syd
Spanish Cay Lonesome Beach

Spanish Cay is on the northern edge of the Bahamas – in this image you can see the blue water from the Atlantic Ocean outside the little cover areas shown. There are plenty of small beach areas that look wild and secluded just like this beach. This image was post-processed using Photoshop’s Sky Replacement panel as the sky in the original photo was totally flat (the sky is from a company that is out of business now); On1 Effects 2023 using the AI brush to select different parts of the image – used Dynamic Contrast on the dead branches, foreground water, and fence (see Getting Started with On1 Effects 2023 by On1 and How to Reveal Stunning Detail in Your Water Photos by Scott Davenport); and Camera Raw Filter (see The Photo Editing Trick Every Photographer Should Know! by Mark Denney). It was fun trying out all these techniques. …..Digital Lady Syd
Hiding in a Palm Tree

I think this is a little Eastern Bluebird female who was helping me while I cleaned up my flower beds in my front yard. Not much was done in Lightroom, and Photoshop added Viveza 2 filter to sharpen her up a bit. The light was really dark in the palm tree, but really bright behind her so it was hard to get that looking correct. A Curves Adjustment Layer was used for this. Just a slight painterly effect was added in Topaz (see sidebar for website link) Studio 2’s Impression filter. Then in PS on a few New Layers, mainly just painted in some lines in the foreground palm fronds as they were really blurred. The Camera Raw filter was used to further tweak the color in the HSL panel. Topaz Lens Effects’ Soft Olive Green Vignette preset was added. That was it!…..Digital Lady Syd
Entangled Noses
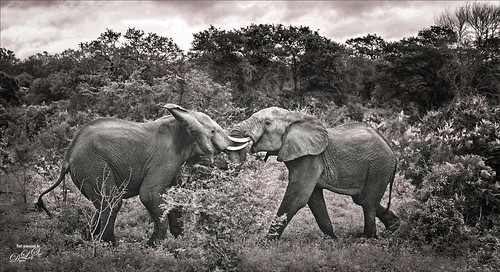
I usually take my own image but this interesting image of elephants in an encounter look good for trying the effect used in the video linked below. It was taken at the Kruger National Park in South Africa and provided in a set of animal wildlife images from Deal Jumbo. The video followed is called Create a Powerful Emotional Effect for Your Portraits in 9 Easy Steps by Adam Scheff. This image was converted to the resulting sepia tone using a split tone preset in the Camera Raw filter. Some dodging and burning and sharpening was also used on this image. A Levels Adjustment Layer was used to give a slight matte tone to the shadows. Just a lot of fun to try a different look……Digital Lady Syd
Turn Around
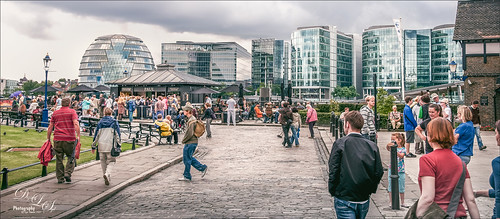
Good example of the image that is behind you – was actually going into the Tower of London tour and this was behind me. I love all the people doing all kinds of things and the buildings look so modern compared to where I was going! I am so glad I turned around – need to remember to do this more often. Not much was done with image – it is not an HDR – pretty much out of camera. A little was done in Camera Raw using a couple graduated filters and radial filters and the image was cropped more to a panorama size. That was about it……Digital Lady Syd
Beautiful Clouds at Stirling Castle
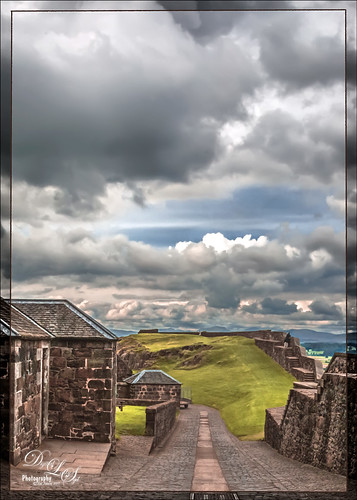
This image was taken at Stirling Castle in Scotland. The sky was so dramatic that there were many different ways to process the clouds, but I settled on a less dramatic and more sunny feel to the image. It was actually quite an overcast day when this image shot. There was not a lot done to this image. Biggest problem was some noise – both Luminance and Color so Adobe Camera Raw was used to clean it up. I can’t remember the last time I had color noise so this was unusual. On a stamped layer, Lucis Pro was applied and the clouds were painted out in a layer mask to keep them from being too crisp. Nik Viveza 2 and a Red Channel Luminance Adjustment Layer was added. Then I realized I had a slightly crooked image so PS Adaptive Wide Angle Filter was used to straighten it up just a little – worked perfectly! (See my How to Use the Adaptive Wide Angle Filter blog.) Then a border was created using single line rectangle, selecting the outside, adding a layer mask to a stamped layer, and clipping a Black & White Adjustment Layer on top. That was it. What a wonderful place to visit!…..Digital Lady Syd
I’m Just a Little Kitty Cat
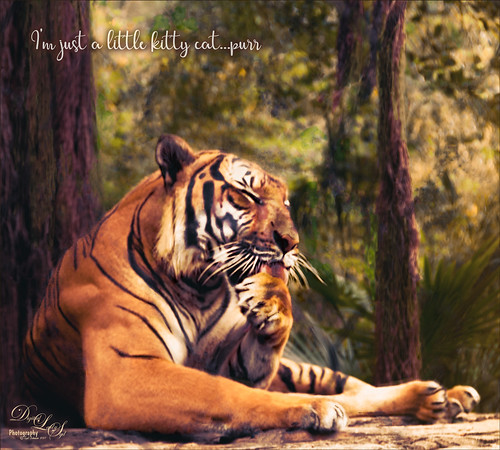
I just love to photograph the big cats – they are so interesting and beautiful! This tiger image had fencing all over it and the Healing Brush in Topaz Studio (see sidebar for website link) actually took almost all of it out of the image – I was totally surprised. They have just recently added it into the program. For me to get it to work well a very small size of 0.03 was used and by dragging the brush first over the color that you want added in, it tends to fill in with that color. Then just a Curves Adjustment Layer for color adjustment and then a Levels Adjustment Layer for contrast correction for a bit of a vintage matte feel. A Color Look Up Table set to the TealOrangePlusContrast preset and the opacity to 29%. Topaz Detail was used to sharpen the face. A Red Luminosity Curve was used to add a little more contrast. A left side yellow-orange light leak was added to the image to lighten it up a little. Created a composite layer on top (CTRL+ALT+SHIFT+E), made it a Smart Object (right click on menu and select), and opened the Camera Raw Filter. Went to the HSL sliders and adjusted mainly the orange and yellow colors in all the sections to get the tiger color and background just right. Last step was to add the text – used the Streetlight script font. What a cool tiger!…..Digital Lady Syd
Santa Believing!
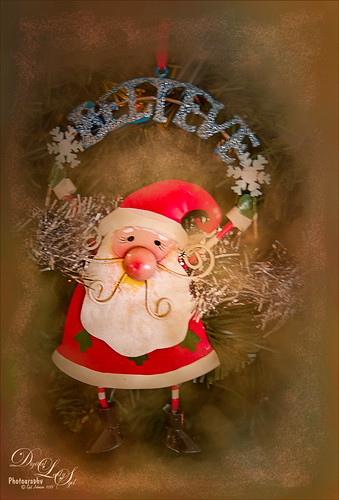
Had to post this little image of a Santa ornament that is very appropriate while I am struggling to get my new computer loaded up and ready to use. Windows 10 is really turning out to be a big learning experience for me after coming from Windows 7. Anyway, this guy is how I am feeling – I Believe I will get it up and running!!!
I actually did this as my first image on my new computer with practically nothing added to PS CC. All I did on this image was to use the ACR in the Bridge to do the initial image adjustments since I do not have Lightroom going yet. Next one of my Corel Painter textures was added in layer above and a layer mask applied. By using a watercolor brush set a soft edge and low opacity (20%), the Santa was softly painted back using a black foreground color in the mask. A Curves Adjustment Layer was used to adjust contrast, and on a New Layer a Glitter brush was used to add some structural interest into the background (see end of my Some Christmas Cheer and Resources blog for settings to make brush). The image was sharpened using a High Pass Filter set to 5.8 radius and then on a New Layer above, the Sharpen Tool was applied just to his face. Last step was to use two Radial Filters in the Camera Raw Filter to get soft vignette effect and direct focus to the Santa. Felt good to get back to working on images!…..Digital Lady Syd