
Darling Dahlia
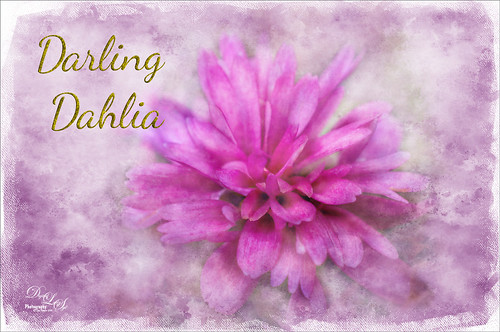
Image of a little dahlia that just poked up its head in my winter spring bed a month ago. It was only about 2 inches wide but just lovely! First sharpened the image using Photoshop’s Shake Reduction filter. Then sharpened again by duplicating the layer, setting it to Hard Mix blend mode, adding a Gaussian Blur set to Radius 3, and setting the Layer Fill slider to 5%. Next took Belle Fleur called Rose Garden texture into Alien Skin’s Snap Art 4 and set it to Watercolor Abstract preset (Brush Size 81, Photorealism 58, Coverage 57, Stroke Length 62, Color Variation 43, and Default Brush Style. It was set to Soft Light blend mode. Added another texture, one of mine named SJ The Phyllis Sky (created with Grut’s Charcoal Shin Ding Brush – painted a texture background in three colors – blue, turquoise and brown – gave a lovely texture and cloud feel that was saved to use again). A Hue/Saturation Adjustment layer was clipped to the texture so it became purplish in color (Hue 292, Saturation 19, and Lightness -8). A layer mask was added to paint out a lot of the flower to bring through the warm color of the flower from the texture underneath. On a layer above some painting clean up was done on some of the petals. Added a New Layer filled it with 50% gray using the Edit -> Fill. Set it to Soft Light blend mode and used a black and white brush to paint back areas for lightening or darkening the image. Added a Curves Adjustment Layer to add back some contrast – painted in the layer mask to lighten the effect in the center of the flower. Added a Text Layer using the Dancing Script OT font – in layer style turned on the Bevel & Emboss default settings and a Stroke effect using the Structure Size of 18, and Fill Type Pattern – Graphic 09 at 47% Scale. A Canvas Vignette was added on top to give a painterly look. This flower was so pretty…..Digital Lady Syd


Leave a Reply
You must be logged in to post a comment.