
New York! New York!
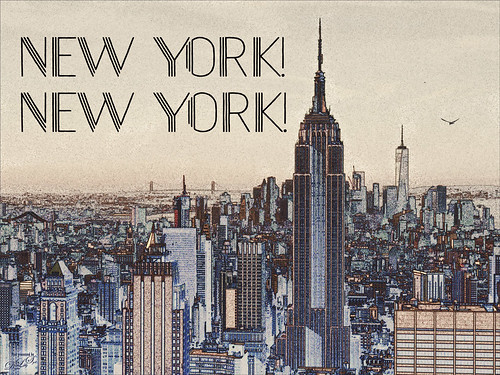
Just having some fun with this image using a little High Contrast Sketch tutorial from an older book called Photoshop Blending Modes Cookbook for Digital Photographers. This is good for low contrast images. This image was from a set of New York images from Deeezy to try this out on. Basically duplicate the background layer, turn it to Overlay blend mode, and set the layer to 60% opacity. Next go to Filter -> Stylize -> Find Edges. Do these steps two more times. If too much, try adding a Filter -> Blur -> Gaussian Blur Filter on the second Overlay layer using a Radius of 60 px. (This image did not need it.) A text layer using Naive Deco Sans font was applied. Obsidian Dawn’s single bird was added. Then a Curves Adjustment Layer was used so the grain would show up more in the sky and a Color Lookup Adjustment Layer using a new LUT called Dystopia…16 (they are in with the Lightroom presets) was added. This was a lot of fun to do and pretty simple…… Digital Lady Syd


Leave a Reply
You must be logged in to post a comment.