
Contemplating Life
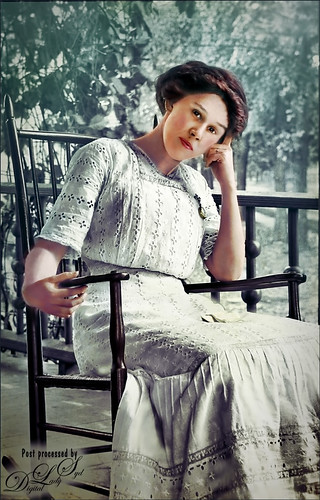
This was a black and white image from one of my favorite websites, Shorpy’s Historic Picture Archive (click on link to see original image). This image just sort of struck me as one I would really like to colorize. The first step was to sharpen up the image using the now free Nik Silver Efex Pro 2 to add some natural contrast to the overall image. Next I used two different methods in this image, although I probably should have stayed with just one, but here are links to my blogs on these techniques: How To Hand Tint a Vintage Image and Create a Brush To Do This blog and How To Colorize an Old Photo blog. A Red Channel Luminosity Curves Adjustment Layer was used to add in more contrast. (See my How To Use a Red Channel To Create a Nice Blended Image Effect blog.) On a stamped layer above (CTRL+ALT+SHIFT+E), opened Topaz (see sidebar for website link) Texture Effects 2. My Crisp Morning Run preset was run (this used the original Topaz Crisp Morning Run preset and switched out the Texture to a bright turquoise one half-way down the list and the Opacity was set to 0.29; also changed Vignette Strength set to 0.60 and Size 0.53.) Then in Light Leaks section, the Enable Masking was turned on. Brush tab was selected, and the woman was painted out with a brush around the head area (brush settings: Radius 0.50, Strength 0.59, and Hardness 0.30). In the Split Tone section, used the Enable Masking feature with the Spot tab to just hide the face area – set sliders to Transition 0.84 and Color Aware 0.86. Nik Viveza 2 (also free) was used to sharpen up the texture on her dress using a Control Point and the Structure slider. Added a Black and White Adjustment Layer set to Luminosity blend mode to balance the contrast. (See my How To Use a Black & White Adjustment Layer To See Contrast in an Image blog.) I just did not like the way her arm and hand on the chair looked too large so the Liquify Filter was used to adjust. Frooze the dress sleeve and chair behind and under the arm, then reduced the size and straightened the arm with Forward Warp Tool set to Size 300, Density 50, Pressure 100, and Rate 0 – just moved a little. Next PS’s Liquify Pucker Tool was set to Size 200, Density 50, Pressure 1 and Rate 80 – dabbed on hand a couple times. To enlarge the eyes just slightly, used the Bloat Tool set to Size 70, Density 50, Pressure 1, and lowered Rate to 32. Clicked once on each eye to just gently enlarge. Now all I could see was the red moire in the shadows of her arm skin and around eyes. Used Topaz DeNoise 6 set to overall Strength of 0.14, adjust Shadow 0.37, and adjust Color Red 0.69 to remove – set this layers opacity to 87%. I could paint these old vintage images all day long – really relaxing to do!…..Digital Lady Syd


Pingback: HOW TO COLORIZE USING IMAGE COLORIZER | Digital Lady Syd's Fun Photoshop Blog
Pingback: HOW TO CONVERT BLACK AND WHITE IMAGES TO COLORFUL PAINTINGS WITH TOPAZ STUDIO 2 | Digital Lady Syd's Fun Photoshop Blog