
The Worker Bee
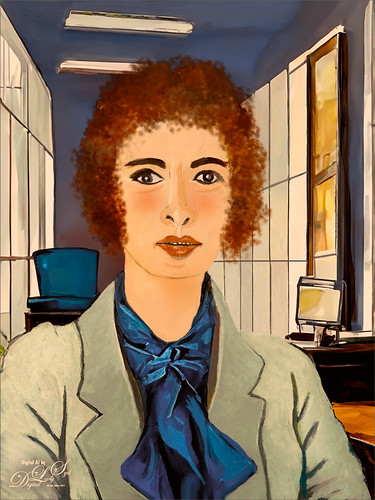
Here is another member of my Selfie Family – this time in a work environment. Tried out some new brushes and thought I would share what they are. To get the texture in her jacket, used Kyle’s Bruno Brush from his Spring 2022 set (go to Brush Settings pop-out at top right and select Get More Brushes and go to the set to download – double-click the file to load once downloaded). In the Brush Settings Panel, turned off the Scattering settings and set the Options Bar Opacity to 40% – but also liked it at 80%. The texture looks very painterly in this brush. For her face and cheek coloring, used an Airbrush (which means buildup is turned on either in the Brush Settings Panel or clicking on the Airbrush icon in the Options Bar). To make this brush, download Kyle’s Real Watercolor brushes from Photoshop (as discussed above – they are a separate group in this list). Choose Kyle’s Square Simple brush and in the Brush Settings Panel set Shape Dynamics to Size Jitter Control: Pen Pressure, Transfer to Opacity Jitter of 92% and Opacity Jitter Control to Pen Pressure, Buildup checked on, and Smoothing checked on. Put the Flow to 18% in the Options Bar. The hair was painted using Zummerfish Blending Brushes – Sampled Brush 43 2 for the curls. The last brush used was one I have mentioned before and really like – Kyle’s Fall 2023 (another set to download like above) Great Brush (changed Flow to 54% and Smoothing to 12% in the Options Bar) – used small size for detail brush and larger to paint in solid colors. Selected the background area and ran Generative Fill with prompt Acrylic office interior for this image – the Oil Painting Interior results did not look good. Also used my original selfie nose again, but this time ran another Generative Fill (Oil Painting Nose) to get a better result than from the total subject fill. That’s it – the new brushes actually worked out really well!…..Digital Lady Syd
Smiling Wolf
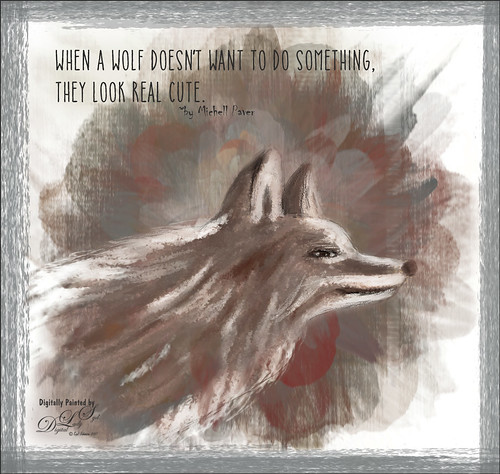
This is my attempt at drawing a wolf. It actually looks a lot like a dog so I am not sure what I was really drawing here. Used a tutorial in the Digital Painting Techniques book on Painting Fur by Richard Tilbury. First a thin black brush was used to the original sketch of the wolf on it own layer to begin the drawing. On layers underneath, the wolf was painted using the Pastel Scratchy Photoshop brush from Corel Painter Master Melissa Gallo’s Painting with Photoshop class to paint the hair. (Her class and PS brushes are terrific even though it is a few years old.) A couple of Fay Sirkis’s (another great painter and Corel Painter Master) Pet PS brushes were also used but they are hard to run down now – these are still some of the best around. (KelbyOne has her very good Four Seasons PS Painting tutorials with brushes to download if you are a member.) Topaz (see sidebar for website link) Impressions was opened and a preset created using the steps in a great video by Topaz Labs called RAW to Envisioned with Bobbie Goodrich (third example). The main text is Catalina Anacapa Sans from Creative Market and by Kimmy Design – a really nice clean font. The small text is in called Chiller. The last step was creating a border using a my Pencil Thin Vertical Lines brush (pencil lines were scanned and a brush was created – then in Brush Panel set the Angle to 90 degrees and Roundness to 12%) by changing the Angle and adding around the edges in a brown color. I will be practicing more animal drawings so look out!…..Digital Lady Syd


