
Never Thought I Would Use a Wax Crayon Effect!
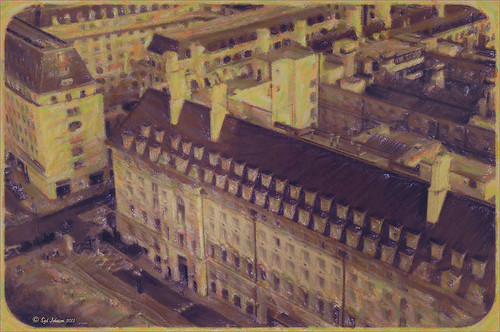 |
Yep, this image was processed using the wax crayon brush in Snap Art 3. I totally love the vintage feel to this image. I am adding the Lightroom image as brought into Photoshop so you can see the difference – just click on the image. I really liked the before image as it was processed using one of my favorite presets, GA B&W Infrared 01 preset which gave it a little bit of a blown out look. Jack Davis’s Bluish Split Toning preset was applied after this (the presets use different settings so both can be applied – Jack’s preset can be downloaded from his Facebook Freebies section and selecting his Lightroom Wow 4 Presets.) White rounded corners were created in the Post-Crop Vignetting section using Style: Highlight Priority, Amount +100, Midpoint 32, Roundness -93 and Feather 0. Once in Photoshop the background layer was duplicated and made into a Smart Object. Alien Skin’s Snap Art 3 was opened and the Pastel (sketch) preset was selected. Three layers were used to adjust the parameters for the Wax Crayon I was using on the image – just basically played around with the settings until I liked them. Since it is a Smart Object, I can always go back and change anything I don’t like. Next 2 Lil’ Owls Studio Color Bokeh Grunge (see sidebar for website link) Sweetness overlay was added using the Subtract blend mode at 58% layer opacity. Curves, Levels and Hue/Sat Adjustment Layers were added to add more contrast and color into the image. The last step used Nik Viveza 2 with a control point on the front of the building to draw attention to this area. That was it – I really like the final result! Not at all what I had in mind, but love it just the same!…..Digital Lady Syd
Digital Lady Syd Related Blogs:
Digital Lady Syd Reviews Alien Skin Snap Art 3
Get Great Results with Alien Skin Snap Art 3 and Topaz ReStyle Together!!
Snap Art and Simplify – Now That’s Painterly!


Leave a Reply
You must be logged in to post a comment.