Little Green Frog’s Makeover Using Nik’s Color Efex Pro 4!
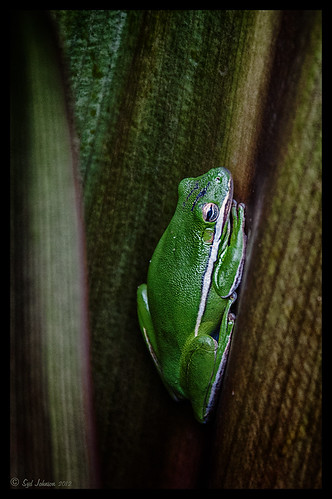
This little guy was hiding between a couple Queen Emma Lily leaves during a rather heavy rainstorm. Had to get his picture! He is a Green Treefrog and is one of the reasons I don’t get a good night’s sleep this time of year, but his coloring is beautiful!
I tried several different effects before settling on a recipe of Nik’s Color Efex Pro 4 filters. These filters were stacked as follows: Detail Extractor set to an Overall Opacity of 50%; Midnight using Neutral Color Set, the Blur slider reduced to 8%, and Overall Opacity of the filter set to 80%; Vignette Lens centered on frog and Overall Opacity set to 53%; and Image Borders – just a plain Type 13. This is a reminder that you don’t have to use the filter effect at 100% – just open up the Control Points panel at bottom of each filter panel and an Opacity slider appears that can be adjusted for the amount you want. Back in Photoshop, I used the LAB Sharpening technique to sharpen up just his body a little (see my blog Unsharp Mask Filter in LAB Mode). A Curves Adjustment Layer was added to increase contrast just a little and that was it. He has no idea how handsome he is!…..Digital Lady Syd
Digital Lady Syd Related Blogs:
NIK Color Efex Pro 4 – Digital Lady Syd’s Review!
Pseudo HDR Using NIK Color Efex Pro 4
White Daisies! Using Color Efex Pro Midnight Filter
Nik Color Efex Pro 4 Just Does It Right!
White Daisies! Using Color Efex Pro Midnight Filter
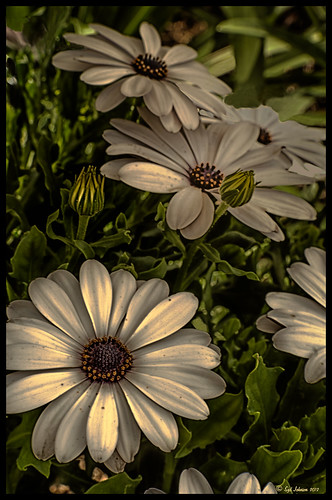
These beautiful daisies are growing in my front yard – first time I had seen this variety with the navy and orange centers. (Hover over image to see the image as it came from Lightroom.) Got a chance to try out the new Color Section in the Lens Correction Panel in Lightroom 4’s update (Adobe Camera Raw 7.1 for Photoshop) and it worked great! See New Color Fringe Correction Controls for information on this new tool. Next used Nik Color Efex Pro 4 with Detail Extractor, Midnight and Image Borders filters stacked. The Midnight Filter set to Sepia Color Set really gave this image the lovely soft feel. Added a few control points in Nik Viveza 2 to bring out the structure of the flower centers and buds. Added a Curves Adjustment Layer and painted out a few of the distracting light points. That was it……Digital Lady Syd
Digital Lady Syd Related Blogs:
NIK Color Efex Pro 4 – Digital Lady Syd’s Review!
Nik’s Viveza 2 Plug-In – A Hidden Gem!
Nik Color Efex Pro 4 Just Does It Right!
Whale Watching with Nik’s Color Efex Pro 4 & Viveza 2
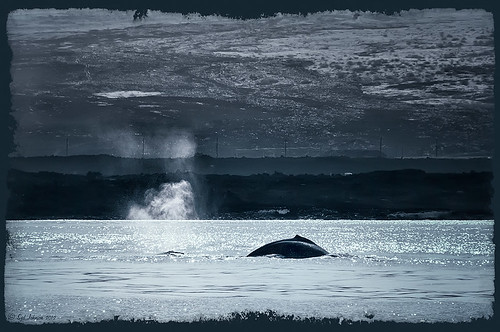
One of the many photos of a great whale watching trip on the Big Island in Hawaii. (See Hawaii Ocean Sports for information on whale watching boat trip.) This image used one of the workflows I like to use for quick processing of my images. The RAW file was adjusted in Lightroom where the Highlights, Shadows, Whites and Blacks sliders were moved. Next the Exposure and Contrast sliders were adjusted, and finally it was straightened and cropped. The image was brought into Photoshop and opened in Nik’s Color Efex Pro where five filters were added in this stack order: B&W Conversion (Dynamic Contrast), Photo Stylizer (Cool Silver – Style 1), Low Key, Darken/Lighten Center, and Detail Extractor applied just to background area with Control Points. Not sure how I came up with this combination, but I really liked the final result. Nik’s Viveza 2 was used to sharpen up the whale and water blowing up behind him. OnOne PhotoFrame acid controlled 12 (see sidebar for website link) was added using a matching color from image. That was it!
The combination of Color Efex Pro and Viveza is a pretty powerful combination. I do not process any image now without at least going into Viveza – it is a fabulous finishing plug-in…..Digital Lady Syd
Digital Lady Syd Related Blogs:
Nik’s Viveza 2 Plug-In – A Hidden Gem!
Detail Pop Using Nik Color Efex Pro and Viveza
Using NIK’s Color Efex Pro 4 and Viveza Together
Nik Color Efex Pro 4 Just Does It Right!

Loved the beautiful old puppets on display in one of the walkways at the Hilton Waikoloa Village on the Big Island in Hawaii. It seemed like a perfect time to once again add the Nik Color Efex Pro 4’s new Film Efex – Vintage filter. The Colorize Filter, Midnight Filter, and Image Border were then stacked on top. Finally a little Nik Viveza 2 to sharpen the elephant a bit and that was it! Love the results!…..Digital Lady Syd
Digital Lady Syd Related Blogs:
The New Film Efex-Vintage Filter From NIK CEP 4
Beautiful Daisies with Film Efex: Vintage in Nik Color Efex Pro 4
Unsharp Mask Filter In LAB Mode
(Here are my settings for the filters: Film Efex-Vintage – Saturation 10%, Warmth 79, Vignette 63, Brightness -2, Grains per pixel 500, Film Strength 80%, and Film Type 13; Colorize – Method 6, Color R143G209B219, Strength 5%; Midnight – Color Set Neutral, Blur 0, Contrast 30, Brightness 60, Color 57, Shadows 20, and Overall 78%; and Image Border – Type 3, Size 60%, and Spread 98%.)
Another Soft Hawaiian Landscape
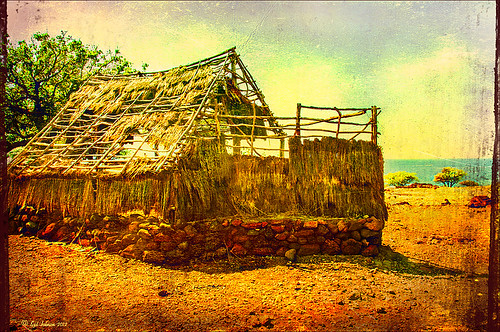
Image was taken at Lapakahi Historical State Park of one of the homes the early Hawaiians lived in roughly 600 years ago on the western side of the Big Island.
For this image, the steps used were from my my blog Using Color Efex Pro and Texture for a Warm Hawaiian Landscape Effect for the second image. Same Lightroom preset, same textures (using Russell Brown’s Texture Panel (see my blog Russell Brown’s Paper Texture Panel Updated!), and same adjustment layers. Image was sharpened and a New Layer was added on top where a paint brush set to yellow at 20% opacity was used to paint in the blown out highlights on the roof of the house. (See my blog Getting Rid of Those Blown Out Areas in Your Image on how to do this.) A different OnOne PhotoFrame was added – Taufer_Texture_12. (See sidebar for website link.)
Not very realistic but definitely has that Hawaiian feel and that is okay!…..Digital Lady Syd
Beautiful Soft Flowers
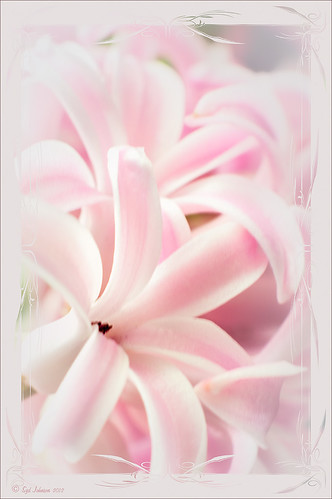
Just loved the pink hyacinths I bought – hope they will come back next year! This image was taken with my Micro Nikkor 60 mm f/2.8 lens at f/9.5. Used Mike Moats workflow (see info on this in related blogs below) with Color Efex Pro 4 (stacking Tonal Contrast, Darken/Lighten Center, and Vignette filters) added first and then Viveza 2 to make the details sharp. OnOne PhotoFrame napp_frame_12 (see website link in sidebar) was added. Final result – beautiful!…..Digital Lady Syd
Digital Lady Syd Related Blogs:
Using NIK’s Color Efex Pro 4 and Viveza Together
Nik’s Viveza 2 Plug-In – A Hidden Gem!
The Macro Shot
Detail Pop Using Nik Color Efex Pro and Viveza
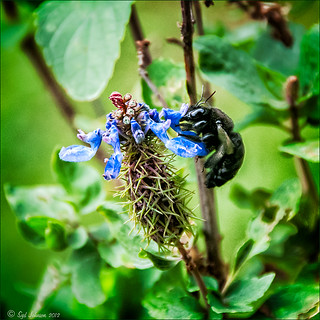
This little bee really wanted his picture taken so here it is. I am still not sure what flower this is – it was at the Hawaii Tropical Botanical Garden on the Big Island in Hawaii. To get the color so bright and the detail so sharp in this image, a Nik Color Efex Pro recipe was used following a link at the Nik website called My Go-To Recipe for Bringing Out Details with Ellen Anon. Next Nik Viveza 2 was added to soften the large leaves in the background (set Control Points in corners and move the Structure slider to -100 to get a soft smooth appearance). Very simple and easy to do. I still love using these two plug-ins together!…..Digital Lady Syd
Digital Lady Syd Related Blogs:
NIK Color Efex Pro 4 – Digital Lady Syd’s Review!
Using NIK’s Color Efex Pro 4 and Viveza Together
Combining Plug-ins for More Image Interest
The Macro Shot
Daisies are Everywhere!
Beautiful Daisies with Film Efex: Vintage in Nik Color Efex Pro 4
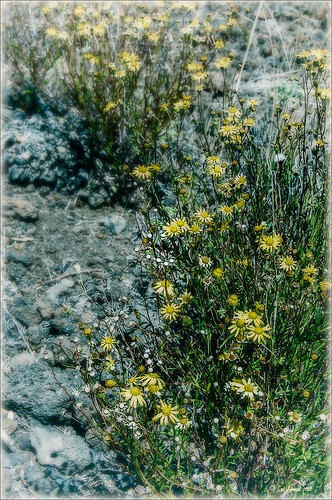 |
These beautiful sunshine daisies were growing wild at the 9000+ ft. on the Mauna Koa volcano on the Big Island in Hawaii. The ground was very arid and it was super-breezy at this spot. This is just another example of using Nik’s Silver Efex Pro 2 and Color Efex Pro 4 together to get a very nice look. The original had a very cluttered appearance (hover over image for original), but by using Film Efex: Vintage and Vignette: Blur filters stacked, this much more appealing image is created capturing what the flowers looked like to me. Totally loved the color combination that resulted.
If you do not own these two Nik plug-ins, I would encourage you to download a trial. Together they create a wonderful result. For more information on the steps required to get this look, see my Fun Photoshop Blog “Use NIK Color Efex Pro 4 and Silver Efex Pro 2 Together to Create Fabulous Landscapes!” Also see my Tidbits blog “The New Film Efex-Vintage Filter From NIK CEP4.” Have fun experimenting – I know I am!…..Digital Lady Syd
Magnificent Macros with Nik Plug-Ins
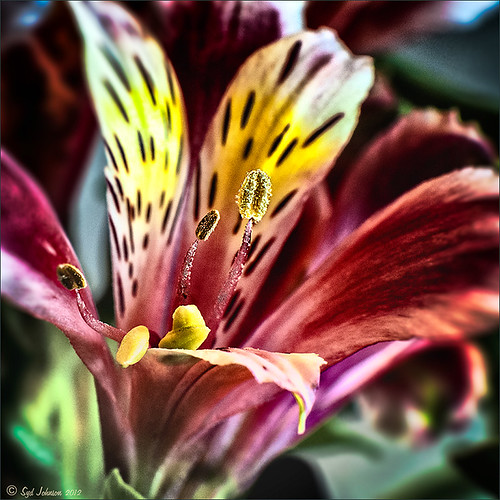
The Jazze Rose Frost Alstroemeria flower is one of the prettiest perennials that you will find. This one resides in my front yard now. The same workflow with Nik products that really make your landscapes pop was applied to this macro. Silver Efex Pro 2 (same High Structure-Harsh preset with Color Filter set to Green), Color Efex Pro 4 (Darken/Lighter Center and Graduated Neutral Density filters stacked), and Viveza 2 to bring out details in the stamen structure were applied. That was it! Check out my Fun Photoshop blog “Use NIK Color Efex Pro 4 and Silver Efex Pro 2 Together to Create Fabulous Landscapes!” for more information.
Give this a try next time you want a different look for your macros!…..Digital Lady Syd
Aerial Shot Using a Point-And-Shoot Camera! Not Bad!

Thought I would show you what results you can get even when shooting with an inexpensive point-and-shoot camera. I got several wonderful images from the air, but this one of the Rockies was my favorite. (For a nice read on aerial photography, see Julieanne Kost’s book “Window Seat – The Art of Digital Photography & Creative Thinking.”) My little Canon PowerShot A1000 died last month so I had to quickly purchase another small camera. I wanted one that runs on batteries so I do not have to charge it all the time (since I do not use it that much) and I wanted something fairly cheap. I got a Kodak EasyShare 14 mp camera with a 5X zoom for $49 and it gets better pictures than my Canon did! This an example of what it can do. There was more noise in the JPEG image, but that is to be expected with a cheaper lens, and it definitely needed processing in Lightroom and Photoshop. In Photoshop, Adobe Camera Raw sliders were applied including the Noise Reduction sliders; then Nik’s plug-ins Color Efex Pro 4 (stacked filters Vignette: Lens, Detail Extractor, and Skylight Filters) and Viveza 2 (to even out the saturation in the corners) were used. This has been a great surprise to me. Definitely not as good as my Nikon DSLR, but not bad for a inexpensive point-and-shoot camera.
I guess this goes to show that even if you do not have the best camera, it sure beats missing the shot altogether, and you can get a really nice image!…..Digital Lady Syd
Where Am I?

Believe it or not, this is an image of Haleakala volcano popping through the clouds, which is on the Hawaiian Island of Maui approximately 30 miles away, but I am standing at the summit of Mauna Kea volcano on the Big Island. Two dozen telescopes including the large Keck Telescope are located to the right of this shot. The height is at 13,796 feet and the air is a little thin – had to take a 4-wheel drive jeep on a very bumpy and steep gravel road to get to the top. There is also snow on the banks behind me. I loved the way the clouds look so fluffy and light.
Very little processing was done with this image other than a Curves Adjustment Layer and the Nik Color Efex Pro 4 Diamond Head recipe downloaded from Nik Presets and Recipes page.
Definitely try to get to this site if you are on the Big Island – the views are breathtaking and sometimes you do not have the cloud cover as shown above…..Digital Lady Syd
The Macro Shot
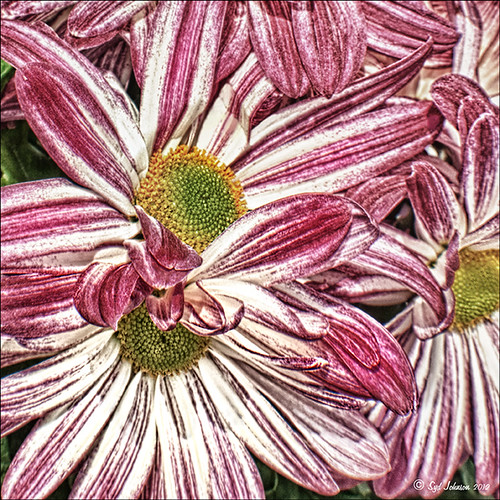
Recently I have been working on my Macro photography, especially since I have had some beautiful flowers on my porch due to the warm winter we are having in Florida this year. One of my favorite blogs is by Mike Moats called Tiny Landscapes where he gives some great advice on taking and processing macro images. A few things I am starting to try and the above chrysanthemums are the result of one of my efforts. A 60 mm Nikkor macro lens was used at F/19 at 1/20 to 1/350 sec. A Bower 0.5 x High Resolution Digital Lens with Macro was added to the lens. I created an HDR image from five shots which is how I got the large dynamic range in the photo. After that the processing was in Nik Color Efex Pro 4 using Tonal Contrast, Detail Extractor and High Key filter effects and Viveza 2. This is the basic workflow Mike Moats uses and it works very well on macro photos. My original shot was taken with a white background but I just did not like the way it looked. Mike says if you do not like the background feel, crop tight, which is what I did. I hope to try out some of his other tips in the near future – it is a lot of fun to take those close up shots…..Digital Lady Syd
Another Pseudo HDR from Me!
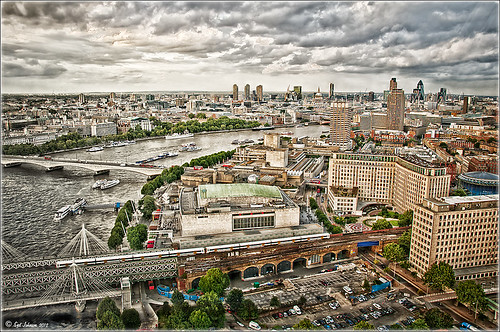 |
I love these photos I got from the London Eye a few years ago – they really look good with the pseudo-HDR look. Here I have applied my SJ-Vivid Drawing Look preset in Lightroom (for here for Adobe Camera Raw preset – note: change file extension to .xmp in zip folder to get file to work). I had to adjust the Exposure a bit after applying the preset. Then it was processed in Nik Color Efex Pro 4 using my SJ-Pseudo HDR1 recipe. NOTE: This download link is broken if you click the Download button, but by right clicking on the button and choosing “Save Link As,” the file will download correctly.” Usually the Detail Extractor slider needs to be adjusted so the image is not overdone. Next it was taken into Viveza 2 to get rid of the muddy color water that is so common in the Thames River pictures. By setting control points in the water areas and adjusting the Hue and Brightness sliders, the color could be changed to more of a blue tone. There was distortion from the movement and the glass of The Eye so I added a layer set to Overlay blend mode and painted with a black brush at 10% opacity over these areas to get it evened out. (Click on the image to see the original – most of the distortion was in the lower front and on the train bridge in the middle.) Finally the Sharpen tool was used on a separate layer along with Curves Adjustment for contrast and Hue/Saturation Adjustment Layers to desaturate a little. Loved the final result. This is very similar to what you would get with the Lucis Arts filter. Overall, loved the results! …..Digital Lady Syd
Digital Lady Syd Related Blogs:
Pseudo HDR Using NIK Color Efex Pro 4
Another Pseudo HDR Image with NIK CEP4 – Got to Love the Effect!
Settings for Vivid Drawing Look ACR/Lightroom Preset and NIK Color Efex Pro 4 Pseudo HDR Recipe
Where Am I?
Combining Plug-ins for More Image Interest
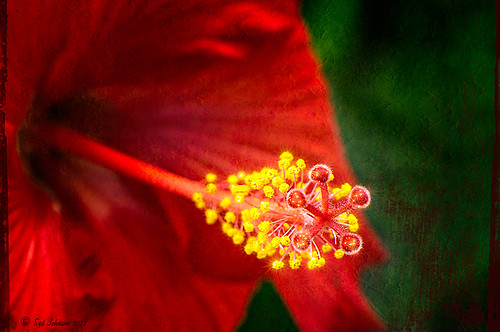
Took this image of a red bloom from the hibiscus tree in my front yard – I love hibiscus flowers! A 60 mm Nikkor macro lens was used at F/6.7 for 1/60 sec. A Bower 0.5 x High Resolution Digital Lens with Macro was added to the lens. The camera raw shot was adjusted in Lightroom and brought into Photoshop. Some of the distracting background was cloned out, the image sharpened a bit, then Nik’s Color Efex Pro 4’s Darken/Lighten Center filter effect was applied. The image was taken into Nik’s Viveza 2 where the structure on the pistil and stamen was increased, and the background softened a little by setting the structure to -100. ShadowHouse Creations texture 5AT-2 was added and set to Soft Light at 62%. Next the new Topaz Star Effects plug-in was applied to the tips of the stigma to make it sparkle and a bit to the yellow anthers (see sidebar for Topaz’s website link). Finally OnOne PhotoFrame’s Taufer Texture 12 was applied to finish off the image (see sidebar for OnOne’s website link).
This is a good example of how several different effects can create more interest – it also helps to have a great color combination to work with too!…..Digital Lady Syd
Digital Lady Syd Related Blogs:
Trying Out Topaz Star Effects
Using NIK’s Color Efex 4 and Viveza Together
Daisies are Everywhere!

I wrote a Fun Photoshop Blog called “Using NIK’s Color Efex Pro 4 and Viveza Together” showing a great workflow using these plug-ins on the same Smart Object layer. Here are my daisies again shot at a different angle. (They were shot using my 18-200 mm zoom lens at 75 mm, F5.0, 1/60 sec, and ISO 400.) Different CEP4 filters were stacked to give a totally different result. (See settings below.) I really liked the way the color of the flower was altered to give this softer feel. Lightroom and ACR will give a fairly close look as to what Viveza achieves, but not exactly the same as discussed in the other blog. Give this workflow a try – download the trials and see what you get if you do not already own the plug-ins. This can be very addictive! Have fun…..Digital Lady Syd
Plug-in Settings for this image: CEP4 filters: Cross Processing (Method T04, Strength 86%, three controls in the background to remove the effect), Tonal Contrast (Highlights -80%, Midtones -80%, Shadows -80%, Saturation 20%, Contrast Type Fine, one control point on pink background flower, and Opacity Slider set to 62%), Darken/Lighten Center (#1, Center Luminosity -36%, Border Luminosity -2%, and Center Size 57%), and Vignette (Vignette Color set to light yellow, Shape 2, Adapt Edges 0%, Transition 84%, Size 46%, Opacity 38%, and one control point set on pink background flower to remove effect). Viveza used seven control points to adjust background and bring out the center of the flower.
Digital Lady Syd’s Rule No. 5: Just Step Outside and Look Around!
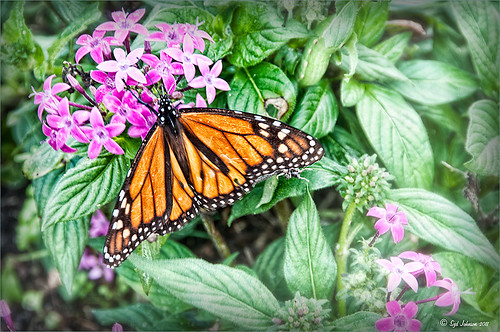
If you find yourself bored because you have not taken any interesting images recently, just step outside and take a look around. I was feeling just this way this past week – with the holidays there just was not much time to go out and take some interesting pictures. So on Christmas Day, I decided to walk around outside just on the off chance there was something interesting. It was warmer than usual outside and there was this beautiful unexpected Monarch butterfly in my Purple Queen flowers. He seemed a little aggravated that I was taking his picture, but hey, I wasn’t really bothering him. (You can tell the butterfly is a male because of the black spot on his mid-hind wings in the vein.)
The image was shot with a Nikon D300 using my 18-200mm zoom lens at 200 mm, f/9.5, 1/90 sec, ISO 400 – did not have time to change to a macro lens or I would have missed the shot. I shot in burst mode and several of the shots were blurry as he was moving his wings so fast! Not used to taking pictures of butterflies! This image was processed using NIK Color Efex Pro 4 with the Detail Extractor Filter, Vignette Blur to get ride of distracting leaves and ground in the image, and a regular Vignette. Used the Sharpen Tool on another layer and a Curves Adjustment Layer to finish off.
It was fun to take more of a macro shot for a change I always love taking pictures of flowers. Great change of pace and it got me interested in working on my flower photos for a few days while the weather is pretty bad. In the meantime, take a look around outside your house and maybe you will find something interesting, like I did, that you had not noticed before!….Digital Lady Syd
A Little After-Holiday Cheer!
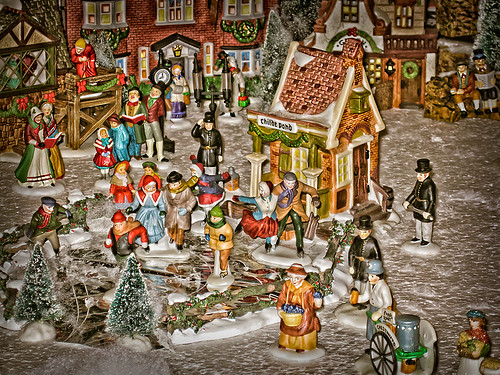
With the holidays winding down, I thought I would post one of the shots I took with my little point and shoot Canon 1000 camera of a friend’s Dickens Village set up in her living room. I can’t say enough about how beautiful it looked, especially in the evening when the houses were all lit up. Absolutely Amazing!
The image was processed in Lightroom just a bit – the colors were so strong it did not need much adjustment. Next NIK’s Color Efex Pro 4 was applied using the Detail Extractor filter and setting points so the snow was not affected as much, and a slight darkening Vignette filter. Back in Photoshop the Sharpen Tool was used on some of the figure’s faces and back edges to make them stand out a little more and that was it.
Hope you had a great holiday – I know I did……Digital Lady Syd
Digital Lady Syd Related Blogs:
NIK Color Efex Pro 4 – Digital Lady Syd’s Review!
Pseudo HDR Using NIK Color Efex Pro 4
NIK Color Efex Pro 4 – First Try!
Black and White Photo or Not? Give It a Try on That Difficult Image
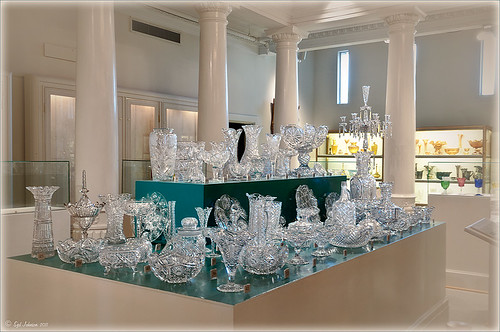 |
This image is of the beautiful cut glass display at the Lightner Museum located in the old Alcazar Hotel in St. Augustine. As you can see it is a very nice collection and I wanted to find out if the color in the image was distracting from actually seeing the ornate cut glass. See the black and white conversion by hovering over the color image. As I discovered, this image turned out to be a difficult choice to process no matter which effect you want.
Color Version
The top image was processed using the NIK Color Efex Pro 4 (CEP4) plug-in on a Smart Object layer (right click image and select “Convert to a Smart Object” since CEP4 will keep your settings and control points in case you want to adjust the results later) and stacking several filters including from top to bottom: Tonal Contrast, Darker/Lighten Center, Vignette, Glamour Glow, and Pro Contrast. Various control points were added to selectively choose areas for some of these effects. In Photoshop the cut glass edges were selectively sharpened using the Sharpen Tool on it own layer, and a final Curves Adjustment layer was added to get the correct contrast. Overall, this image is attractive since the blue-green sets off the glassware nicely.
Since there are some bright colors in the background that might be distracting from the main focus point, and the museum walls and columns have what I consider to be a rather bland creamy color to it, a black and white conversion might be appropriate to tone down some of the distraction and get rid of the creamy tones.
Black and White Version
I duplicated the cleaned up image layer and turned it into a Smart Object as above. Once in the NIK silver Efex Pro 2 (SEP2} plug-in, from the side preset panel the o14 Grad ND (EV -2) preset was selected and it really made the glass pop out clearly. In Photoshop the Sharpen Tool was used to bring out some of the glass edges (again, do this on a New Layer above the image) and the opacity of this layer is reduced so artifacts are not viewed. A final Adjustment Curve is added to give just the right amount of contrast. The items on the back wall initially appear to be more distracting than in the color image but the creamy tones did convert to the white tones nicely.
Conclusion
The image may not work as a black and white and the only way to figure this out is to try it. In this case SEP2 was used to convert the image to black and white, but the conversion can be done in lots of ways – in Adobe Camera Raw or Lightroom using a preset, or in Photoshop using a Black and White Adjustment Layer or Channels, as just a couple examples. NIK’s SEP2 is an excellent way to find out quickly since the presets allow you to glance over many black and white variations – if the image is really not going to look good as a black and white, you will know it.!
I am on the fence about which version I like best. The image was not the best choice to process to begin with and the glass creates a huge challenge just to get enough contrast to make the it stand out. Still it was good practice and I like the picture because I liked the cut glass collection. Just remember sometimes the image you want to process is not that great and does not work – but at least try a couple different effects including black and white and maybe there is a good shot hidden in there!…..Digital Lady Syd
Related Digital Lady Syd Blogs:
NIK’s Champion Plug-in – Silver Efex Pro 2
Topaz B&W Effects vs. Nik’s Silver Efex Pro
Topaz B&W Effects Plug-In – A Real Winner!
NIK Color Efex Pro 4 – First Try!
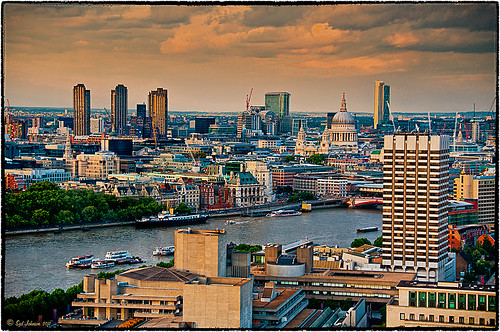 |
Well, here is my old standby image from the London Eye used as an example of what the long-awaited NIK Color Efex Pro 4 upgrade will do. Hover over image to see original. I am still sorting through all the new features they have added to this wonderful plug-in. Check out my Fun Photoshop Blog “Nik Color Efex Pro 4 – Digital Lady Syd’s Review” for a more in depth discussion.
One of the major new features allows you to stack any number of filters and save the whole group as a preset to use again. I really stacked up this image just to see what results I could get. The filters in the order they are stacked are: Tonal Contrast, Brilliance/Warmth, Vignette: Lens (a new filter), Contrast Color Range, Remove Color Cast (Plus Control Point set on faded green trees on left – click to see original problem area), Graduated Filter, and Image Borders.
I believe the final result is quite striking. In the meantime I will still be playing with the filters and trying different stacks to see what really looks good. If you get a chance, go download the trial version and see what you think…..Digital Lady Syd
Topaz B&W Effects vs. Nik’s Silver Efex Pro
I did a blog on my Fun Photoshop Blog called “Topaz B&W Effect Plug-in – A Real Winner!” that touched on some of the differences of Topaz’s new plug-in and the great black and white standard plug-in by Nik called Silver Efex Pro 2.0. I thought I would just mention a few other things I noticed that are definitely different about the two programs.
Below is one of my favorite images for trying out new effects (the original has some basic flaws so I can see if the product will correct it) and was taken from the London Eye. Topaz B&W Effects was applied (hover over or click on image to see the Nik version).
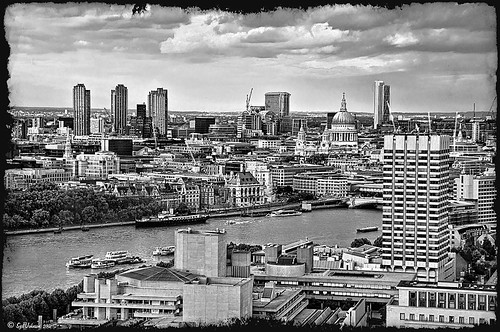 |
This is as close as I could get to making the two plug-ins look alike. The sky and some of the buildings’ contrast and detail are slightly different, but overall the results are pretty much the same. I am not sure which version I like best.
The image below I also used Topaz B&W Effects.
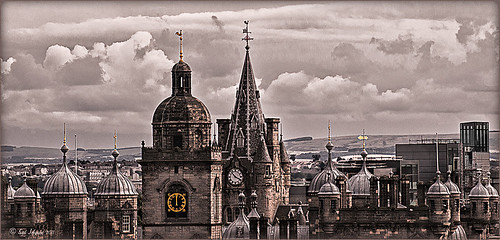
In this case, I could not duplicate the results in either NIK Silver Efex Pro 2.0 or Color Efex Pro 3.0. I liked the results and was surprised how nice the image turned out. By the way, I created for the Topaz plug-in a SJ-Cityscape preset for use in the Traditional Collection for both of the Topaz images – it can be downloaded here.
My final thought is to say that I think there is a place for both black and white plug-ins. Nik’s black and white plug-in is considered the best and I am not sure Topaz has created a better one, but it is very close. Topaz B&W Effects is definitely a great product since it does several things the other plug-in cannot do – and I really like that.
Well I hope you have fun (I sure am) trying out both of these excellent products. I plan on experimenting more with Topaz’s B&W Effects and will post more on it later……Digital Lady Syd
PS. Be sure to download the 30 day trial for Topaz B&W Effects – it is a fully functional trial to try out!

