Edinburgh Lunch

This image (a favorite of mine taken of a little street in Edinburgh, Scotland) was used to try out a new Photoshop Action downloaded from Adobe Create Magazine. It is called Painterly and is very flexible as to how it can be used to make a very nice artistic effect of an image. The action was created by BlackNull (or Nuwan Panditha) and also included brushes and patterns needed to run the action. There is a very informative 6-page PDF file that explains everything you need to know on how to get good results. It was a lot of fun to do and only took an hour or so to get this final image. A couple of my regular tweaks in Photoshop were done after applying the action, but overall the effect was from the action. One disadvantage is that the image, which was set to 8-bit, became over 1 Gig in size. Since I had turned off many of the layers while adjusting the action, I just right clicked on the Layers Panel upper right pop-out and selected Delete Hidden Layers. Then it became much more manageable. Anyway, thought I would present the action as it was really nice to try out. Enjoy!…..Digital Lady Syd
Young Warrior

I loved how this image turned out. The original was taken at the Native American Festival in Ormond Beach, Florida. Not going to go into all the details as it was a huge process – 27 layers and lots of hours but I will say it was all done in Photoshop, mainly with a Flat Fan Oil Brush I created. Must give a shout out to Melissa Gallo, a Corel Master, for her wonderful textures and her techniques in teaching how to do this type of image, including creating your own brushes! Check out her website and get the Painting in Photoshop Workshop if you want to learn some fabulous techniques and tips. (She also has a new one being released shortly called Painter for Photographers that I am so looking forward to taking!) This texture is her April Pastel texture. Also used Topaz (see sidebar for website link) ReStyle to get the color in the image exactly right. This plug-in is in my top three! Totally fabulous what it can do to an image!…..Digital Lady Syd
Digital Lady Syd Related Blogs:
Digital Lady Syd Reviews Topaz ReStyle
A Little Painting Action

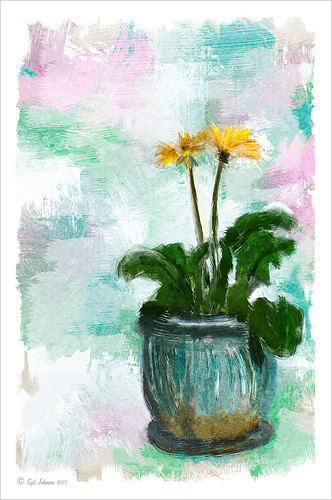
Here is another example of Jack Davis’s Mixer Painting SetUp-BETA action. Just a lot of fun to do. It is not as clear a result as with Alien Skin’s Snap Art 3, but there is more individual interpretation when creating the painterly look. Check out my Can You Get a Painting Look With a Photoshop Action? Jack Davis Can! blog to learn how to do each of the steps and for info on how to download the action. What made this image look nice was adding Painted Textures Parisian Pool to the image just above Pattern Fill 1. In the Layer Style dialog, the This Layer black tab was split and set to 108/155 (ALT+click on tab and drag to split) and the white tab set to 139/209. I would encourage to download this action and give it a go!…..Digital Lady Syd
Painting a Dragon

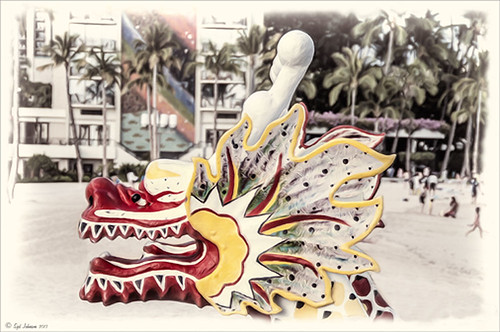
This was the head on a wood boat pulled up on the sand in front of the Rainbow Tower at the Hilton Waikoloa Village on Waikiki Beach in Oahu, Hawaii. Recently I did a blog called Can You Get a Painting Look With a Photoshop Action? Jack Davis Can! where his Wow Smart Object Painting1 Action was applied to several images. This image uses the same action to create a nice basic painting. A darken layer was added above to show emphasize the edges for the dragon from the background image (see my The Best Dodging and Burning Technique blog). At this point I thought it looked pretty good, but the background was competing with the dragon in color, so I decided it needed to be pulled back some. Topaz (see sidebar for website link) Black and White Effects was used to soften the background. Several of the presets created really interesting looks due to the canvas effect being applied in the action first. I settled on an old wedding preset I had created back in version 1. (If you are interested, here they are: Conversion – Basic Exposure: Contrast 0.04, Brightness 0.10, Boost Blacks 0.35, and Boost Whites 0.01; and Finishing Touches – Silver and Paper Tones: Tonal Strength 0.44, Balance 0.96, Silver Hue 5.81, Silver Tone Strength 0.85, Paper Hue 77.42, and Paper Tone Strength 0.38; Transparency – Overall Transparency 0.80. A white border was then created around edge using Right Edge Size 0.11/Edge Exposure -1.00/Edge Transition 0.09; Left Edge Size 0.14/-1.00/0.08; Top 0.20/-1.00/0.09; and Bottom 0.09/-1.00/0.16.) Back in Photoshop a New Layer was created and the Clone Stamp was used to even out the border just a little around the image. A Curves Adjustment Layer was added to add contrast to the dragon and further separate it from the background – then the layer mask was filled with black (CTRL+I in mask) and just the dragon was painted back in white to reveal it (see my Using Curves Adjustment Layers to Get Rid of Shadows and Highlights blog). The last step was to add a Hue/Saturation Adjustment Layer to further adjust the background saturation (Saturation was set to -41 in Master) – but this time the dragon was painted in black to hide adjustment on it. This really turned out how I remember this image……Digital Lady Syd
Digital Lady Syd Related Blogs:
Digital Lady Syd Reviews Topaz Black & White Effects 2.1
Which Tool to Use – Smudge or Mixer Brush?

I ran across an old tutorial that was in the very first Photoshop Creative magazine back in 2006. It was on how to create a digital painting by using the Smudge Tool. Well that was something I had to try out – couldn’t believe I had not tried this before! I really like the Mixer Brushes, which is what I usually use (see my blog Adobe Photoshop CS5’s Mixer Brushes). Once I started playing around with the Smudge Tool using different brushes and sizes and opacities, it was actually fun. My curiosity got the best of me and now I needed to know what IS the difference between the two tools – they create very similar results? I was able to find a reasonable answer on the Internet at Model Mayhem.com. Here is what they said:
“The Smudge Tool simulates the effect you see when you drag a finger through wet paint. The tool picks up color where the stroke begins and pushes it in the direction you drag……The Mixer Brush simulates realistic painting techniques such as mixing colors on the canvas, combining colors on a brush, and varying paint wetness across a stroke.”
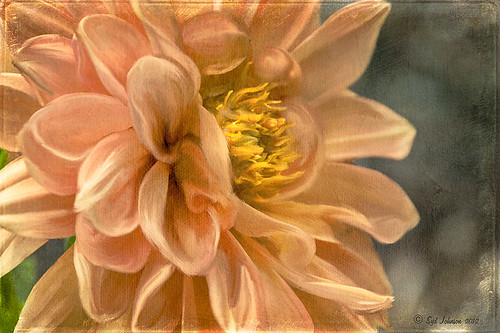
I think this is a nice short explanation of what is happening. For my Peach Dahlia I found it was nice to use both tools. It seemed it was easier to blend colors with the Mixer Brush and then smooth edges and shape color using the Smudge Tool. The Photoshop Wow Book for CS3 and CS4 (still my favorite Photoshop book) had a nice section on painting with the Smudge Tool. They recommended using the Natural Brushes that come with Photoshop and start by using short strokes, which samples the color underneath more frequently. Then use a small brush size for detail.
To create this image, first a blank layer was placed on top. Then these two brushes were used to paint: Mixer Brush – created tool preset brush with these settings: Stipple Dense 26 pixels from Natural Brushes set (Options Bar: No Current Brush Load, Load the Brush After Each Stroke, Wet 100%, Load 1%, Mix 91%, Flow 100%, Check Sample All Layers). Smudge Brush Tool Preset created using Stipple 54 pixels from Natural Brushes preset with Options Bar set to Mode Normal, Strength 78%, and Checked Sample All Layers. Be sure to save these brushes as Tool Presets so the Options Bar settings are retained – if just saved as brushes, the settings might not be correct. Also, note that if the Finger Painting box is checked in the Smudge Tool options bar, the smear stroke will start with the Foreground color. If turned off, the color under the cursor is sampled first. At 100% Strength, only the first color sampled is applied – at lower settings it fades out the first color and picks up the new one. Then I just alternated mixing and smudging until I liked what I saw. The last step involved adding three textures to the image to give a real painting look: the first one is a light gray canvas texture (I created it by taking a picture of a portion of the canvas on a large oil painting in my dining room – try this – you might really like the results) set to Soft Light at 53% opacity; next ShadowHouse Creations Old Photo 2 set to Overlay at 100% opacity – it provides the interesting edging on the image; and Flypaper Textures Aquaflora taster set to Overlay at 80% opacity. I painted out a little bit of the texture on the top two textures just to direct the eye to the center of the flower. A Curves Adjustment layer was added on top to give just a small contrast boost. Overall it was really fun to try out a new tool and learn something about it!…..Digital Lady Syd


