
The Ant and the Plant
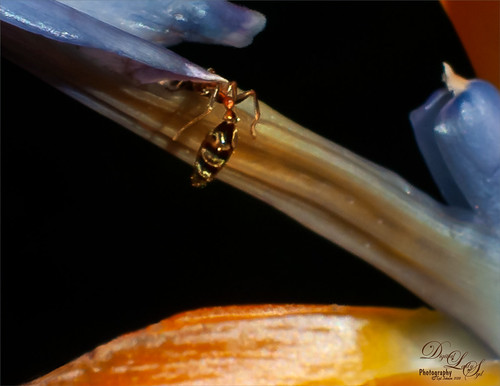
This image was taken of my Bird of Paradise bloom in my yard and it had this busy, busy ant clamoring all over it. Not sure what an ant like from the plant, but he definitely was not too concerned about me taking him image. My 60 mm Nikkor macro lens was used at F/11 and 1/350 sec. A Bower 0.5 x High Resolution Digital Lens with Macro was added to the lens. Very little was actually done to this image. Just used a close crop, a little clean up on the plant, and a spotlight effect placed on the ant. It was a lot of fun to watch this little guy…..Digital Lady Syd
Beautiful Soft Flowers

Just loved the pink hyacinths I bought – hope they will come back next year! This image was taken with my Micro Nikkor 60 mm f/2.8 lens at f/9.5. Used Mike Moats workflow (see info on this in related blogs below) with Color Efex Pro 4 (stacking Tonal Contrast, Darken/Lighten Center, and Vignette filters) added first and then Viveza 2 to make the details sharp. OnOne PhotoFrame napp_frame_12 (see website link in sidebar) was added. Final result – beautiful!…..Digital Lady Syd
Digital Lady Syd Related Blogs:
Using NIK’s Color Efex Pro 4 and Viveza Together
Nik’s Viveza 2 Plug-In – A Hidden Gem!
The Macro Shot
Soft-Look Flowers Using Textures

These beautiful dahlia flowers are now planted in a flower bed in my front yard. To get this effect, it was a pretty simple process. I sharpened the center and darkened the green stems first. Next ShadowHouse Creations Subtle Tones ST-8 texture was set to Color Blend Mode. With a layer mask I painted out the texture over the flowers very lightly using a soft 13% opacity brush and building up the effect until it looked the way I liked it. Next ShadowHouse Creations 3 Assorted Texture Set T 2 texture was set to Hard Light Blend Mode to add a very feminine look – also a layer mask was used to clear the lacy texture from on top of the flowers. A Hue/Saturation Adjustment Layer was added on top to select the correct texture color by adjusting the Hue slider. The last step added OnOnePhotoFrames toner scratch 21 (see sidebar for website) with a very light purple-pink color. That was it. I loved the final result. I hope you will try using some of the beautiful textures from ShadowHouse Creations website where there is a huge selection of textures that can be downloaded for free. Major thanks for what he does to help us budget-minded Photoshoppers!…..Digital Lady Syd
The flowers were photographed on a table with a science fair 3-sided white board behind them and natural light from a window – shot with a Nikkor 60 mm Macro Lens set to F/3.2, 1/15 sec at ISO 400 with an attached Bower 0.5 x High Resolution Digital Lens with Macro lens, which gives the large depth-of-field effect.
The Macro Shot

Recently I have been working on my Macro photography, especially since I have had some beautiful flowers on my porch due to the warm winter we are having in Florida this year. One of my favorite blogs is by Mike Moats called Tiny Landscapes where he gives some great advice on taking and processing macro images. A few things I am starting to try and the above chrysanthemums are the result of one of my efforts. A 60 mm Nikkor macro lens was used at F/19 at 1/20 to 1/350 sec. A Bower 0.5 x High Resolution Digital Lens with Macro was added to the lens. I created an HDR image from five shots which is how I got the large dynamic range in the photo. After that the processing was in Nik Color Efex Pro 4 using Tonal Contrast, Detail Extractor and High Key filter effects and Viveza 2. This is the basic workflow Mike Moats uses and it works very well on macro photos. My original shot was taken with a white background but I just did not like the way it looked. Mike says if you do not like the background feel, crop tight, which is what I did. I hope to try out some of his other tips in the near future – it is a lot of fun to take those close up shots…..Digital Lady Syd
Using the Hue/Saturation Adjustment Layer Temperature Slider for Color Change
 |
I tend to shoot HDR when I am at home photographing my flowers. I like having the different exposure options to choose from even if I do not create an HDR image. In this case an AF Micro Nikkor 60 mm lens at F/3.2, 180 sec, ISO 200 with a Bower 0.5 x High Resolution Digital Lens with Macro was used to shoot 5 exposures set to exposure compensations of -2, -1, 0, +1, +2. These five images were processed in CS5 using Photoshop’s Merge to HDR program – click on the image to see the original Photoshop HDR composite. (Here are the HDR settings used: Radius 350, Strength 1.86, Gamma 2.03, Exposure -0.45, Details 228, Shadow 100, Highlight -86, Vibrance 75, and Saturation -26 – a curve was created with points at Input 25 Output 43 and Input 58 and Output 65. I saved this down as a preset to use again.)
To get a little different look, I decided to use the red-green dynamic color combination. A Hue/Saturation Adjustment Layer was used to change the Reds to Hue +32, Saturation +33 and Lightness -7. To get the center green, while still in the Reds, I moved the temperature tabs on the slider at the bottom of the adjustment layer – see settings below. The center color totally popped! In Magentas the Saturation was set to +14. That was all it took change the colors to something really dynamic!

The final steps involved adding a few control points in Nik’s Viveza 2 for contrast and detail and a Sharpen Tool layer to emphasize the center. OnOne PhotoFrame Taufer Texture 07 was applied (see sidebar for website link). The background was changed to a darkish green to give more color contrast.
Once again, by just playing around in Photoshop and trying a few filters and different colors, you can make an ordinary image into something quite spectacular. Go try out the Hue/Saturation Adjustment Layer temperature slider too – it gives some very interesting results…..Digital Lady Syd


