Coral Pink Blanket Flowers

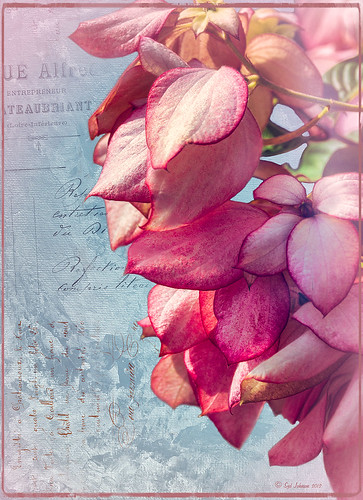
Just bought some beautiful textures from Distressed Textures and had to try one out. This is just a point and shoot image from my little Kodak camera that I used to take these pretty pink flowers called Gallardia Galya Coral Spark or common name Blanket Flower. Just did the regular adjustments in Lightroom and then opened it up in Photoshop. The background was duplicated and this new layer was opened in Topaz (see sidebar for website link) Detail 3 and set to Medium Details 0.38, Large Details 0.16, and Contrast 0.30 was applied. A New Layer was created above and the Mixer Brush was selected. Fay Sirkis‘s Signature Watercolor Smooth Blender brush was used to smooth out and sharpen the edges of the flower in the front since the low end camera does not always give sharp edges. Next I added Distressed Textures The Artist’s Palette Museum Canvas texture. A layer mask was added and the flower painted out softly. French Kiss Savoire Faire Overlay was added and set to Color Dodge at 100%. A layer mask was added and the writing was painted off the flowers. The last step was to add a Curves Adjustment Layer to increase the contrast of the image just a little. I wish I had had my better camera with me, but at least I got the shot – some beautiful pink flowers!…..Digital Lady Syd
04/18/2013 | Categories: Textures | Tags: Detail, Distressed Textures, Fay Sirkis, French Kiss Overlays, French Kiss Texture, Textures, Topaz Detail 3 | Leave A Comment »
Macro Magic

I just love Melissa Gallo’s textures – they are so soft and beautiful and they never cease to surprise me how pretty they look on an image. The macro shot above is of my Painted Lady Hibiscus Tree that is growing on my back porch. She blooms year round for me with these huge soft pink blossoms! Basically all I did was a little noise removal and then applied Topaz (see sidebar for website link) Simplify 4 using a preset I created called Hawaii Landscape. (Settings are Simplify Section: Simplify Size 0.20, Feature Boost 0, Details Strength 0.66, Details Boost 1.00, Details Size 0.27, Remove Small 0.06, and Remove Weak 0.10; Adjust Section: Brightness 0, Contrast 1.00, Saturation 1.04, Saturation Boost 1.32, Dynamics 0, Structure 1.00, and Structure Boost 1.00; and Edges Section: Color Edge – Normal, Edge Strength 1.89, Simplify Edge 0.58, Reduce Weak 33.33, Reduce Small 0.20, and Fatten Edge 0.) Next Melissa Gallo’s Painted Textures Winter Wheat from her Cyber Monday Set 1 was set to Linear Light blend mode at 100% layer opacity, and Seafoam from her 2 for Friday Set 2 was left at Normal blend mode and 67% opacity. A layer mask was added to Seafoam and the pistil and stamen were softly painted out to remove the texture and color on these parts. Kim Klassen’s Cloth & Paper Magicfilm 3 texture was added on top and set to Linear Dodge blend mode at 79% opacity. This one gets a little tricky as I used the Blending Options dialog in its Layer Style – turned off the B Channel and set the Underlying Layer right white tab to 197/255 (split the tab by pressing ALT and sliding). This gives the pretty yellow glow grunge effect throughout the image. French Kiss’s Tour Eiffel 1903 overlay was added and set to 25% opacity. A Linear Gradient Fill Adjustment Layer was clipped to the overlay layer using a free colorful gradient called Picasso-16 from Graphix1 Picasso Inspired Gradients set. (To clip to a layer, ALT+click between the layers so only the top layer will affect the layer below.) French Kiss’s free Glorious Grunge Edging was added on top as a border and set to an aqua color. Try the Layer Style trick for an added dimension to your images…..Digital Lady Syd
04/16/2013 | Categories: Textures | Tags: French Kiss Overlays, gradients, Kim Klassen Textures, Painted Textures, Textures | Leave A Comment »
Where Am I?
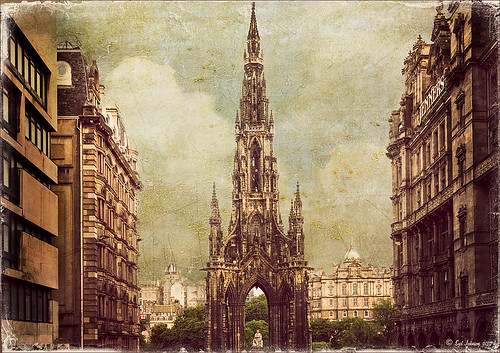
This is the beautiful Scott Monument in Edinburgh, Scotland. There is an excellent tutorial called Processing with Textures by Colleen of Chasing Dreams Photography that shows you how to create a vintage feel that looks somewhat like this. After doing basic processing in Lightroom, the image was brought into Photoshop where Lenabem-Anna Texture – 208 was added and set to Overlay blend mode at 17%. She has such beautiful textures that can be downloaded from FlickR – see her Use Information before downloading. This texture was chosen to lighten the dark image in the center. The texture was removed by painting a sampled color from the texture over the building areas using a low opacity brush. Next her beautiful vintage sky Texture – 230 was applied and set to Darken at 100% – a layer mask was used to remove texture from the parts of the image where the texture should not be covering. A vintage action was run on the background layer to add more of the effect and the layer was set to 49% opacity. On top Flypaper Elysium Copy Taster Texture was added but a Hue/Saturation Adjustment Layer was added with Saturation set to -100 so no color but just the scratches were seen. The texture was set Overlay blend mode at 45% opacity. French Kiss free Glorious Grunge Edging Overlay was added and a Solid Color Adjustment Layer using a cream color for the edging. A dark vignette was applied at 54%. To get a better feel for all these steps, check out the video. This image was a lot of fun to do and I really like the vintage look!…..Digital Lady Syd
01/17/2013 | Categories: Photo Art, Textures, Where Am I? | Tags: adding textures, Flypaper Textures, French Kiss Overlays, French Kiss Textures, How to Create a Textured Landscape, Lenabem-Anna Textures, Texture, Textured Landscape, Textures, vintage look | Leave A Comment »
Dingbats on Textures – Who Knew?
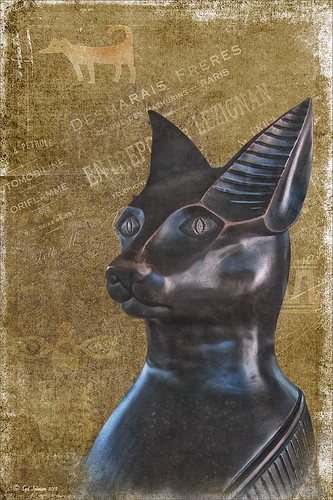
This beautiful cat statue was located outside the door to the breakfast buffet at the Hilton Waikoloa Village on the Big Island in Hawaii. After initial processing in Lightroom, the image was brought into Photoshop where French Kiss Bohemian Texture, a free download, was added behind the cat image. A black layer mask was added to the cat layer and the cat image was painted out with a white brush – it was refined by going into the Properties panel with the mask selected and clicking on the Mask Edge button to smooth out the selection. French Kiss Grunge No1 Chateau (a free download of PNG brush overlays) was placed on a layer above the texture but under the cat, and a brown Solid Color Fill Adjustment Layer was clipped to the layer (go to Layers -> New Layer -> Solid Color Fill and check Use Previous Layer to Create Clipping Group). The overlay was set to 69% opacity. Just above this layer another French Kiss overlay – Bohemian Template Overlay was applied (in set with Bohemian Texture download) with another Solid Color Fill Adjustment layer added using a soft cream color. The overlay texture was set to 48% opacity. Next above the cat image, French Kiss Artiste Impasto Texture (not free) was set to 32% to get a textured look on the cat – my own free gray Cat Painting Texture would probably work just as well. Now what was really neat is how I got the interesting animal and markings effect – they are from Tangaroa Dingbats font. By adding a layer style (double click on the layer) and selecting the Inner Glow with the default settings, and Pattern Overlay using my free Digital Lady Syd’s Smudge Texture as a pattern set to 258% scale, you get the soft orange-brown look. (To create a pattern from a texture, just open it up in Photoshop and go to Edit -> Define Pattern and it will appear at the bottom of your patterns list.) A separate text layer had to be created for each of the three objects selected and each text layer was set to approximately 30%. The Sharpen Tool was used on New Layer to sharpen the eyes just a little and that was it. I think it turned out pretty nice and it was a lot of fun to create. Try out using dingbats in your images to add a little different look to a texture…..Digital Lady Syd
01/15/2013 | Categories: Textures | Tags: dingbat fonts, dingbats, Free Textures, French Kiss Overlays, French Kiss Textures, Hilton Waikoloa Village | Leave A Comment »
Christmas Wreaths at SeaWorld
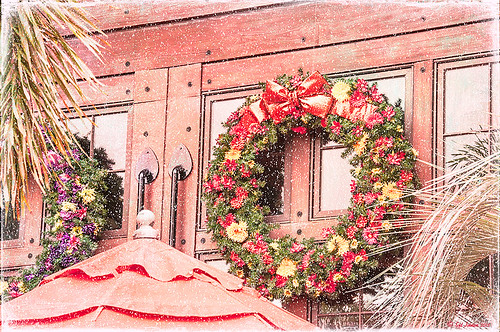
For this wonderful holiday, thought I would show this pretty image of wreaths from SeaWorld Orlando. Just a little basic processing in Lightroom before taking the image into Photoshop. Topaz (see sidebar for website link) Adjust 5’s High Key preset was applied with the Overall Transparency set to .24. Next Topaz Detail 3 was applied using the HDR Enhancement II preset. French Kiss’s Artiste Chamante texture was applied and set to Overlay at 100% opacity. My free Snow1 Overlay was next applied and set to 75% opacity. French Kiss’s Glorious Grunge Edging Overlay was applied next and a Solid Color Adjustment Layer set to a light pink was added. Since the edging did not seem to show up real well, it was duplicated along with the Adjustment Layer. That was all that was done and I love the final effect – the umbrella really added to the shot. Hope all are having a wonderful week!…..Digital Lady Syd
12/25/2012 | Categories: Photoshop Filters, Textures | Tags: Adjust, Detail, filters, free overlay, French Kiss Overlays, French Kiss Textures, plug-in, plugins, SeaWorld, SeaWorld Orlando, Snow Overlay, Topaz Adjust 5, Topaz Detail 3 | Leave A Comment »
Little Red Corvette

Just felt like using a couple of my old standby favorite plug-ins to create a vintage feel to this image. This old red corvette image was taken at the 39th Annual Daytona Turkey Run at the Daytona International Speedway infield. I love the way the raceway seats are in the background – it just seems to the be the right setting for this old girl – I love corvettes! It was processed first in Lightroom starting out with cropping and applying one of David duChemin’s Lightroom 4 presets called Warmer Sunset -.66 Grad – I was surprised it gave such a nice vintage feel for starting post-processing of the image. From there several adjustments basic Lightroom adjustments were done and the chrome was sharpened using an Adjustment Brush. In Photoshop Nik Viveza 2 was used with control points placed on the windshield to clean up some window glare (this plug-in does an amazing job with window glare) and on the detailing on the car. Then Nik Color Efex Pro 4 was applied and several of my favorite filters were stacked – Darken/Lighten Center, Detail Extractor, and my favorite for getting this vintage feel, Film Efex Vintage set to Film Type 14 with an overall opacity of 56%. A Curves Adjustment Layer was added and French Kiss free Glorious Grunge Edging Overlay with the lines inside removed was applied and set to a tan color. I wish I could fix up this car – she really was a beauty!…..Digital Lady Syd
Digital Lady Syd Related Blogs:
Yellow Dogface Butterfly in her Glory!
Soft and Sharp Image at the Same Time!
12/20/2012 | Categories: Lightroom, Photoshop Filters | Tags: Color Efex Pro, corvette, free overlay, French Kiss Overlays, French Kiss Textures, Lightroom, Lightroom presets, NIK Color Efex Pro 4, Nik Viveza 2, plug-ins, plugins, vintage, Viveza | Leave A Comment »
Checking Out French Kiss Textures
I broke down and bought some French Kiss textures and overlays. They have such beautiful real painted textures that they caught my eye. Also the overlays and brushes are from vintage French books and letters – creates a very unique look. I hope to figure out how to make some of my own overlays when I get a chance. In the meantime I thought I would post this image of pink bougainvilleas that I shot at SeaWorld-Orlando. This image used Artiste Collection Impasto Overlay II texture and Artiste Savoir Faire Overlay twice with parts of the text turned in different directions. Just layer mask out parts you do not want showing. You should check out the French Kiss website for several free textures and overlays and try this technique out. There are also some good texture tutorials on how to this look. Very beautiful results very quickly! For more tutorials that used French Kiss products, see my blogs listed below. Have fun!…..Digital Lady Syd
Digital Lady Syd Related Blogs:
A Vintage Butterfly Postcard Effect
Artistic Daisy!
A Little Hollywood for My Butterfly Model
Getting a Nice Painterly Landscape Effect with Topaz Simplify and Texture
11/13/2012 | Categories: Textures | Tags: French Kiss Overlays, French Kiss Texture, Overlay Texture, SeaWorld, SeaWorld Orlando, Textures | Leave A Comment »
A Vintage Butterfly Postcard Effect
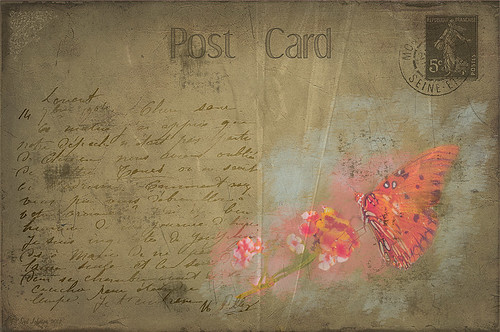
My butterflies certainly get around. This lovely lady is checking out my yellow and pink lantanas in my front yard. I had fun creating this antique post card effect. Not sure why I did it but it was fun. Thought I would share how I got this final result as it involves using overlays, which add such an interesting look to an image. The original butterfly image was processed using Nik Color Efex Pro 4‘s Detail Extractor filter and then Film Efex Nostalgic Film Type 1 filter. This gave a very solid looking, almost illustrative look, butterfly and flowers to work with. I added a black layer mask and painted back the parts I wanted to use for the image. Underneath this layer ShadowHouse Creations PC8 (Post Card) texture was added and a Solid Color Adjustment Layer clipped to the texture (CTRL+Click between the layers) using a lighter color to brighten it up. Two layers were created and light blue and pink were painted around the butterfly and flowers. Three of French Kiss’s overlays were added: 1904 for the writing, Grungy Flourish for the upper left corner design, and Stamp 2 – all from the French Script No 1 brush collection, and Glorious Grunge Edging for the outside of the postcard (this is free on her website and a really nice overlay effect). Also on a New Layer a single brush stroke of Paper Scratch Brush in Paper Damages Brush Set on Adobe Exchange was used to get the folds. This just sort of developed and it was fun to do. Got to love Photoshop!…..Digital Lady Syd
Digital Lady Syd Related Posts:
Artistic Daisy!
11/08/2012 | Categories: Photoshop Filters, Textures | Tags: French Kiss Overlays, French Kiss Textures, How to Create a Postcard, NIK Color Efex Pro 4, overlays, ShadowhHouse Creations, ShadowHouse Creations Textures, Textures, Vintage Postcard Look | Leave A Comment »

