
Painting People
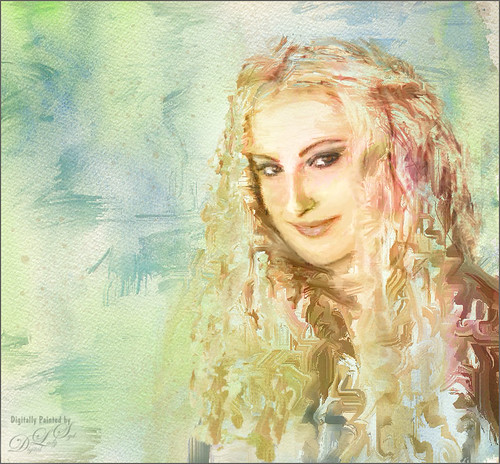
This image is my first Painter image of a person – my very pretty daughter-in-law – that I have tried to make it look realistic without looking too much like a photo. Not sure I completely succeeded, but it is fun to paint people for a change. In Painter Topaz (see sidebar for website link) Restyle’s Pale Salmon Pink preset was applied. Back in Photoshop, I did some clean up layers. Two textures were applied: Painted Textures June Party set to Hue blend mode at 80% layer opacity to give the hair that sort of “with-it” look that is popular right now, and French Kiss (see sidebar for website link) Morning Dew set to Multiply at 62% layer opacity to add to the background that was painted in Painter. Finally a Nik Viveza 2 layer was created to emphasize the face a little more….Digital Lady Syd
Another Pseudo HDR from Me!
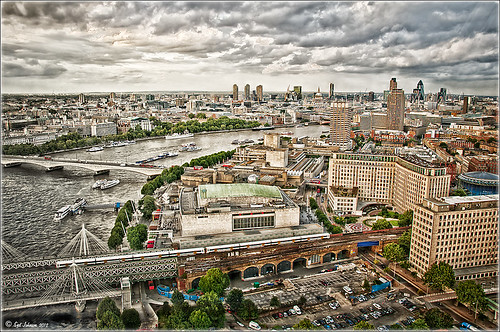 |
I love these photos I got from the London Eye a few years ago – they really look good with the pseudo-HDR look. Here I have applied my SJ-Vivid Drawing Look preset in Lightroom (for here for Adobe Camera Raw preset – note: change file extension to .xmp in zip folder to get file to work). I had to adjust the Exposure a bit after applying the preset. Then it was processed in Nik Color Efex Pro 4 using my SJ-Pseudo HDR1 recipe. NOTE: This download link is broken if you click the Download button, but by right clicking on the button and choosing “Save Link As,” the file will download correctly.” Usually the Detail Extractor slider needs to be adjusted so the image is not overdone. Next it was taken into Viveza 2 to get rid of the muddy color water that is so common in the Thames River pictures. By setting control points in the water areas and adjusting the Hue and Brightness sliders, the color could be changed to more of a blue tone. There was distortion from the movement and the glass of The Eye so I added a layer set to Overlay blend mode and painted with a black brush at 10% opacity over these areas to get it evened out. (Click on the image to see the original – most of the distortion was in the lower front and on the train bridge in the middle.) Finally the Sharpen tool was used on a separate layer along with Curves Adjustment for contrast and Hue/Saturation Adjustment Layers to desaturate a little. Loved the final result. This is very similar to what you would get with the Lucis Arts filter. Overall, loved the results! …..Digital Lady Syd
Digital Lady Syd Related Blogs:
Pseudo HDR Using NIK Color Efex Pro 4
Another Pseudo HDR Image with NIK CEP4 – Got to Love the Effect!
Settings for Vivid Drawing Look ACR/Lightroom Preset and NIK Color Efex Pro 4 Pseudo HDR Recipe
Where Am I?


