The above image is from the Library of Congress and is an image taken of the Business District in Manhattan, New York City, cc1900. Shorpy.com showed it as a blog image and has posted some really interesting info about what buildings were in this original image. What intrigued me is the smoke from all the smokestacks and all the American Flags (I counted at least 160), most flying on top of the buildings. A lot of clean up was done first and the image had to be converted to RBG from Grayscale and reasonable size needed to be set. On a cleaned up stamped image (CTRL+ALT+SHIFT+E), Topaz Studio was opened and one of my uploaded Community presets (SJ Building Sharp) was applied. I did go through and tweak the four adjustments (Basic, Precision Contrast, Precision Detail, and Dehaze) in this preset, but it is pretty much the same settings. The last step in Topaz was to reduce the total effect in the sky – used a Mask Transparency of 0.33 with a brush and then added a Feather of 0.23 in the More Mask Options section. In Photoshop a Color Lookup FoggyNight preset added at 11% layer opacity and Linear Burn blend mode. Two textures from Flypaper were added: Alice set to Overlay blend mode and 100% layer opacity and Villa Adriana set to 36% layer opacity and Overlay blend mode. Last step was to open Nik Viveza 2 and add a little lightness on the buildings facing the sun and in the corners for a subtle vignette effect. Really fun picture to work with……..Digital Lady Syd
10/17/2017 | Categories: Photoshop Filters, Textures, Topaz Studio | Tags: Nik Viveza 2, Topaz Studio, vintage | Leave A Comment »

I loved the way this image turned out – never expected it to be this pretty considering it was an image I snapped while standing on the street in front of our hotel. It is Nelson Monument (in center) and Acropolis (aka National Monument of Scotland on left corner) on Calton Hill – I did not get to visit this site but wish I had. This was not difficult to process once I got going. After cleaning up a rather boring image, Topaz (see sidebar for website link) Simplify 4 was opened and a preset I call the John Barclay BuzSim Setting preset was used, (The settings are: Simplify: Colorspace RGB, Simplify Size 0.19, Details Boost 1.00, and Details Size 0.20; Adjust: Brightness 0.01, Contrast 1.08, Saturation 1.03, Saturation Boost 1.15, Structure 1.00, and Structure Boost 1.00; and Edges: Edge Type – Color Edge Normal, Edge Strength 0.00, Simplify Edge 0.30, Reduce Weak 10.00, Reduce Small 0.20 and Flatten Edge 0.00.) I listened to one of John’s excellent videos on Topaz Labs and created this preset which has a very subtle result. Next I added 2 lil Owls (see sidebar for website link) Workshop 6 – Texture 1 which has the beautiful turquoise and light yellow sky color – the layer was set to Overlay Blend Mode. The beautiful text was supplied by my favorite Shadowhouse Creations – his Text Brush 5. I actually clipped a bright green Color Fill Adjustment Layer to the text (to clip just ALT+click between the two layers and the color fill adjustment layer will only affect the layer below) – then the text layer was set to 55% opacity. Another 2 Lil’ Owls Texture – texture 4 was used as an overlay frame (follow the steps in my blog How To Make Frames or Borders – scroll down to the section called “To save the frame you created as an overlay to use again”). A light yellow Color Fill Adjustment Layer was clipped to the texture file. A Curves Adjustment Layer where the red, green and blue channels were adjusted to get this slight vintage feel. The last thing done was to add a Color Fill Adjustment Layer to the whole image using a soft cream color (#c6c3bd) and then Nelson Monument was painted out in the layer mask so the eye is drawn to that area of the image. Had a lot of fun as usual – never get tired of this!…..Digital Lady Syd
03/21/2013 | Categories: Borders and Frames, Historical Info, Photoshop Filters, Textures | Tags: 2 lil Owls textures, ShadowHouse Creations Textures, Simplify, Topaz Simplify 4, vintage, vintage landscape, vintage look | Leave A Comment »

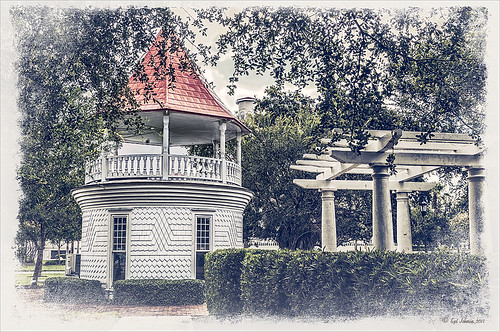
May have figured this out already since I have posted very similar photos – but this is at Fortunato Park in Ormond Beach, Florida – and is one of my favorite places. The above is the rooftop cupola from the old Hotel Ormond – the only remaining part from a beautiful old hotel that was torn down in 1992. It was in such a bad condition that it could be restored – what a shame!
Okay – I am a huge Photoshop plug-in fan – I love to be able to do something with a photo that I could not do just in Photoshop or Lightroom alone. Nik plug-ins really made this image! Basically Nik’s Viveza 2 (my very FAVORITE plug-in – can’t beat it for fixing any problem in an image) was applied to the image to add detail and contrast to localized areas of the image (detail in the orange roof, saturation and color to sky in middle of cupola, and detail to the interesting lines on the building). That in itself added a huge improvement to the image. Next Nik’s Color Efex Pro 4 was added and three filters stacked: Bleach Bypass, Detail Extractor, and Film Efex Vintage using Method 14 and setting the Overall Opacity slider to 52% – did not want to overdo the vintage feel. I use the Film Efex Vintage often – lots of versatility in just this one filter! (See related blog links below for other examples.) Next Shadowhouse Creations Scratch Box frame layer was applied – this is from the Scratch & Frame Box Overlay.PSD file he supplies. (Check these out – some great borders just in the PSD file!) I created a PNG file of just the frame by following the steps in my blog How To Make Frames or Borders – scroll down to the section called “To save the frame you created as an overlay to use again” and follow steps. I used an off white color sampled from the image in a Color Adjustment Layer clipped (ALT+click between layers) for the frame. That was all I did and I love the slightly vintage effect – goes nice with historic buildings. Next time I will show you a totally different look for this same image (see A Fairytale Gazebo)……Digital Lady Syd
Digital Lady Syd Related Blogs:
Digital Lady Syd Reviews Nik HDR Efex Pro 2
Little Red Corvette
Yellow Dogface Butterfly in her Glory!
The New Film Efex-Vintage Filter From NIK CEP 4
02/21/2013 | Categories: Historical Info, Photoshop Filters, Where Am I? | Tags: borders, Color Efex Pro, Film Efex Vintage Filter, Historical, NIK Color Efex Pro 4, Nik Viveza 2, overlays, vintage, Viveza | Leave A Comment »

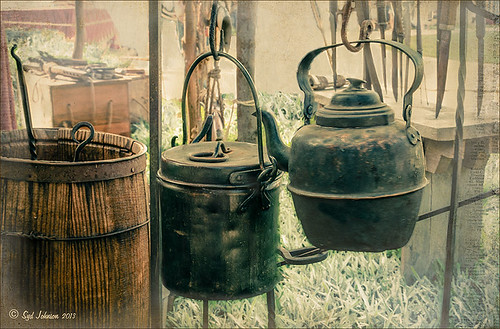
The image was taken at the 24th Annual Native American Festival in Ormond Beach, Florida recently. I just loved the way this image turned out since it started out with a very cluttered background. It was an three image HDR image that was processed using Photomatix Pro’s Merge to 32-bit HDR in Lightroom. The resulting TIFF file was adjusted and Matt’s 70’s preset was applied before taking the image into Photoshop. Some background clean-up was done and the Kim Klassen cafe simplicity texture (sign up to get several beautiful free textures including this one) at 55% opacity was added to the image – really gives it that vintage feel. The pots were painted out with a low opacity black brush on a white layer mask. A Curves Adjustment Layer was added to give just a little more contrast in the image. That was it – very simple processing but one of my favorite images from the event.
It is amazing how pretty the results can be by trying different textures on an image. Really loved this one….Digital Lady Syd
Digital Lady Syd Related Blogs:
Check out my Textures category in the sidebar for more Tidbits Blogs
Check out my Fun Photoshop Blog (link at top of page) and click Textures category in the sidebar
02/07/2013 | Categories: Textures | Tags: HDR, Kim Kalssen texture, Lightroom preset, Merte to 32-bit HDR, Photomatix Pro, Texture, vintage, vintage look | Leave A Comment »

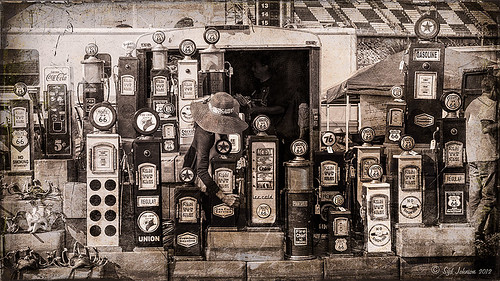
Really loved how this 3 image HDR turned out. Who knew you could actually buy old gas pumps! They were being sold at the 38th Annual Turkey Run located in the Daytona International Speedway infield last month. The three images were stacked using the free Lightroom Photomatix Merge to 32-bit HDR if you own Photomatix HDR Pro. My duChemin Maasai Chocolate split tone preset (that I created from settings in David duChemin’s Vision & Voice: Refining Your Vision in Adobe Photoshop Lightroom book) was also applied. In Photoshop 2 Lil Owls texture 6 (see sidebar for website link) was set to Vivid Light at 45% opacity. A Levels Adjustment Layer was added, some clean up done, and French Kiss Glorious Grunge Edging overlay border was added and changed to a dark brown color using a Solid Color Fill Layer clicked to the overlay. That was it.
12/27/2012 | Categories: HDR, Lightroom, Textures | Tags: 2 lil Owls textures, duChemin, free overlay, French Kiss Overlay, HDR, Merge to 32-bit HDR, vintage | Leave A Comment »

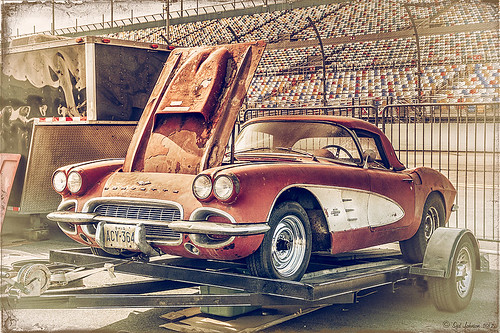
Just felt like using a couple of my old standby favorite plug-ins to create a vintage feel to this image. This old red corvette image was taken at the 39th Annual Daytona Turkey Run at the Daytona International Speedway infield. I love the way the raceway seats are in the background – it just seems to the be the right setting for this old girl – I love corvettes! It was processed first in Lightroom starting out with cropping and applying one of David duChemin’s Lightroom 4 presets called Warmer Sunset -.66 Grad – I was surprised it gave such a nice vintage feel for starting post-processing of the image. From there several adjustments basic Lightroom adjustments were done and the chrome was sharpened using an Adjustment Brush. In Photoshop Nik Viveza 2 was used with control points placed on the windshield to clean up some window glare (this plug-in does an amazing job with window glare) and on the detailing on the car. Then Nik Color Efex Pro 4 was applied and several of my favorite filters were stacked – Darken/Lighten Center, Detail Extractor, and my favorite for getting this vintage feel, Film Efex Vintage set to Film Type 14 with an overall opacity of 56%. A Curves Adjustment Layer was added and French Kiss free Glorious Grunge Edging Overlay with the lines inside removed was applied and set to a tan color. I wish I could fix up this car – she really was a beauty!…..Digital Lady Syd
Digital Lady Syd Related Blogs:
Yellow Dogface Butterfly in her Glory!
Soft and Sharp Image at the Same Time!
12/20/2012 | Categories: Lightroom, Photoshop Filters | Tags: Color Efex Pro, corvette, free overlay, French Kiss Overlays, French Kiss Textures, Lightroom, Lightroom presets, NIK Color Efex Pro 4, Nik Viveza 2, plug-ins, plugins, vintage, Viveza | Leave A Comment »


