
Blowing in the Wind!
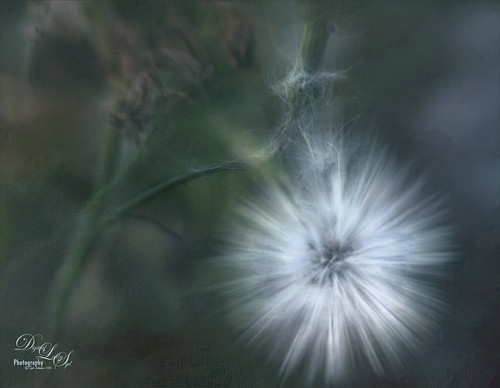
Had some fun with this little dandelion – it was taken using my Lensbaby Composer at F/4 using a Macro +4 Lens. In Lightroom just the regular basic adjustments. In Photoshop Nik Viveza 2 was used to lighten up the white strands in the flower. Then Lucis Pro 6.0.9 was applied using the Split Channels. Next Nik Color Efex Pro 4 was opened and 4 filters were added: Detail Extractor, Glamour Glow, Reflector Efex, and Darken/Lighten Center. Can you tell I was having a lot of fun with this one? Next Topaz (see sidebar for website link) Lens Effects was opened and the Motion filter Type Zoom was centered on the flower to straighten out the strands. In a black layer mask, just the strands were painted back. A Levels Adjustment Layer was used to lighten up the overall image. Next Topaz Texture Effects was used to apply one of my painted textures set to Blend mode Subtract in the plug-in. Back in PS, Melissa Gallo’s Trees in May texture was added and set to Linear Dodge blend mode and 40% layer opacity. That was it! It is so much fun just to play around with an image and I am sure this little dandelion did not care!…..Digital Lady Syd
The Mighty Ant
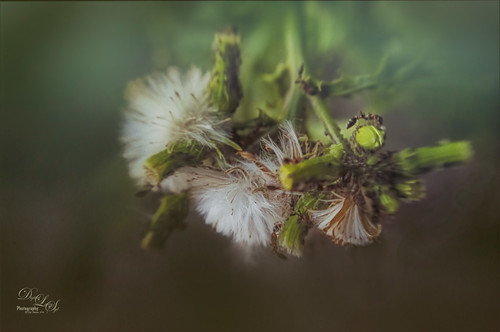
For some reason, this dandelion weed has grown to some humongous size by my front door in this major hot summer we are having and the ants are having a ball tromping all over it! I decided to pull out my old Lensbaby Composer set it to F/4 and Macro +4 lens to get this guy doing some kind of balancing act on a bud. This pretty much is how the image looked out of camera. I love the soft DOF you get with the Lensbaby. On a duplicate layer the now free Nik Color Efex Pro 4 was opened. The Detail Extractor was applied to mainly just the ant and a little bit of the foreground to give it a little more sharpness, and the Vignette Filter was used where a darker green color was sampled from the image to soften the bottom. Back in PS, Topaz (see sidebar for website link) Texture Effects’s Crisp Morning Run preset was applied (removed Adjustments, and added Diffusion panel, changed the Blur to 0.42, then painted back the ants, then set Strength 0.58, Softness 1.00) to get the beautiful turquoise effect in the background. I had not used this lens in a long time so it was a lot of fun to use!…..Digital Lady Syd
Looking Innocent!
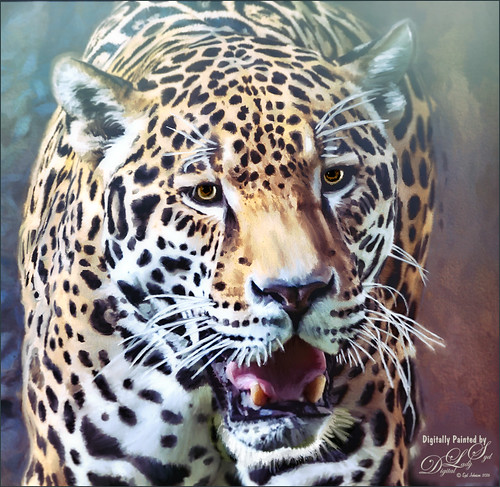
Loved how this beautiful Jaguar turned out taken at the Jacksonville Zoo in Florida. In Lightroom tried to really bring out the colors so image could be painted in Photoshop. This image was actually of the cat walking, but his face was so beautiful, I decided to crop close. First the image was painted on several different layers using mostly mixer brushes. Brightened eyes using an Exposure Adjustment Layer (see How To Do a Quick Eye Sharpening in Photoshop blog). Topaz (see sidebar for website link) Reflector filter’s Gold Left was used to lighten the left side of the face. On a composite layer (CTLR+ALT+SHIFT+E) Topaz Texture Effects’s Crisp Morning Run preset (with these changes: Basic Adjustment Brightness -0.27, Shadow -0.29, Highlight 0.17, Clarity -0.60, Sat 0.11, Temp -0.40, Tint 0.05, and Opacity 0.80). On a new Composite Layer, Nik Viveza 2 (now free) was applied to just the nose to brighten it up just a little more in the image. And as a final step, a Black and White Adjustment Layer was opened to just make sure my focal point stood out correctly (see How To See If you Captured the Focal Point). Really liked the final effect!…..Digital Lady Syd
Swimming in Circles
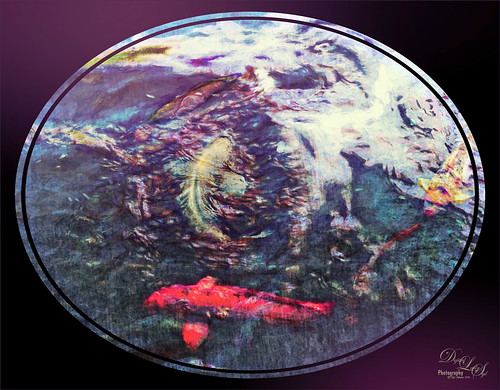
Lots of fun playing with this image of some Hawaiian fancy fish (koi) that was not that great – wanted to see what I could do with it since it had an abstract feel to begin with. In Lightroom, used the Basic Auto button, then backed off the Highlights to -12. Painted with the Adjustment Brush set to Clarity (60), Dehaze (45), and Sharpness (71) on the fish to bring them out just a little. Got to watch the Dehaze brush setting as it can overcook the results if too much is used. Topaz (see sidebar for website link) Glow Graphic Sketch II preset was applied and the layer was set to Overlay blend mode at 77%. On a duplicate layer (CTRL+J) applied Topaz Impression’s Cezanne I preset with changes to the Orange Hue and Saturation sliders. Created a New Layer and set to Overlay – used a black brush set to 12% brush opacity and burned in parts of the image where areas are blending too much together. On a stamped layer (CTRL+ALT+SHIFT+E) used Topaz Texture Effects’s Burning Effect preset. Changed the border to create the pretty oval effect. Finally applied Nik Viveza 2 (now free) to draw attention to the two middle fish. I thought it turned out to be an interesting effect…..Digital Lady Syd
Quietly Standing Out
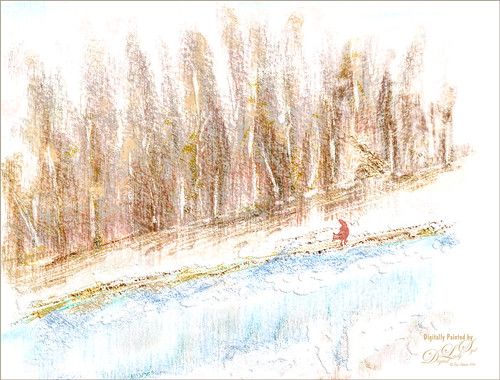
Sometimes it just feels good to paint! Totally enjoyed trying out and practicing with Melissa Gallo’s Painting Spring brushes and paper (still have a lot to learn but enjoying it immensely). Once the basic background was painted, it was brought into Photoshop to finish up. The impasto effect was created using Kyle Webster’s Impasto Kit – Super Light Gesso 2 layer style with the Natural Media Knit Pin brush from Grut.com to paint in the snowy effect. Topaz (see sidebar for website link) Lens Effects’s Polarization filter using the Bottom Half 2 Stops preset was applied. The Fox was created on its own layer using a free brush from Fox-russdepress.com and adjusting it to match my image. Topaz Texture Effects’s 1 Color Burst II was added without the vignette effect. Last step was to add Nik Viveza 2 (now free) to really showcase the fox. That was it! Loved painting this image!…..Digital Lady Syd
A Pretty Fancy Carousel Horse!
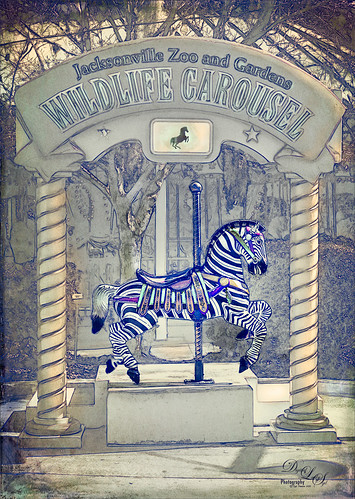
Just another fun pix from the Jacksonville Zoo the Wildlife Carousel photo op area. To get this rather interesting effect, an inexpensive action I purchased a while ago called Mix Art Sketch Painting Photoshop Action was applied to get this nice halftone sketch effect. It has a lot of choices to select when using it. After running the action, Topaz (see sidebar for website link) Texture Effect was opened and the Vibrant Grunge preset was applied. The layer was set to Multiply. Otherwise just some clean up layers and a little Nik Viveza 2 (now free!). Loved the effect. I need to work a little more with this action, but I see lots of possibilities……Digital Lady Syd
Deserted Roller Coaster
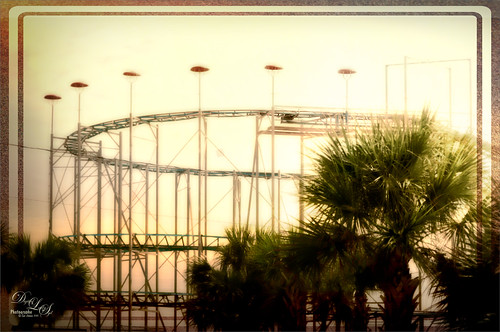
I guess this image definitely indicates winter is on its way – very desolate looking Roller Coaster at the beach in Daytona Beach, Florida. Wanted to show another example of Topaz (see sidebar for website link) Texture Effects using the preset I created and uploaded onto the Community site. (See my Digital Lady Syd Reviews Topaz Texture Effects Fun Photoshop Blog.) In Lightroom Dave Delnea’s Custom Tone oo2 was used and the DeHaze slider in the Adjustment Brush added a little foggy effect at the top of this image. In Photoshop Topaz Detail 3 was applied to darken and soften the image a little. Then on a stamped layer, Topaz Texture Effects was opened and my SJ Soft Pastel Effect preset with some changes (Basic Adjustments turned off; Diffusion – in Mask brushed out the center of the large palm and part of the wood structure in top of the roller coaster with brush Strength of 55. Vignette – Strength 0.42, Size 0.01, Transition 0.32, Roundness 0.18, Color Black and set Center towards the right; Split Tone – removed; Border second row first border – Size 1.09 with Keep Aspect Ratio on No.) I am starting to really enjoy this plug-in!…..Digital Lady Syd
Feeling Spiffy!
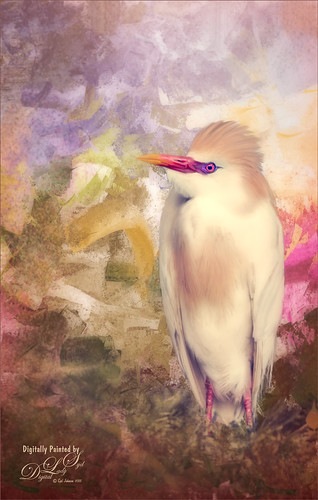
The reason I like this photo is that it was really sharp out of camera even though this Cattle Egret was trying to stay a little hidden in a very green tree covered area. He just seemed to need a nice background, so here it is. It was painted Corel Painter and matched the color in his beautiful beak. Since I wanted some of the original background to show through around his feet, the texture was placed above the bird and the bird’s layer mask (from Topaz – see sidebar for website link – ReMask 5) was used so the bird appears. Then I could use a low opacity brush on the bottom of the bird layer mask to paint in some of the grass detail where he was standing. Several layers of painting before Topaz Texture Effect’s Soft Warm Breeze preset was applied on a stamped layer (CTRL+ALT+SHIFT+E). (I changed the Overlay color from orange to black and Diffusion Strength to 0.62.) The eyes and beak were sharpened and Nik Viveza 2 was used to finish up the overall effect. Really fun to paint!…..Digital Lady Syd


