Where Am I?
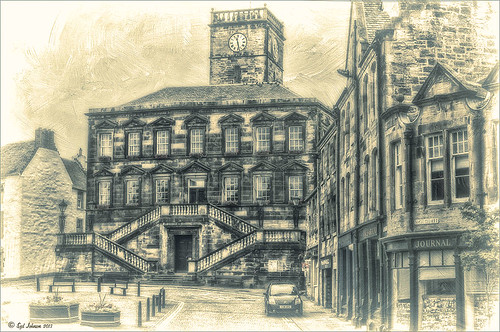
This is a tough one since this image is not of the main attraction in the area. This is the Burgh Hall Tourist Information Center (check out link for live webcams of area) that resides in the center of the town of Linlithgow, Scotland, just outside of Edinburgh. Linlithgow Palace (the birthplace of Mary Queen of Scots) ruins are just behind this building along with a beautiful old church, St. Michael’s Parish Church, next to it. If you are in Edinburgh, it is a wonderful day trip as it is only a half-hour train ride to get there.
The image was processed using Topaz (see sidebar for website link) Black and White Effects 2 three times! The first application used just the Traditional Collection Warm Tone preset set to an Overall Transparency of .90. Next, the same preset was selected, but the Diffusion Section with Softness slider set to .85, Diffusion to .65, and Diffusion Transition to .50, and the Overall Transparency set to 1.00 was applied. The the windows, steps and clock face were painted out using the Localized Adjustments section. The third time a Quad Tone preset I made was applied using Navy Blue, Green, Yellow and White tones . (Quad Tone settings are: Color 1 Region set to Red 1/Green 1/Blue 12 and slider set to 15.08, Color 2 Region Red 63/Green 78/Blue 84 and slider set to 143.9, Color 3 Region set to Red 216/Green 211/Blue 129 and slider set to 227.5, and Color 4 Region was set to white with slider set to 255.0.) Some Border Edging in white was added. French Kiss L’Artiste Dove Wings texture was added and the center of the image was lightly painted back in a white layer mask using a soft low opacity black brush. A Curves Adjustment Layer was added for contrast. Puppet Warp was used to slightly straighten out the buildings – this old building just did not have any straight lines! I totally love the slight diffused look on this image – definitely getting to be a favorite effect for me and I am seeing it a lot more in images now……Digital Lady Syd
Digital Lady Syd Related Blogs:
Straightening with Puppet Warp!
Where Am I?
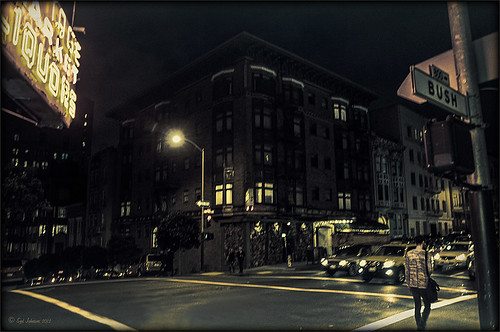
This is an image of San Francisco taken at night in February in a brisk and cold breeze. I just listened to another interesting webinar by Nichole Paschale from Topaz (see sidebar for website link) called Night Photography Enhanced with Adjust, Black and White Effects and Star Effects. I am always surprised how much I learn from these short videos – there were several good tips in this one, even though I know these programs pretty well. My image was not that great, but I needed a nighttime image to try some of the techniques on. Now I rather like the effect. Of course it uses one of my favorite plug-ins, Black and White Effects, so I am not surprised I like the results. The preset was set to my Old Vintage Effect (see Quad Tones in Topaz Black and White Effects Plug-in to create), one I use on a lot of my images. Next the Star Effects plug-in was used to enhance the streetlight using Sun Flare 1 preset. A Flypaper Texture Lemoncello Taster texture layer was added using the Multiply blend mode at 35% opacity. It still did not have the feel I wanted, so I added a Black and White Adjustment layer and mainly lowered the yellow and added some reds and greens and blues. The opacity was set to 26%. A layer style was added to frame the image. I can honestly say this is exactly how the street looked to me as I was walking to dinner on that cold dark night. If you have not tried out some of Topaz’s videos, give them a listen. Lots of cool things to try in them!…..Digital Lady Syd
Topaz Black and White Effects Quad Tones Are Great!
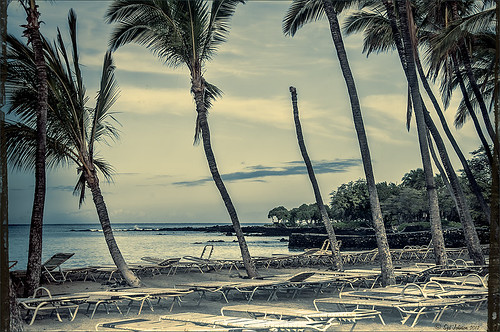
Just another day in paradise! This is beach front at the Waikoloa Beach Marriott Resort and Spa on the Big Island in Hawaii. I was having trouble finding some way to make the image really pop and look like it looked to me when I was there. I ended up going into Topaz’s Black and White Effects (see sidebar for website link) thinking it might look good as a black and white image. In Topaz plug-ins, you have to reset your settings or the last one used shows up on the image. Well the last effect I had used was my Old Vintage Effect Preset and it gave this image exactly what it needed. To create this preset, see my blog “Quad Tones in Topaz Black and White Effects Plug-in” to get the basic information to create the quad tone colors required for this warm sunny feel. I did increase the Adaptive Exposure slider from 0.18 to 0.41 to get more of an HDR look, checked Process Details Independently because of a little haloing around the tree trunks, and selected a light Vignette for this image instead of a Border. In Photoshop I had to remove a little noise. No sharpening or curve adjustments were needed. OnOne (see sidebar for website link) PhotoFrame Taufer Texture 12 was added. I really like this combination of colors and have used it many times. Try the settings if you want to get that warm feel…..Digital Lady Syd
Digital Lady Syd Related Blogs:
Sunny Preset for Topaz Black and White Effects
The Art Corner: Painting and Sculpture by Tassaert
Topaz Plug-Ins – Same Image Trying Each!
Topaz B&W Effects Plug-In – A Real Winner!
I Didn’t Know That! Export Layers to Files in Photoshop
 |
Every now and then I run into a situation where I want to take one of the layers I am working on in Photoshop and save it down as a separate file. Now it is possible to delete all the files and rename the file, etc., etc., etc. but this can take a while to do and it could cause you to lose the file you are working on if you get careless. This week I wanted one of the sky images I had imported into my image a while back to use again and to put in my Sky folder since I like it. (Hover over image to see sky image created from layer in psd file.) I found out there is a little known script sitting in Photoshop that will accomplish just what I wanted to do in just seconds.
Steps to Export Layer(s) to Files in Photoshop:
1. In your image, turn off all layers you do not want to create images of by clicking on the eyeballs on the left of the each layer in the Layers Panel. (To do this quickly, you can highlight the layer you want to export to a file and ALT+Click on the eyeball – all the other layers are turned off immediately.)
2. Go to File -> Scripts -> Export Layers to Files.
3. The Export Layers to Files dialog appears. Fill out as shown. Be sure to capture all the check boxes or you will get image files for each layer in your file.
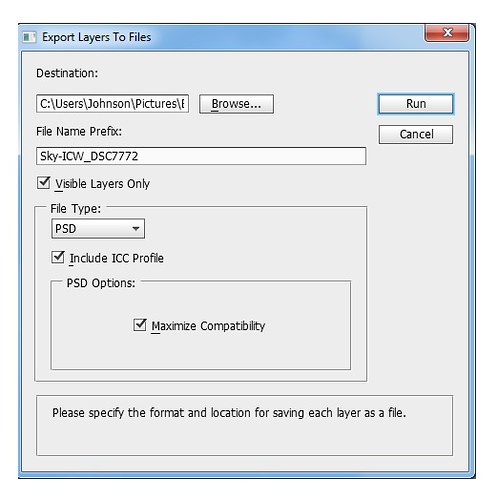
4. Click Run and that’s it – really quick and easy!
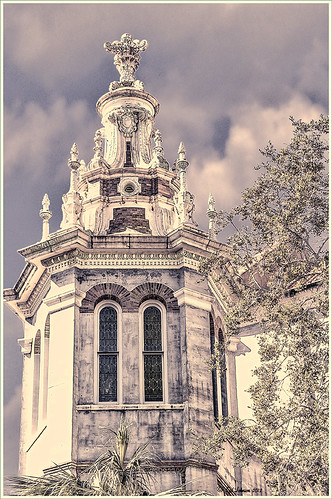
The image is of the Flagler Presbyterian Church in St. Augustine, Florida, where Henry Flagler and his family are buried. Topaz Adjust 5 and Topaz Black and White Effects were used on this image (see sidebar for website link). The sky is the one I moved in from an image I took on the International Coastal Waterway near St. Augustine while sailing.
Give this script a try next time you want to break apart an image…..Digital Lady Syd
Some of My Favorite Plug-Ins
 |
I am starting to sort through all the plug-ins that are out there and slowly figuring out what really works for my workflow. This is a really hard process since there are so many great plug-ins and some of them give very similar results. I have blogged on this many times showing how the same images look with the various plug-in effects.
I started working on this image – not one I was totally in love with, but the old Flagler Presbyterian Church is so beautiful to look at that I wanted to create that sensation in the image. I began by manipulating the file in Topaz Adjust 5 (see link to website in sidebar) and hit the “Get Lucky” button just for the heck of it – and this really cool illustrated look appeared that I was not sure what to do with it. (Hover over image to see the Topaz 5 illustrated image.) I decided it needed a new sky so I opened up OnOne’s Perfect Mask (see website link in sidebar) and added a sky I had placed below the image. This plug-in is the best one I have found for replacing skies quickly – check out the little holes in the trees where the sky peaks through. Next several different effects were tried but none made me go “Wow” — that is until I decided to go into the Topaz Black and White Effects plug-in (see link to website in sidebar). It took no time at all – in fact I started with the same settings from my “My Office Friend Ted” image which was a totally different type of image. A few things were adjusted but it still was not quite right. Back in Photoshop a Color Balance Adjustment Layer was added to bring out the blues in the sky a bit more to get the right look. Now it looks like I remember it – but it took some effort. Luckily, I had a plug-in that gave me a great start.
I guess I can honestly say I still love both Topaz Adjust and Black and White Effects – they do have that versatility to turn an okay image around. Definitely great plug-ins and reasonably priced too! And OnOne Perfect Mask is the best for skies – still figuring this plug-in out for other types of selections. I hope to have a page set up soon on which plug-ins have made it into my workflow……Digital Lady Syd
Digital Lady Syd Related Blogs:
Topaz Plug-Ins – Same Image Trying Each!
Same Image – Different Plug-In
My Office Friend Ted

This bear now sits in my office but I was never sure why I got him. Last week there was an interesting post by Ian Summers called “3 Exercises to Keep Creative Imagery Flowing” which gave me an insight to this conundrum. One of his generic creative exercises is called “Create a Giant Love Nest,” an environment that involves surrounding your work/creative area with many of the things you liked as a kid to help feed your creativity. I guess that is how Ted arrived – I found him at a bargain price in Cracker Barrel and had to have him. I am not even sure I had a Teddy Bear as a child but I liked his happy look (he never complains) and he is very soft and big (31 1/2″ tall). What’s not to like? So in honor of using childhood (and adult) toys and collectibles as a way to increase your creativity (and a good excuse to keep some of those things you just can’t part with), I am presenting my office friend “Ted.”…..Digital Lady Syd
PS. Ted was processed in Lightroom Beta 4 (see my Tidbits Blog “Trying Out Lightroom Beta 4“) and Photoshop using Topaz Black and White Effect (see my Fun Photoshop Blog “Topaz B&W Effects Plug-In-A Real Winner” and click on sidebar for website link). I started with the Opalotype Collection Flavescent preset and essentially adapted it by cranking up the transparency to 100, and adjusting the strength and placement of the vignette. A little localized face detail and burning on his mouth was added. That’s all.
Create a Great Shot with a Good Crop
Thought I would show you what a difference a good crop can do for turning an ordinary image into something that has some real eye appeal. The rain on the petals could not even be seen in the original shot.
For Lightroom Users: The above image was first cropped in Lightroom using the Crop Tool, but you can do this in Adobe Camera Raw or even Photoshop or Elements to get the correct look. I have found that by zooming in on an image using the Navigator at a canned magnification zoom like 2:1, then using the hand to move the image around, gives you a quick feel for what kind of crop you need. Then it was adjusted using the other sliders.
For Photoshop or Elements: Open your image in Adobe Camera Raw and select the Crop Tool from the Camera Raw Tools at top (6th icon over). Use the Zoom pop-down box in the lower left to try different zoom magnifications. Hold down the Space Bar to move image around to see how a crop would look. Click the little arrow in the right bottom corner of the Crop Tool – this should be set to Constrain to Image and in my case, 2 to 3 since I want a 4 X 6 image to print. There are corner tabs that can be pulled out to adjust the crop at this point and get the final look. Now do your adjustments in ACR and the final crop will be applied once it is opened in Photoshop or Elements. Similar steps can be done using the Crop Tool in Photoshop or Elements after exiting ACR.
Below is my original RAW file. As you can see, it was blown out a bit and not well composed. Note that sometimes the close-up cropping just does not work for the image. JPG’s usually do not have as much information as RAW files and may not have enough information to give a clean close-up crop. But it is still worth a try to see.
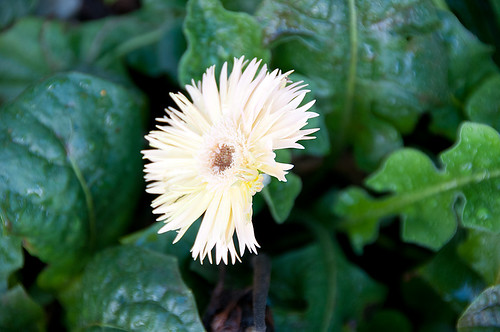
After applying ACR adjustments, the image was opened up in Topaz Black and White Effects plug-in using a Traditional Collection preset as a starting point. A Transparency of 1.00 was set to bring back the some color into the black and white image, and Quad Tones were added using the colors Black, Darker Blue, Light Blue and White to add the bluish tones. In Local Adjustments the center color was painted back in, details painted in, and a little dodge to add contrast.
Next time you think an image is just not going to work, try some different types of cropping. You might find a really interesting look!…..Digital Lady Syd
The Art Corner: Painting and Sculpture by Tassaert
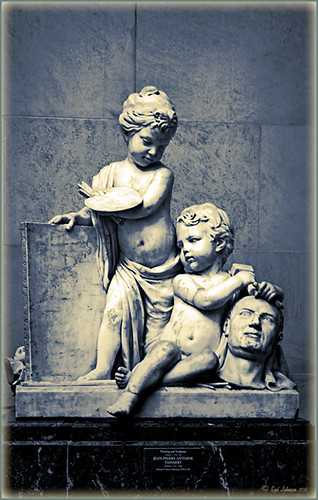
The above piece of artwork is found in the East Sculpture Hall of the National Gallery of Art in Washington, DC, and was sculpted in 1774-1778 in Paris by Jean-Pierre-Antoine Tassaert, a lesser-know Flemish sculptor who lived from 1727 to 1788. I found this piece to be very charming once you understand what the head in the artwork represents. The children are so detailed and sweet looking. From the National Gallery of Art’s website: “With Clodion’s Poetry and Music (also located in the same area of the Gallery), this allegory was one of four that were meant to bring to life the abstract concepts of the arts and sciences. They were commissioned by Louis XV’s finance minister Abbé (Joseph-Marie) Terray for his elaborate Paris residence (to decorate the dining room of his Parisian mansion). The subject was an appropriate one for Terray, since he also served briefly as the director of the king’s buildings with overall responsibility for the state of the arts in France. Painting, sculpture, music, and literature are celebrated by the young cupidlike figures in the two works here; other children carved by two other artists represented geometry, geography, architecture, and astronomy.” The last two pieces, Geometry and Architecture by Jean-Jacques Caffieri created in 1776 and Astronomy and Geometry by Felix Lecomte created in 1778 are located at the National Trust, Waddesdon Manor, Buckinghamshire, England. I think Tassaert’s sculpture is the best of the four in the series.
I processed this piece in the Photoshop plug-in Topaz’s Black and White Effects (see sidebar for link) using the Warm Tone I preset as a starting point, then adding a Quad Tone Effect (Color 1 Region was set to black with slider set to 0.oo, Color 2 Region set to R75/G78/B96 with slider at 142.5; Color 3 Region set to R222/G220/B172 with slider at 228.9 and Color 4 Region set to White with slider at 255.0 – these tones made a very nice soft contrast for this type of image). Some Local Adjustments using the Details and Burn Brushes were used on the sculpture itself. Finally a vignette was added and centered on the children to make them appear spotlighted. Be sure to create a preset if you like the results.
If you get a chance, try to go to one of the two places showing the sculptures discussed. They are very interesting pieces. I did not get an image of Poetry and Music so that is on my list for my next trip to the National Gallery of Art!…..Digital Lady Syd
Quad Tones in Topaz Black and White Effects Plug-in
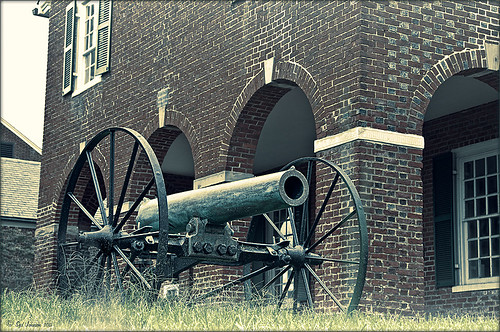 |
This image is of an old cannon on the grounds of the Historic Fairfax County Courthouse in Virginia. I do love NIK’s new Color Efex Pro 4 plug-in, but I keep going back to Topaz’s new Black and White Effects plug-in. (Hover over image to see original shot.)
The Topaz Black and White Effects preset I created gives a really nice sunny vintage feel and I think it is great for that historic look. To create the preset, select the Van Dyke Brown Collection Effect and Chamoisee Cyan preset as a starting point. The trick to getting this look is to set up in Finishing Touches the Quad Tones using these settings: Color 1 Region (R1 G1 B12) – 15.08; Color 2 Region (R63 G78 B85) – 143.9; Color 3 Region (R216 G211 B129) – 227.5; and Color 4 Region (R255 G254 B237) – 225.0. The sliders will need to be adjusted depending upon the image used. The Transparency setting was set to 1.00. For this image a small light Edge was added. Also, I was able to brush away the distortion over the back part of the left wheel using the Burn tool with a large brush and lightly clicking a few times, then using a smaller brush to run over the details just a bit. It totally disappeared! These brushes work wonders! To bring out the cannon a little more, back in Photoshop the image was sharpened using a High Pass Filter set to 9.1 Radius, a black mask was added to cover up the effect, and then by painting just the cannon on the mask, only it becomes sharp.
I really like the Quad Tone effect in this plug-in. Topaz has created a very nice video on how to use this section called “Quick Tip – Quad Toning Explored.” This may be the key to why it is hard to reproduce this look in other plug-ins.
For more information on this plug-in, see these related posts:
Fun Photoshop Blog: “Topaz B&W Effects Plug-In-A Real Winner!”
Tidbits Blog: “Topaz B&W Effects vs. Nik’s Silver Efex Pro”
Tidbits Blog: “Just Another Topaz Black and White Effect Example“
Get Rid of Those Power Lines Fast – with Paths and Spot Healing Tool!
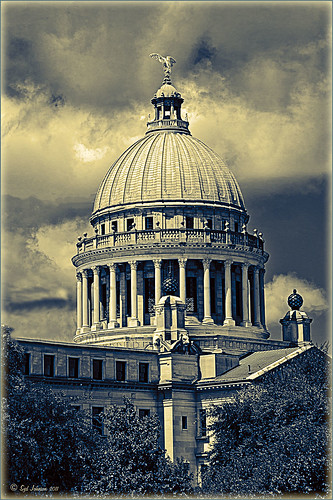
Since I like to shoot old buildings, and there always seems to be a never-ending batch of power lines in these images, here is the technique that works best to clean up those lines.This tip is from Bryan Hughes, Product Manager for Adobe Photoshop, called simply “Remove Power Lines.” Below is an example of an image of the State Capital Building in Jackson, Mississippi, that had some real problems with lines. Hover over the image to see the original power-lined shot. It was processed with Topaz’s Black and White Effects plug-in.
 |
Most of the lines were removed following the steps below:
- Select the Pen Tool (P).
- Go to the Path Panel and click along the wire setting anchor points as you go.
- Next select the Spot Healing Brush (J) – in Options Bar be sure that the Content Aware box is checked and that the size of the brush is roughly twice the size of the wire you want to remove.
- In the Paths Panel, click the “Stroke Path with Brush” icon at bottom of panel (2nd over from left).
- Once the wire disappears, delete the Work Path by clicking on the Trash Can. If the wire did not completely disappear, just paint with the Spot Healing brush over the exposed area to clean up.
This technique works great as long as you are not in front of areas like the building columns or details. I found in this case, still use the Spot Healing Brush on these areas – but just click once and move along. It will do an amazing job in most cases. Note: To get rid of the path line on the image, open Path Panel and press DEL to remove the work path.
In the image above, the only areas that caused a problem was where one line went through the large ornamental balls – these had to be copied onto another layer, transformed, and layer masked to line up. Otherwise, no major problems and very fast even though there were lots of power lines. The traffic light was cloned out, and street light was removed using Edit -> Fill – Content-Aware after selecting with Lasso Tool. The new Topaz Black and White Effects was used to create the color effect on this image.
Try using this tip – it is really fast and great to have in your arsenal of quick tricks…..Digital Lady Syd
Just Another Topaz Black & White Effect Example
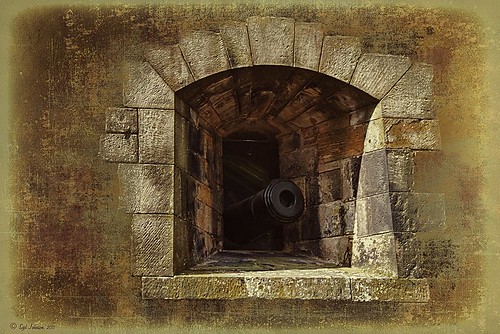
This image was taken at Edinburgh Castle in Scotland. I just keep playing around and finding new looks for images. The cannon and opening were selected and placed on their own layer, then a white layer was added below it, and a texture from ShadowHouse Creations Another Mixed Bag Texture Set (some really beautiful free textures on this site) was added. On several layers above and below using different colors from the image, various brush marks were added using Gorjuss Grunge Again brushes (unfortunately these are no long available), some really nice brushes to add a bit of color and detail. Create a composite and duplicate this layer. Next use the Topaz Black and White plug-in with the Opalotype Collection Effect and Yellow Lilac preset as a start. A lot of changes were made in the Conversion and Finishing Touches panels and Detail and Burn brushes were used to emphasize the stone. (See my Fun Photoshop Blog “Topaz B&W Effects Plug-in – a Real Winner!) and Tidbits Blog “Topaz B&W Effects vs. Nik’s Silver Efex Pro” for more information on this plug-in.) The plug-in layer was set to 52% opacity back in Photoshop. A Curves Adjustment Layer was added and some sharpening applied. It was a really fun image to do.
Hope you got an idea for creating a little different effect with this plug-in…..Digital Lady Syd
Topaz B&W Effects vs. Nik’s Silver Efex Pro
I did a blog on my Fun Photoshop Blog called “Topaz B&W Effect Plug-in – A Real Winner!” that touched on some of the differences of Topaz’s new plug-in and the great black and white standard plug-in by Nik called Silver Efex Pro 2.0. I thought I would just mention a few other things I noticed that are definitely different about the two programs.
Below is one of my favorite images for trying out new effects (the original has some basic flaws so I can see if the product will correct it) and was taken from the London Eye. Topaz B&W Effects was applied (hover over or click on image to see the Nik version).
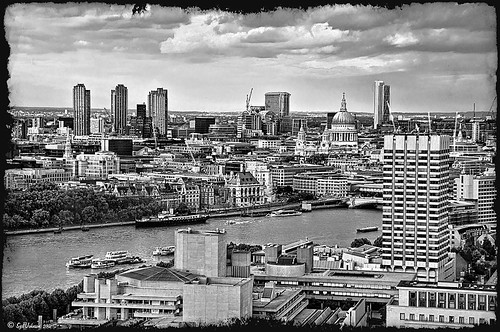 |
This is as close as I could get to making the two plug-ins look alike. The sky and some of the buildings’ contrast and detail are slightly different, but overall the results are pretty much the same. I am not sure which version I like best.
The image below I also used Topaz B&W Effects.
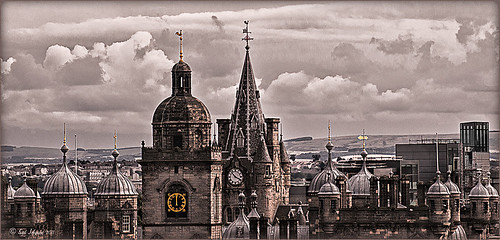
In this case, I could not duplicate the results in either NIK Silver Efex Pro 2.0 or Color Efex Pro 3.0. I liked the results and was surprised how nice the image turned out. By the way, I created for the Topaz plug-in a SJ-Cityscape preset for use in the Traditional Collection for both of the Topaz images – it can be downloaded here.
My final thought is to say that I think there is a place for both black and white plug-ins. Nik’s black and white plug-in is considered the best and I am not sure Topaz has created a better one, but it is very close. Topaz B&W Effects is definitely a great product since it does several things the other plug-in cannot do – and I really like that.
Well I hope you have fun (I sure am) trying out both of these excellent products. I plan on experimenting more with Topaz’s B&W Effects and will post more on it later……Digital Lady Syd
PS. Be sure to download the 30 day trial for Topaz B&W Effects – it is a fully functional trial to try out!


