
Handsome Fellow

Love how this beautiful Iguana looks up close – he lives at the Palm Beach Zoo in Florida and I think it may be a juvenile since it was so colorful. It took a lot of manipulating to get this image post-processed, but I really like the final results. Two images had to be stacked and aligned in Photoshop as some parts were more in focus in one image than the another. A black layer mask was added to the top image and just the parts needing to be sharper were added painted back in. Topaz Sharpen AI was tried on a stamped layer, but some bad haloing appeared so this filter was removed. On a stamped layer the Iguana was selected using a layer mask. On a duplicate stamped layer placed underneath the subject layer, the Tilt Shift Filter in the Blur Gallery was applied to smooth out the background. I had to reload PS2021 as the pins were not showing for these filters on my computer in PS2022. Not sure what the issue is here! Used Viveza to sharpen up photo and the new Spectrum Neo for the lighting-love the relight effect in this filter. Then a Color Lookup Adjustment Layer and two Levels Adjustment Layers (one for a vignette) were used to finish up. It took a while, but well worth effort……Digital Lady Syd
London Back When????
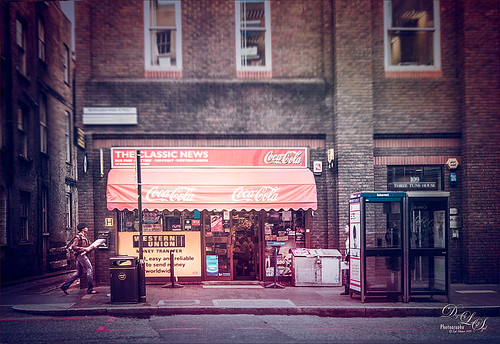
Just having some fun here with a technique that I learned from Colin Smith (he is a regular on CreativeLive and Photoshop guru) at PhotoCAFE. He created Photoshop Secrets: Photographic Effects videos using CS5, but there are some very good techniques in them. This one is from his Toy Camera video where he teaches you how to add some very nice light leaks. Oh yes, these are free to watch. This image was taken in London Borough High Street – loved the images I took of this store – so British looking!
I added a bit of a vintage feel in Lightroom by applying 2 Lil’ Owls (see sidebar for website link) At the Vineyard 7 preset before going into Photoshop. Then just followed Colin’s instructions. This image used both reddish and light green light leaks. Used the Blur Gallery Tilt Shift filter in CC2014 (Blur set to 14 pixels, Distortion 100%, and Symmetry turned on) to get a more blurred effect on the top and in the foreground of the image. The layer was converted to a smart object and the Camera Raw filter was opened. Two Radial Filters were used to direct the eye more to the left side of the image and on the storefront as the primary focal point, and on the person as a secondary focal point. The signage was also blurred slightly using the Blur Tool at 75% Strength on a separate layer since text really draws the eye. A Blue Solid Color Fill Adjustment Layer set to Color blend mode and layer opacity of 25% – I decided it looked more vintage using the cooler tones. A Curves Adjustment Layer was added for contrast. I just did not like how these old buildings were standing so finally got the buildings straight using the Perspective Warp Command and then the Crop Tool to clean up edges. That was it. Loved the effect!…..Digital Lady Syd
Digital Lady Syd Related Blogs:
How To Create/Use a Light Leak
Topaz Lens Effects Plug-In
Digital Lady Syd Reviews Nik Analog Efex Pro


