Straightening with Puppet Warp!
Who knew???? I listened to a short video by Bryan Hughes (the newest inductee to the Photoshop World Hall of Fame) who is the Product Manager for Adobe Photoshop. I had the fortune to attend one of his classes at Photoshop World a few years back and he was great. I picked up this trick listening to one of his videos, “Puppet Warp to Straighten Images,” that I thought would really work with this image. Below is the image I used the puppet warp on to straighten the columns in St. Giles Cathedral in Edinburgh, Scotland. Hover or click to see the original image before the puppet warp was applied.
 |
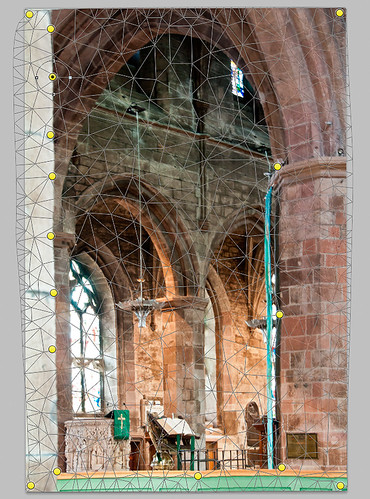
It is pretty easy to do but it did take me a couple of tries before I was able to get the lines straight. To access in Photoshop CS5, go to Edit -> Puppet Warp. Press Enter to return to Photoshop. To remove the crazy mesh lines as shown below, uncheck in the Options Bar.
Here are a couple of tips:
1) Convert your image to a Smart Object (right click layer and select Convert to Smart Object) – then you can come back and adjust your image if you do not like the results later.
2) Do what the video says, first place a pin at each corner of the image so you do not move the whole image when you adjust a new pin.
3) Find two places that you want to straighten and set new pins. Then drag or use the arrow keys and move very carefully to get the line to straight. If it starts to bend a little strange, set a pin down and put another one between to adjust the line more subtlety with the arrow keys again. Below is a screen capture of what the puppet warp on the image looked like right before I clicked Enter to set. See all the yellow pins down the left side – it took this many to get the column to line up right.

I believe Puppet Warp works as well as the Lens Correction Filter in many cases – it just takes a little practice to get it right. Give it a try, you might be surprised how good it works!…..Digital Lady Syd
PS. If you would like to know how I did the digital workflow for this image, see my Fun Photoshop Blog “Digital Landscape Effects with Nik Software.”
The Ruler Tool Rules in Photoshop CS5!
Have you ever gotten all the way through an image and suddenly realized that your horizon line is off just a tad and it starts driving you crazy? I try to straighten my images in Adobe Lightroom as a first step before I do anything, but there are times the horizon just gets messed up. I personally have never liked fixing horizons in Photoshop – I thought it was very cumbersome. Along comes CS5 with little known enhancement.
- First go to the Eyedropper Tool and select the Ruler Tool in the fly-out menu.
- Click and drag a line along the crooked horizon.
- Go to Options Bar and select the Straighten Button.
Voila, your horizon is straightened and cropped in one big swoop! By the way, if you do not want the image cropped, just straightened, hold down the ALT key when clicking the Straighten Button.

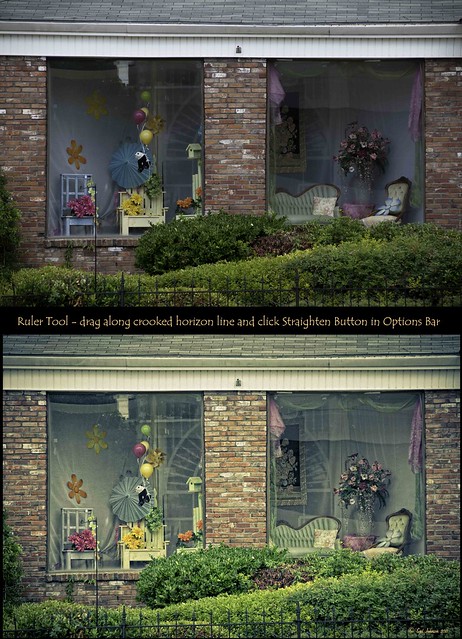
Sometimes it is not so obvious which is the horizon line as in the image above – it is easy to line up with the wrong horizontal or vertical line. Above is a before and after I used the Ruler Tool – it is a subtle but important difference. (Applied a Vintage preset in Adobe Lightroom to get the nostalgic look.) Hope this was helpful!…..Digital Lady Syd


