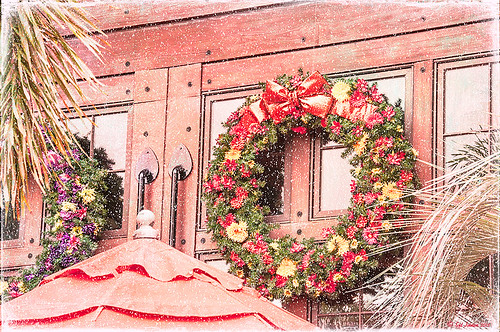
For this wonderful holiday, thought I would show this pretty image of wreaths from SeaWorld Orlando. Just a little basic processing in Lightroom before taking the image into Photoshop. Topaz (see sidebar for website link) Adjust 5’s High Key preset was applied with the Overall Transparency set to .24. Next Topaz Detail 3 was applied using the HDR Enhancement II preset. French Kiss’s Artiste Chamante texture was applied and set to Overlay at 100% opacity. My free Snow1 Overlay was next applied and set to 75% opacity. French Kiss’s Glorious Grunge Edging Overlay was applied next and a Solid Color Adjustment Layer set to a light pink was added. Since the edging did not seem to show up real well, it was duplicated along with the Adjustment Layer. That was all that was done and I love the final effect – the umbrella really added to the shot. Hope all are having a wonderful week!…..Digital Lady Syd
12/25/2012 | Categories: Photoshop Filters, Textures | Tags: Adjust, Detail, filters, free overlay, French Kiss Overlays, French Kiss Textures, plug-in, plugins, SeaWorld, SeaWorld Orlando, Snow Overlay, Topaz Adjust 5, Topaz Detail 3 | Leave A Comment »
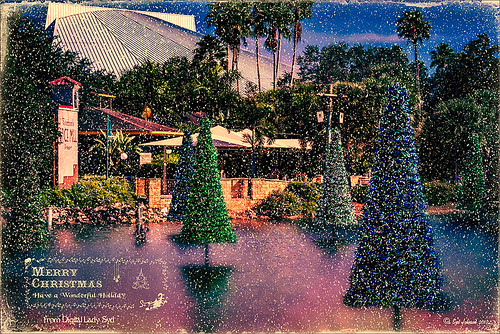
These “floating” trees were in the pond area at SeaWorld Orlando in October and they looked really strange. I decided to spruce them up a bit and give them that holiday feel – these must have been the first decorations they put up. I have said it before and I will say it again – whenever I cannot figure out something interesting to do with an image, OnOne’s (see website link on sidebar) Perfect Effects usually has the answer. In this case two effects were stacked: Nicely Toasted preset from the Vintage group – set to Hard Light at 74% opacity and Warm Vintage also from the Vintage Group with a few changes to Brightness (-45), Contrast (-40), and Darken Blend Mode with Strength 58. A Composite Channel Curve was set (In157/Out 138). My free Snow1 Overlay was added along with my free Merry Christmas PNG Overlay using an Outer Glow layer style set to a bluish color (Blend Mode Normal, Opacity 39%, Spread 8%, and Size 215 px) – use this trick to to make your text and overlays stand out if on a busy background. Added text layer for my name, and added French Kiss Glorious Grunge Edging Only with the grunge erased from the middle. All of these overlays used a Solid Color Adjustment Layer set to a soft cream color sampled from the roof of the building. (Layer -> New Fill Color -> Solid Color and check Use Previous Layer to Create Clipping Mask for each overlay). The text layer used the same color. A Curves Adjustment Layer was added and the mask filled with black – with a 30% opacity white soft brush, the areas I wanted affected were painted back in the mask. That was it. Hope you can use a few of these tricks to make some nice cards…..Digital Lady Syd
Digital Lady Syd Related Blogs:
Where to Find Those Cool Free Christmas Card Templates?
Free Christmas Card Vectors and Brushes
Beautiful Christmas Flowers
Some Free Christmas Overlays to Spice Up Your Christmas Cards
12/18/2012 | Categories: Photoshop Filters | Tags: Free Overlays, French Kiss Textures, OnOne Perfect Effects, overlays, Perfect Effects, plug-in, plug-ins, plugin, SeaWorld, SeaWorld Orlando | Leave A Comment »
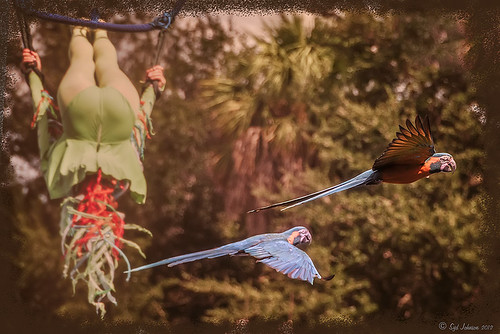
I was so busy trying to shoot these beautiful McCaws in sharp detail on my camera (Blue Horizons Show at SeaWorld-Orlando) that I did not notice what else I was shooting. What a surprise! Although I must say I did a pretty good job of catching the birds while they were zipping by pretty fast. The birds even look like they are laughing!
After basic processing in Lightroom, I decided the image needed a soft background feel as it was really busy and the birds were getting lost in the background. So I went back to one of my all time favorite filters, Nik Color Efex Pro 4‘s Film Efex-Vintage, to get the look I liked. First the Darken/Lighten Center filter and Brilliance/Warmth filter were applied – both of these filters I use a lot as they always give nice results. But one of my very favorites is the Film Efex-Vintage filter – there are so many options with this one filter that it is amazing. This time Film Type 11 was chosen with the vignette turned off. It turned this image into these beautiful brown tones. Clean up, a Curves Adjustment Layer to add just a little contrast, a Photo Adjustment Layer set to Cooling Filter 80 at 43% density (applied to just the birds by filling the layer to black and painting back in the birds in white), Noiseware‘s Default preset, and a soft painted layer was used to slightly soften the trapeze artist. My Soft Sparkle Overlay Frame was added with a Color Fill Adjustment Layer clipped to it to change the color to a dark brown. To see other results of using the Film Efex-Vintage filter, check out some of my older blog links below……Digital Lady Syd
Digital Lady Syd Related Blogs:
The New Film Efex-Vintage Filter From NIK CEP 4
Loving SeaWorld!
Hawaiian Bliss!
Nik Color Efex Pro 4 Just Does It Right!
12/06/2012 | Categories: Photoshop Filters | Tags: Color Efex Pro, Film Efex Vintage, Free Borders, Free Frames, Imagenomics Noiseware, NIK Color Efex Pro 4, Noiseware, SeaWorld, SeaWorld Orlando, Soft Sparkler Overlay Frame free download | Leave A Comment »
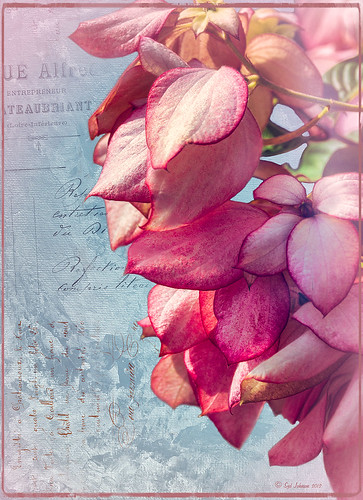
I broke down and bought some French Kiss textures and overlays. They have such beautiful real painted textures that they caught my eye. Also the overlays and brushes are from vintage French books and letters – creates a very unique look. I hope to figure out how to make some of my own overlays when I get a chance. In the meantime I thought I would post this image of pink bougainvilleas that I shot at SeaWorld-Orlando. This image used Artiste Collection Impasto Overlay II texture and Artiste Savoir Faire Overlay twice with parts of the text turned in different directions. Just layer mask out parts you do not want showing. You should check out the French Kiss website for several free textures and overlays and try this technique out. There are also some good texture tutorials on how to this look. Very beautiful results very quickly! For more tutorials that used French Kiss products, see my blogs listed below. Have fun!…..Digital Lady Syd
Digital Lady Syd Related Blogs:
A Vintage Butterfly Postcard Effect
Artistic Daisy!
A Little Hollywood for My Butterfly Model
Getting a Nice Painterly Landscape Effect with Topaz Simplify and Texture
11/13/2012 | Categories: Textures | Tags: French Kiss Overlays, French Kiss Texture, Overlay Texture, SeaWorld, SeaWorld Orlando, Textures | Leave A Comment »

An easy way to get a painterly look. This image is at the entrance to SeaWorld in Orlando, Florida, and is a great place to take a shot – very Disneyland-like colors! This look was created by doing these things:
1. Applied Topaz (see sidebar for website link) Simplify 4 using the Painting V preset set to transparency to .28
2. Next French Kisses Artiste Fauve Rainbow texture was added – although any painted texture you like could be used. A Hue/Saturation Adjustment Level was clipped to the texture layer (by ALT+clicking between the layers) and Saturation was set to -100 to desaturate the texture so it can be layered on top of the image so the color in the texture does not show up on the image. The texture blend mode was then set to Hard Light at 34%. (Try different blend modes to see which looks best on your image.)
3. A Levels Adjustment Layer was added to brighten the image as the texture tends to darken the midtones.
4. Topaz Detail 2 was applied to sharpen the image using the Creative Detail Accent preset with some adjustments to the three color sliders and the saturation slider.
That was it and you get this nice painterly effect!…..Digital Lady Syd
Digital Lady Syd’s Related Blogs:
Topaz Simplify and Lens Effects Saves an Image!
Digital Lady Syd Reviews Topaz Simplify 4
Using Topaz Simplify for That Artistic Feel!
11/01/2012 | Categories: Photoshop Filters | Tags: Detail, painterly effect, Sea World, SeaWorld, Simplify, Texture, Topaz Detail 2, Topaz Simplify 4 | Leave A Comment »
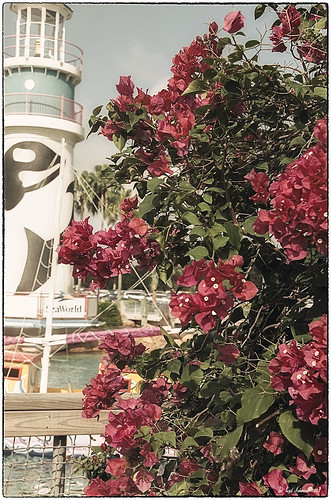
Just a great start to a fun day at SeaWorld-Orlando. This is what you see right after entering the theme park. The lovely red flowers are red Bougainvilleas. In Lightroom three images were used in PhotoMatix’s Merge to 32-bit HDR program. Then the resulting TIFF image also was processed in Lightroom 4.2 before it was opened up in Photoshop CS6. Nik Color Efex Pro 4 plug-in was applied stacking these filters: Film Efex: Vintage using Film Type 4, Glamour Glow, Midnight using an overall Opacity of 40%, and Image Border Type 4. A Curves Adjustment Layer was added to adjust contrast and the Sharpen Tool was used on the blooms. I really love the lighthouse with the whale image……Digital Lady Syd
Digital Lady Syd Related Blogs:
Digital Lady Syd Reviews Topaz DeNoise 5
10/16/2012 | Categories: HDR, Photoshop Filters | Tags: Color Efex Pro, NIK Color Efex Pro 4, PhotoMatix Merge to 32-Bit HDR, Sea World, SeaWorld | Leave A Comment »


