
Bathing Beauties
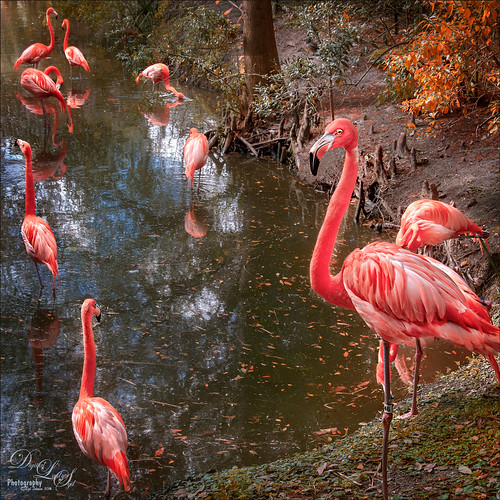
These birds look just like bathing beauties stepping into the water daintily. I just love Flamingos – they are so much fun to watch and photograph. Took this image of some Flamingos a while back at the Jacksonville Zoo and did not think it was that great. After watching a couple videos on On1 Photo Raw 2018 (see sidebar for website link), I decided to give it a go and see if I could get this image to look better and I was pretty pleased. When I did a Fun Photoshop blog on sharpening (see my Comparing Some Sharpening Techniques blog), I mentioned how good both On1 Effects Dynamic Contrast and Sharpening filters were. Well once again, I am pretty pleased with the results. If you have On1 software, check out Colby Brown’s video on Top 5 Tips for Wildlife Photography where he discusses how to use these filters. Then the rest of the image was post-processed in Photoshop. A stamped layer set to Hard Mix blend mode at 6% Fill Opacity was used to add an overall sharpening to the image (this was also mentioned in my sharpening blog). A Spotlight Layer set to Overlay blend mode and white was painted on the feathers (see my How to Add a Spot of Light blog.) Then a little vibrance was added using the Channel Mixer Adjustment Layer – learned this nifty trick from Denny Tang in his Vibrancy Masking Photoshop Tutorial video. Nik Viveza 2 was used to direct the focus, a Black and White Adjustment Layer set to Luminosity blend mode at 36% layer opacity, and a darken/lighten layer to emphasize the eyes and beaks a little. and a Matt K vignette (see my How to Create a Subtle Vignette blog). I might add that I used Artistic Profile 03 in the new Lightroom update to begin working on this image. I love it when I try out a new technique and it works really well……Digital Lady Syd
Castillo de San Marcos
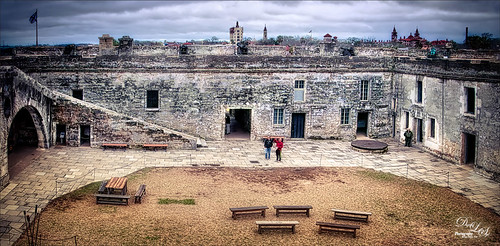
This image of Castillo de San Marcos, the old fort in St. Augustine, Florida, was built in 1672. The weather was a little overcast but many famous building spires can still be seen in the background. A lot was done to this image, mainly starting the HDR process in Aurora 2018 (see sidebar for website link) using three-images, and then in Photoshop, On1 Photo Raw 2018 Develop module was opened to increase Detail. The PS Adaptive Wide Angle filter had to be used to straighten the walls of the structure. (See my How to use the Adaptive wide Angle Filter blog on how to do this.) What a wonderful historic place to explore in the US…..Digital Lady Syd
Deer on a Fountain
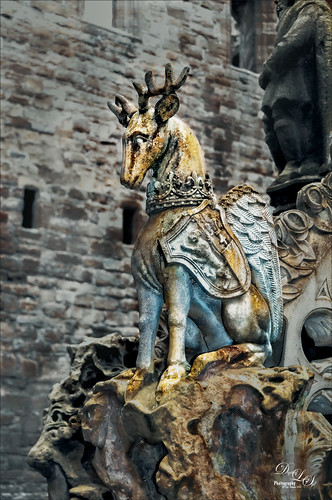
This image is of a a fountain built in 1538 by James V at the old Linlithgow Palace in Scotland – it has been known to flow with wine on a few occasions. This actual center fountain is not this colorful, but these colors came from the image itself so I imagine at some time it was quite beautiful. I loved the regal look of this deer statue on the fountain. On1 (see sidebar for website link) Photo Raw Effects 2018 made this image really nice and sharp – used Overall Settings filters of Dynamic Contrast (which really adds the nice detail to just the deer), Glow (47% opacity) and Color Enhancer, and Local Adjustments of Vibrance to just the deer at 57% layer opacity. On a stamped layer, Topaz ReStyle (see sidebar for website link) Zambezi Zest preset was applied. Nik Viveza 2, a Black and White Adjustment Layer and several Curves Adjustment Layers were used to get the final look. On a New Layer a white Spotlight Effect was added to the deer head to draw the eye. That was it. Wonderful place to visit and explore!…..Digital Lady Syd
Posing!
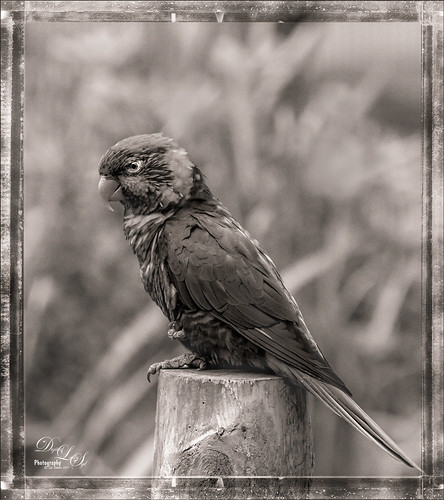
In honor of a sweet little brown bird that was caught in my screened-in porch since Wednesday (he actually trotted out the door once we calmed him down), I decided work on a bird image just to see what a colorful would look like in a basic brown bird look. This image was first processed in On1 Photo Raw 2018 (see sidebar for website link) and then finished up in Photoshop. Followed Steven Dempsey’s short video called Using Color Temperature with B/W Images in On1 Photo Raw 2018. Followed most of the steps using my own settings of course. Then in Photoshop’s Camera Raw filter, applied one of my favorite Split Toning presets, Nick Brandt’s Animal Sepia (Highlights Hue 23 and Saturation 6 and Shadows 41 and Saturation 6). Several Curves Adjustment Layers were used on the eye and beak. Lightened the background slightly with another Curves Adjustment Layer and painted the bird back in the layer mask. I think the On1 workflow for this type of image was very good……Digital Lady Syd


