
Sneaking a Quick Snack

Here is Gulliver, one of my favorite animals at the Jacksonville Zoo. He loves to perform for all the visitors and is always available to entertain you. Just thought I would give him a little bit of Joel Sartore, the famous National Geographic photographer) clean classic style. His PhotoArk images are currently being displayed all around the Jacksonville Zoo which was a real treat. A perfect selection of the subject is essential to get this effect. It took me a bit of time to get the edges just the way I wanted them with no discoloration from the green background – used a brush with sharp edges and cloned away the bad parts. (See my How to Save a Photoshop CC2018 Regular Brush as a Different Tool blog which tells how to create this fur brush.) Then a very small blender mixer brush was used to fix some of the hairs around his body. The other crucial part of this type of image is getting the lighting on the animal correct. I had taken this image through a plastic smeary glass with some glare, so the contrast had to be really adjusted to get a clear look. It was pretty labor intensive but worth it when you get a final image you like…..Digital Lady Syd
Wanted: Female Interested in Long Relationship

This handsome specimen of a Vulture (he really is not that grumpy when you meet him) was really fun to paint. A couple of textures were used, one I painted in Corel Painter and another containing a heart bokeh effect, an Evelyn Flint Flickr Texture. The bird was separated from his background and then my newly created Flat Fan mixers were used to paint in his feathers. Some spotlight effect was used on his face and the text font is called Parkway Lush. Lots of fun to do!…..Digital Lady Syd
Meet the Super-Model Parrot
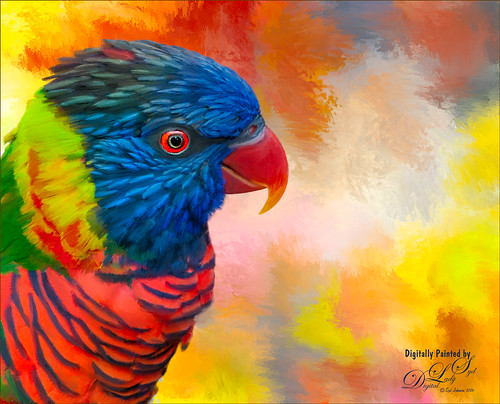
Just a simple little painting of a Rainbow Lorikeet (parrot) taken at the Jacksonville Zoo a few months ago. These little birds were so tame and would let you get so close to take pix – real-life bird super-models! I really enjoyed painting this happy little guy and I tried out a new Photoshop brush to paint him. The background is one I painted in Painter to match the colors in his plumage…you have to consider these kind of things when working with super-models! Used Topaz (see sidebar for website link) ReMask to select and then applied the mask once happy with the selection in PS. It was found in a large free set of brushes from Alex and this brush was named 扇形扁平混合器 (which means Flat Fan Mixer). Unfortunately I cannot find the batch of brushes to share. Just changed the Angle in the Shape Dynamics section of the brush to paint with the brush and change the size to fit. The duplicate texture was added on top and set to Multiply at 53% layer opacity. An Exposure Adjustment Layer was used to create sharp looking painted eyes. And that was it. Try out the brush – you will really like it as a nice blending mixer!…..Digital Lady Syd
A Little Brush Fun!
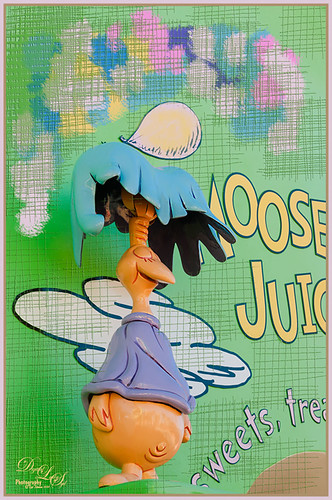
This funny character was part of a sign on a candy store in Dr. Seuss Land at Universal Studios-Orlando and looked like it would be fun to just play with it. Since he was on such an overwhelming green background, I added a new layer and just started using a Mixer Brush to add different blotches of paint to the image. Then on a New Layer above, a brush that I had created was used for the cross hatching effect- just liked the look of it once I added a Bevel and Emboss Layer style to it and set the layer opacity to 55%. To get the hatching off the lettering, a layer mask was added, but first the “Layer Mask Hides Effects” check box was checked in the Layer Style dialog. That way the hatching could be carefully removed from the figure and lettering. The Sharpen Tool was used on the character’s face. A stamped layer (CTRL+ALT+SHIFT+E) was created on top and my free SJ Mid Size Double Edge Frame was added – colors were sampled from the image. This a really cute image was jazzed up a bit by just adding some creative brush strokes!……Digital Lady Syd
A Splash of Color
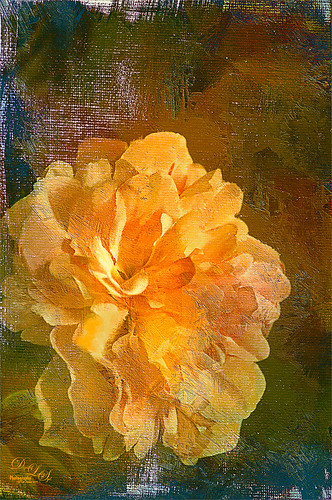
Love the texture on this flower. Lightroom basic changes, Topaz (see sidebar for website link) Detail 3 for sharpening the focal point, Mixer Brush painting on flower – Fays Signature Pastel Blender 02 on image above, Curves Adjust Layer for contrast, Painted Texture‘s Dark Naples Yellow texture twice using Linear Light and Multiply blend modes. A composite layer (CTRL+SHIFTS+ALT+E) was created and turned into a Smart Object. In the Smart Object the blend if This Layer dark tab was adjusted so I could let a little color through. A turquoise blue Color Fill Layer was added underneath the Smart Object so the color shows through. High Pass Sharpening was the last step. I love the colors in this texture!….Digital Lady Syd
A Dreamy Rose!
Really enjoyed making this image. This yellow rose, a free image from stock.xchng by MEJones, was used to begin my painting. Painted Textures Parisian Pool texture was used. The edges of various splotches of color on individual layers were blended in using a Mixer Brush – not sure which one, but the Adobe Chalk Brush with a Shape Dynamics set to 19% would work fine. This brush can be used both as a regular brush and a Mixer Brush. The Camera Raw Filter was used to adjust the color using the HSL sliders. A Curves Adjustment Layer was used to add a little contrast. That was it but lots of fun to do!…..Digital Lady Syd
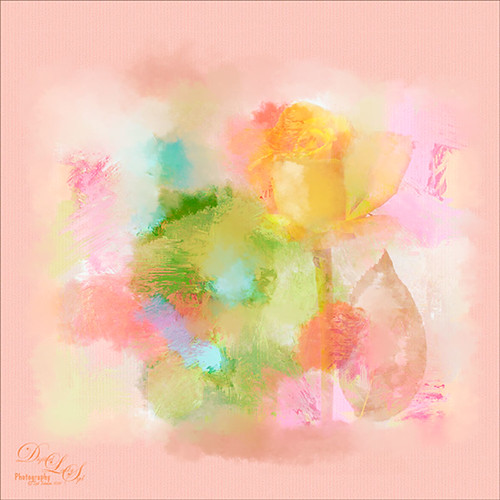
Painting for Spring
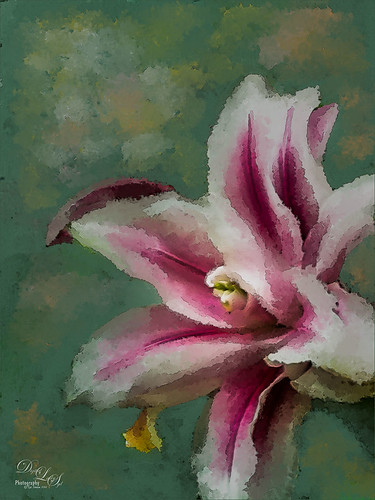
Enjoying learning to use Photoshop to paint. Painted the flower using a Pastel Mixer Brush, then on another layer painted out the background and created a green background with same brush. Added some Mixer Brush splotches of color to add some light interest to the background. Added a Curves Adjustment Layer for contrast and that was it. I really love the spring-like colors!…..Digital Lady Syd
Using Old Wallpaper for a Vintage Look

Just another pretty image of my zinnias growing in my front yard. In Lightroom a preset I created from Jack Davis’ video (see my Can You Get a Painting Look With a Photoshop Action? Jack Davis Can! blog for link) – this was another part of the video where he shows you how to make an Antique Looking preset in ACR, but it can be done as easily in Lightroom. (It is also in his Facebook link for Lightroom presets download.) Once brought into Photoshop, a New Layer was created and the Mixer Brush was pulled out to define the leaves more, especially the ones in front. Fay Sirkis Four Season Classic FX Highlilghts #1 was used along with her 03 Palette Knife Blender brush, downloaded from her webinars on the NAPP website. She just completed a series of four videos where she goes over each season – wonderful videos if you want to learn to paint! Eventually this layer was set to 82%. On top of the Mixer Brush layer, Caleb Kimbrough vintage wallpaper2 was added (he has several free wallpapers to download) and set to Darker Color blend mode at 39% opacity. A layer mask was added and the flowers painted back into the image. Next an Overlay created from Kim Klassen’s Cloth & Paper texture Touch was applied and set to Multiply blend mode. A medium green Color Fill Layer was added, clipped to the overlay, and set to 70% opacity to add a little green tint to the edges. A Selective Color Adjustment Layer was added to get just the right color of red/magenta in the image. Then a Vibrance Adjustment Layer was added and set to +100 to add back a little color. The last step involved sharpening using a High Pass Filter, setting the mask to black, and painting back just the center of the flower and little bit of the wallpaper. Really loved the final vintage feel to the image……Digital Lady Syd


