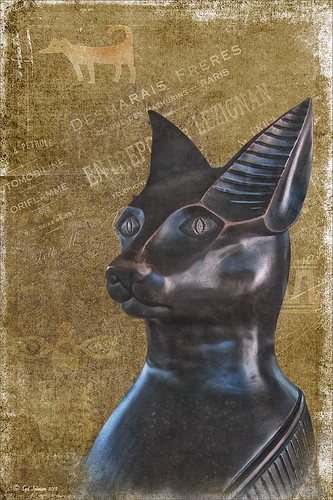
This beautiful cat statue was located outside the door to the breakfast buffet at the Hilton Waikoloa Village on the Big Island in Hawaii. After initial processing in Lightroom, the image was brought into Photoshop where French Kiss Bohemian Texture, a free download, was added behind the cat image. A black layer mask was added to the cat layer and the cat image was painted out with a white brush – it was refined by going into the Properties panel with the mask selected and clicking on the Mask Edge button to smooth out the selection. French Kiss Grunge No1 Chateau (a free download of PNG brush overlays) was placed on a layer above the texture but under the cat, and a brown Solid Color Fill Adjustment Layer was clipped to the layer (go to Layers -> New Layer -> Solid Color Fill and check Use Previous Layer to Create Clipping Group). The overlay was set to 69% opacity. Just above this layer another French Kiss overlay – Bohemian Template Overlay was applied (in set with Bohemian Texture download) with another Solid Color Fill Adjustment layer added using a soft cream color. The overlay texture was set to 48% opacity. Next above the cat image, French Kiss Artiste Impasto Texture (not free) was set to 32% to get a textured look on the cat – my own free gray Cat Painting Texture would probably work just as well. Now what was really neat is how I got the interesting animal and markings effect – they are from Tangaroa Dingbats font. By adding a layer style (double click on the layer) and selecting the Inner Glow with the default settings, and Pattern Overlay using my free Digital Lady Syd’s Smudge Texture as a pattern set to 258% scale, you get the soft orange-brown look. (To create a pattern from a texture, just open it up in Photoshop and go to Edit -> Define Pattern and it will appear at the bottom of your patterns list.) A separate text layer had to be created for each of the three objects selected and each text layer was set to approximately 30%. The Sharpen Tool was used on New Layer to sharpen the eyes just a little and that was it. I think it turned out pretty nice and it was a lot of fun to create. Try out using dingbats in your images to add a little different look to a texture…..Digital Lady Syd
01/15/2013 | Categories: Textures | Tags: dingbat fonts, dingbats, Free Textures, French Kiss Overlays, French Kiss Textures, Hilton Waikoloa Village | Leave A Comment »

This beautiful image of a Buddha statue from Thailand was taken at the Hilton Waikoloa Village on the Big Island in Hawaii. It was a much larger picture that was cropped in close to the sculpture to make a much more interesting image. The original large image was a 3-shot HDR first processed in CS6’s Merge to HDR as a 32-bit tiff file and then it was brought back into Lightroom for Basic slider adjustments. Back in CS6, I decided to crop. Next it was processed using Topaz photoFXLab (see sidebar for website link) – one of my favorite new plug-ins. It has a Dynamic slider in the Adjustments tab that really gives great detail without being over-the-top. The Contrast and Exposure were also adjusted. Sharpening and a Curves Adjustment Layer finished up the image……Digital Lady Syd
Digital Lady Syd Related Blogs:
Digital Lady Syd’s Review of Topaz photoFXlab v1.1
Using photoFXlab v1.1
09/20/2012 | Categories: Art Tidbits, HDR, Photoshop Filters | Tags: 32-bit HDR, Hilton Waikoloa Village, photoFXlab, Sculpture, statue, Topaz photoFXlab v1.1 | Leave A Comment »
 |
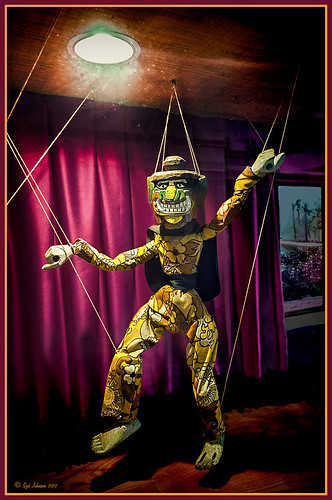
Here is another one of the beautiful puppets that lined the one-mile walkway between hotel accommodations and restaurants at the Hilton Waikaloa Village on the Big Island in Hawaii. To see original unprocessed raw file, hover over image. The image was first processed in Lightroom and opened up directly into the new Topaz photoFXlab (see sidebar for website link). Inside the plug-in the layer was duplicated and Adjustment tab sliders set using the wonderful Dynamics slider at 34. A stamped layer was created and the Plugin tab Black and White Effects preset (see my blog Hibiscus Flowers – I Love to Photograph Them! for settings) was applied to get a more calm darker feeling to the image. Back in photoFXlab the layer was set to the Darken blend mode. Another stamped layer was created and the Detail brush set to maximum strength was used to sharpen up the puppet only. Exit and the changes appeared on a TIFF copy back in Lightroom. Since I now had two Tiff files, they were highlighted to Edit In – > Open as Layers in Photoshop. The Topaz adjusted layer on top was set to 89% opacity. The difficulty with processing this image involved the terrible glass reflections. I decided that I needed something more so I opened up just Topaz Adjust and added a vignette effect just on the upper clown and light area – a little detail was added overall also. Back in Photoshop the image definitely need some noise reduction so Topaz DeNoise 5 was opened and the Overall Strength set to .18 – that’s all it needed! Next a Curves Adjustment Layer was added to darken some of the reflection – the clown was painted out to give more of a spotlight effect to it. A vignette was created around the image and selectively painted areas to further distract from the glass issue. A High Pass filter set to Overlay blend mode was used to sharpen the image – a black mask was added and the clown painted back to just sharpen that area. The last step was adding my Layer Style frame (see my blog Digital Lady Syd’s Free Layer Style Frames). There was also a lot of clean up on this image – more than I normally do. It amazes me how a pretty plain image can be brought to life by using several of Topaz’s wonderful plug-ins!…..Digital Lady Syd
Digital Lady Syd Related Blogs:
Using photoFXlab v1.1
InstaTone in photoFXlabs – Great Fun and Great Results!
09/06/2012 | Categories: Art Tidbits, Photoshop Filters | Tags: Color Efex Pro, Dynamics slider, Hilton Waikoloa Village, NIK Color Efex Pro 4, Nik Viveza 2, photoFXlab, Topaz photoFXlab, Viveza | Leave A Comment »

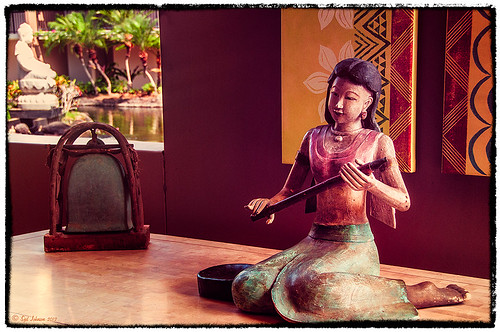
I really loved how this image captured the Buddha statue through the window with the musical sculpture and bell that is protected in the the 1-mile walkway that goes between the hotel buildings at the Hilton Waikoloa Village on the Big Island in Hawaii. I do not have any information on these pieces of art, but they are very interesting. Nik Color Efex Pro basically brought this image to life with four filters stacked: Film Efex Nostalgic using Film Type 4; Pro Contrast to brighten it up a little; Darken/Lighten Center placing the center towards the window; and Image Borders Type 12. A Curves Adjustment Layer was added back in Photoshop and that was it. The texture in the girl’s skirt is beautiful and the wall art was nice too!…..Digital Lady Syd
07/26/2012 | Categories: Art Tidbits, Photoshop Filters | Tags: art, Color Efex Pro, Hilton Waikoloa Village, NIK Color Efex Pro 4, Sculpture | Leave A Comment »

