How to Pop a Picture in Lightroom 5

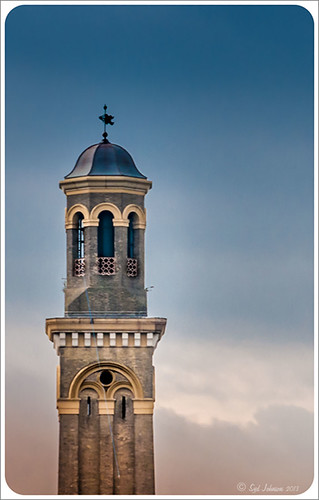
This image of a pretty cupola taken in London uses several of the new Lightroom 5 features. In fact nothing was done in Photoshop to this image. First it was cropped down – only had the very top as shown but it needed to be composed. Then the basic sliders were set just like in previous versions of Photoshop (see my How to Use Adobe Camera Raw (ACR) or Lightroom 4 Quickly blog for tips on this). The HSL panel was used to set the color. Two Graduated Filters were added – one for the blue sky (Temp -22 and Exposure -1.18) and one to bring out the pretty sky and cloud effect (Exposure -0.42, Highlights -60, Shadows 87, Clarity 55 and a light orange color Hue 28/Sat 59). Some Sharpening was done with an Adjustment Brush (Sharpness 100, Shadows -68, and Clarity 100) and the detail painted over. A Radial Filter was applied to just the the cupola – used -1.18 Exposure with the Invert Mask checked. A Post-Crop Vignetting was added using Highlight Priority Style, Amount +100, Midpoint 18, Roundness -100, and Feather 0 – this gives the nice white frame. That was all that was done – a very plain image turned out to be quite striking!…..Digital Lady Syd
Digital Lady Syd Related Blogs:
Lightroom 5′s New Upright Adjustments Section
My Favorite Adobe Lightroom 5 Features
Lightroom 4’s Graduated Filter – Check it Out for Landscapes!

I have never used Lightroom’s Graduated Filter much as I usually do that kind of adjustment in Photoshop with the Gradient Tool on a mask. Recently I came upon a very interesting blog/videos, Adobe Photoshop Lightroom 4’s Graduated Filter Controls by David Marx, that discussed how much improved the Graduated Filter is and how to use it get some great landscape effects.
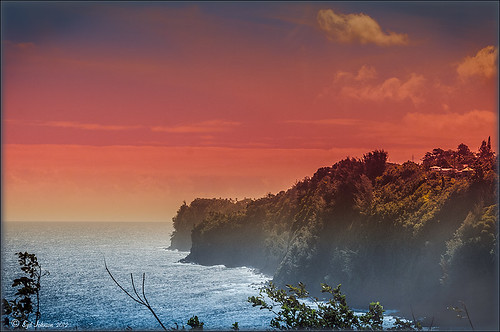
The image above is on the way to Hilo from Waipi’o Valley and shot through a car window???? Still thought it would be a good opportunity to see what I could do with it using this technique since the valley and water were so pretty and the clouds in the sky were a nice addition. This image was first tweaked in Lightroom globally, then 5 graduated filters were added, four for the sky colors and one for the water color coming up from below. I used the Color Wash technique on all four sky filters created, making some quite small to give a nice sunrise feel to the image. Finally it was taken into Photoshop where a layer using BBs Fogs and Mists Brushes were used to create an early morning foggy feel was added (and to cover up some uneven lighting on the valley walls) and for some noise reduction using Imagenomics Noiseware‘s Default setting (you could use Lightroom Noise Removal for a pretty nice result). Here is a small image of the original so you can see what the Camera Raw file looked like:

Once again, a pretty bad image was turned into something that really reminds me of my trip to the Big Island, even though it is not exactly as I shot it???? If you own Lightroom 4, definitely take a look at these very easy to follow videos – the results are quite amazing…..Digital Lady Syd


