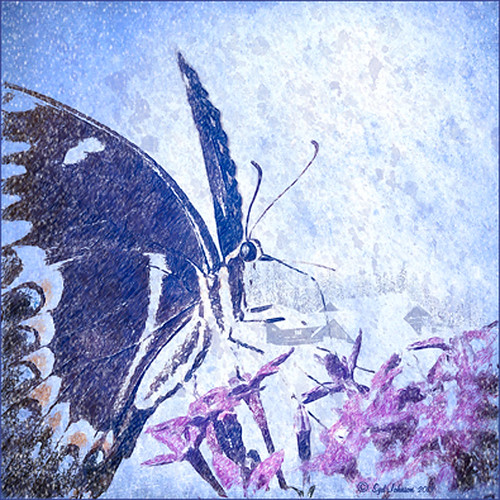
Snowy Butterfly with Akvis Sketch

This is a female Palamedes Swallowtail Butterfly (the males are smaller and blacker in color) that was so much fun to photograph – my favorite type of butterfly to photography as they as not so skiddish to shoot. I decided to try out the Akvis Sketch plug-in that I recently reviewed. (See Digital Lady Syd Reviews Akvis Sketch Plug-in for Photoshop.) To get this image, first I opened up the image in Photoshop. To sharpen the image Calvin Hollywood’s Freaky Amazing Details action was applied – see my Tidbits Blog A Little Hollywood for My Butterfly Model to get information on how to do this and the action download link. A composite was created on top (CTRL+ALT+SHIFT+E) and Akvis Sketch was opened – a preset I created before was applied, (Used the Classic style, Strokes section Color Pencil was set to 63, Edge section Edge Width was set to 56 and a Good Colored Sketch preset was created.) Next a Shadowhouse Creations Vintage Soft Grunge V27b texture was applied. A New Layer was added on top where French Kiss Spatter4 Brush 22 was set to 5000 px at 30% brush opacity to create the soft purple splotchy layer. Next Shadowhouse Creations free Cabin/Trees brush was applied at 49% layer opacity. The top layer used my free SJ Snow2 Overlay slight blur at 100% layer opacity. Anyway just another way to have fun with Akvis Sketch…..Digital Lady Syd
02/28/2013 | Categories: Photoshop Filters, Textures | Tags: Akvis Sketch, Calvin Hollywood, Free Snow Overlay, ShadowHouse Creations Textures, Sketch, Snow Overlay, Spatter Brush, Textures | Leave A Comment »
A Fairytale Gazebo

As promised, here is a totally different rendition of the same image I posted earlier. (See Where Am I?) This was just plain fun to do. Below are the boring details – it actually took me along time and a lot of manipulating to get this result but I really love how it turned out. The soft diffused look really adds the fairytale quality to the image. Bottom line, just keep playing with an image and you can come up with some surprising results…..Digital Lady Syd
Basically I got the crazy pastel colors by applying Nik Viveza 2 (here are the settings which produced a rather green and pinkish layer: Brightness 86%, Contrast 100%, Saturation 86%, Structure 100%, Shadow Adjustments -100, Warmth -2%, Red 17%, Green -9%, Blue 22%, and Hue 39 degrees). Then Control Points were added in various areas to adjust tweak the color. A composite layer was created (CTRL+ALT+SHIFT+E) as the top layer. This layer was duplicated and Topaz (see sidebar for website link) photoFXlab was opened. What I listed in my Photoshop note attached to the image is in parentheses. (Duplicate layer. Plug-ins Tab was selected and Black & White Effects was opened. Used my SJ White Flower settings preset which has these settings: Basic Exposure – Contrast 0.16, Brightness -.04, Boost Blacks -.12, and Boost Whites .20; Adaptive Exposure – Adaptive Exposure 0.26, Regions 8, Protect Highlights .06, Protect Shadows .02, Detail 1.80, and Detail Boost .96; Color Sensitivity – Yellow .22, Green -.04, Cyan .01, and Blue .01; Quad Tone – Color Region 1 Black and slider at 0.00, Color Region 2 Red 23/Green 25/Blue 86 at 119.4, Color Region 3 Red 113/Green 150/Blue 170 at 187.8, and Color Region 4 White at 255.0; and Transparency 1.00. Diffusion section was checked and Softness was set to .75, Diffusion to .60, and Diffusion Transition to .50. Local Adjustments mask was set to Detail brush and the gazebo and columns were painted over. Then the B&W Effects plug-in was exited. Stamp From Stack button was pressed and in the Adjustments tab Dynamics slider was set to 29. Another From Stack button was created and from the Plug-ins Tab, Topaz Adjust 5 was opened where Painting Venice preset was applied with no changes. Once back in photoFXlab the Mask tab was opened and the effect was painted out once again from the gazebo and columns.) The changes were applied and the image was back in Photoshop. The yellows in the front bushes and trees was too bright, so a Image -> Adjustments -> Replace Color was selected using a light purple color. A Color Balance Adjustment Layer was clipped to the Replace Color layer and the purple colors were further enhanced. Next a brush was created to make purple to pink sparkles for the bushes and trees. (Brush settings were: Hard Round Brush – Size 20 px, Spacing 141, Shape Dynamics Size Jitter 25, Scattering 944%, and Color Dynamics Brightness Jitter 50%.) Used a light color (#917eb5) color and a darker color (#5e5098) of purple and painted around trees and bushes – then added a layer mask to remove from areas the lights got scattered over. A clean up layer was created to clean up some of the harsh that showed up in unexpected places. My SJ Snow1 Overlay was applied at 61% opacity. A composite layer was added on top and duplicated. The top layer was changed to Multiply. A layer mask was added and the cupola was painted back in white for emphasis. A Curves Adjustment Layer was added to add contrast to the cupola. The sky was selected and put on its own layer and converted to a bluish purple sky by clipping a light purple Color Fill Adjustment Layer to it. Next a Grunge Border line was applied around the image in a dark purple color.
02/27/2013 | Categories: Photoshop Filters | Tags: Adjust, Black & White Effects, Black and White effects, Free Snow Overlay, Nik Viveza 2, photoFXlab, Snow Overlay, Topaz Adjust 5, Topaz Black & White Effects 2, Topaz Black and White Effects, Topaz photoFXlab, Viveza | Leave A Comment »


