
Merry Christmas from Digital Lady Syd
Happy Holidays to all my blog buddies! I so enjoy the people I have made friends with on the Internet and through blogging. I hope everyone is having a great time and is totally enjoying this time of year.
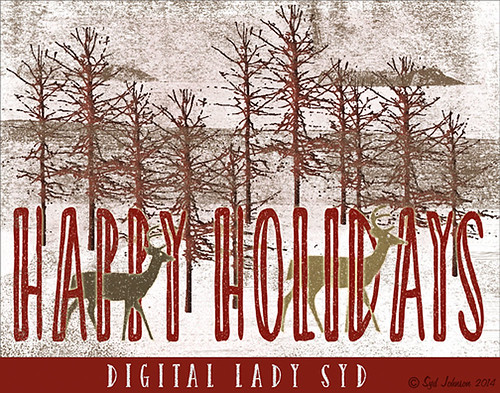
Just a few for those who wonder – how did I make this card? Well, this all started in Photoshop where I began with the cool Ink 3 png file that is in the Christmas Poster Freebies from Design Cuts (by Vintage Design Company). It was free transformed and flipped. A Solid Color Fill Layer using a brownish-beige color was clipped (ALT+click between the layers to clip) to the Ink 3 layer. The text was added. Then this file was taken into Corel Painter where the wonderful Karen Bonaker‘s Christmas brushes were used. The deer were added and the trees were added on separate layers. Then the file was brought back into Photoshop where a layer mask on the text layer was used to make the deer look like they are walking through the text. An Inner Shadow Layer Style was added to the tree layer (Distance 17, Choke 0, Size 17). On the deer layer a Stroke set to 5 pixels, inside, normal blend mode, and a light beige color was added. The Text used an Outer Glow set to the default yellow, but Size 17. The last step was my free Snow1-Overlay set to 43% layer opacity. Basically that was it. I so enjoy making cards!…..Digital Lady Syd
More Holiday Card Fun!

Just a final card I thought I would share that was constructed completely in Elements with a little help from Topaz Adjust 5. I seem to be using the same holiday resources over and over – guess I have found the ones I like. This card started with three different layers of snowflakes – I created brushes from the custom shapes provided with the Shape Tool, but you can download them in lots of places (try these from Obsidian Dawn), and used layer styles and blend modes to get the various effects; the font is Fantaisie Artistique (my favorite) doubled up for each line of text and the bottom filled with black, then dragged out to form a sharp shadow edge; Snow Drops brush by Frostbo for small flake layer – adjust size to get different effects; Santa sleigh in Christmas Brushes by Fina with Outer Glow layer style; and finally Topaz Adjust 5 (see sidebar for link to website) using the Film Collection – Vintage Grunge III preset. This was very easy to create and pretty fast.
I hope you have Happy Holidays and enjoy!…..Digital Lady Syd
Christmas Card from Digital Lady Syd!

Thought I would post this card I did today which follows a really interesting tutorial called “Fun & Exciting Text Effect in Photoshop” where patterns were inserted onto each letter to create this interesting effect. The basic tutorial steps were OK but they forgot to mention that each letter has to be on an individual text layer so a different pattern Layer Style can be applied for each layer. This was a fun project and I like the way it turned out.
There were many resources in this card that I will mention in one lump group. Please check out their sites, these people generously give their expertise away for free so they deserve some recognition! Resources are as follows: Grunge brushes were from Websoulz Super Grunge set; yellow (#3) and green (#1) lines from Swirls by Rocked Out set-these apparently are no long available but try this set of Flowing Line Brushes by Thurgood; background snow brushes are Snow Drop brush by Frostbo and Snow White brush #36 from Supreme-neko; the font is 02 from a Cosmi font set I bought years ago and is not longer available as far as I can tell, but go to daFont.com and look for a larger fat font – there should be several available; the bottom font is my favorite Fantaisie Artistique; Patterns were from Grungy Dirty Patterns from Obsidian Dawn, Free Christmas Patterns, Christmas Patterns by Peter Plastic, Free Christmas Patterns by Succo Design, and Christmas Patterns by slave to fashion 69; Sleigh brush from Obsidian Dawn’s Holiday set; and Dave Cross _01 OnOne PhotoFrame (see sidebar for link to website).
Hope everyone has a wonderful holiday and try out this text effect – great effect for any occasion……Digital Lady Syd
Digital Lady Syd Related Blogs:
How to Add Images to Text
Playing in Photoshop
How to Create Photoshop Brushes from Objects or Text
Free Christmas Card Templates-Part 2
Digital Lady Syd’s Free Christmas Card Template Using Photoshop Elements
Digital Lady Syd’s Free Christmas Card Template
Free Christmas Card Vectors and Brushes
Some Holiday Cheer
Digital Lady Syd’s Free Christmas Card Template

I have been wanting to create a versatile card template that could easily be used with your own images and background. Here is what I have come up with for a basic template for any kind of card. (Download at bottom.) It is set to 8 1/2 inches X 5 1/2 inches, one of the standard sizes for cards (and fits an 8 1/2 inch X 11 inch sheet). On the above image, the kids picture is one of mine that I scanned – it turned out pretty nice considering how old it is. The beautiful bokeh-like background is from ibJennyjenny Magical textures set 3, texture 3 with a Hue/Saturation Adjustment layer added to make color more greenish. I love the Christmas Toy Train font (look at the text file to learn how to use it if you download it) – it replaced the Fantaisie Artistique font in the template.
The file below is exactly how the card should look when using the downloaded template (with my images added). The one above has the “Place Your Photo Above” layer and the “Frame Snowflake 6…” layers turned 90 degrees. This is where the flexibility is – almost all elements can be swapped out and changed and you still have the basic template to follow.

To help you understand how to use the layers, below is a copy of the Layers Panel for the downloaded Basic Template and on the right is the Layers Panel for the image above to show you how it was created.


The type font can be easily changed by highlighting the type layer and double-clicking on the T icon to activate the editing mode for the layer. (The template and the above photo both use my favorite free font Fantaisie Artistique – when you open the template, if you do not have this font on your computer, one from your hard drive will be substituted or download this one, right click on the file and load to your computer.) Layer styles can be added to all the layers, like the Snowflake 6 brush (from Design by Firg’s Snowflake Shape Pack) layer with the White Inner Glow and Outer Glow. Firg’s Snowflake Shape Pack is not free but now are for sale. To try a different option download Obsidian Dawn’s free Snowflakes Photoshop Custom Shapes. All the snowflakes used in this image are the same brush. Need to give credit to the people who create these wonderful free resources on the internet: the tree image was created using a Winter Tree brush by Mels Brushes, Gorjuss Snowflake brushes for tree branches, and Snow Drops brush by FROSTBO for the pretty colored small snowflakes.
……

This image uses exactly the same template with a generic free family image (downloaded from stock.xchng). The Bitstream font is Freehand 575 BT. The same background is used from ibJennyjenny Magical textures set 3, texture 3, as used as above. The ornament is from Photoshop Free Brushes Christmas Balls set – painted a yellow ball on a layer, painted it in, then changed colors and painted it in a reddish color on top to make the design show through.
****DOWNLOAD LINK TO MY BASIC HOLIDAY CARD TEMPLATE****
To create the inside page, just turn off the photo image layers, make your text larger and create a little saying. Friday I will do a short example for my Photoshop Elements friends as this template works fine for this program also also. Have fun using the template and Happy Holidays!…..Digital Lady Syd
Digital Lady Syd’s Related Blogs:
Digital Lady Syd’s Free Christmas Card Template Using Photoshop Elements
Free Christmas Card Templates-Part 2
Free Christmas Card Vectors and Brushes
Some Holiday Cheer
Some Free Christmas Overlays to Spice Up Your Christmas Cards


