32-Bit HDR Using Lightroom and CS6

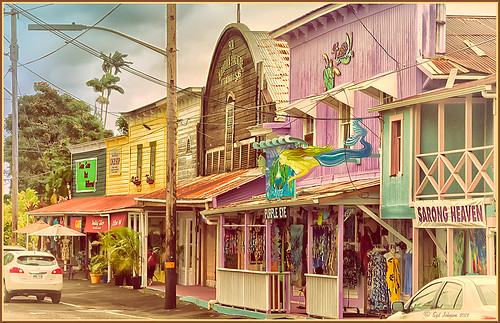
This is a beautiful little town called Honomu is on the road to Akaka Falls on the Hilo side of the Big Island. I love how this image turned out – the original tonemapped file was totally flat. This image was processed as a 32-bit HDR image in Photoshop CS6’s Merge to HDR program, then brought back into Lightroom 4.1 as a TIFF file where it was adjusted using mainly the Basic sliders, then edited back in Photoshop CS6 as a 16-bit PSD file. From there, Nik’s Color Efex Pro 4‘s was opened and these filters stacked: Detail Extractor at 68%, Graduated Filters using Blue No.1 as the sky was an ugly gray color, and finally the Film Efex Vintage set to Film Type 21. Next Nik’s Viveza 2 was added and that is what really made the difference in this image – the detail was popped in the signage areas but smoothed in the sky. Imagenomics Noiseware was added to smooth out the roughness of the whole image. The frame I used is called SJ Thin Double Edge Frame and can be downloaded at my Tidbits Blog DLS Free Layer Style Frames. The colors for frame were sampled from the image. Once again an image that did not have too much going for it turned out really nice……Digital Lady Syd
Digital Lady Syd Related Blogs:
New Lightroom and Photoshop 32-bit Processing Capability
I Didn’t Know That! Eyedropper Tool and Magic Wand Tied Together by Sample Size!

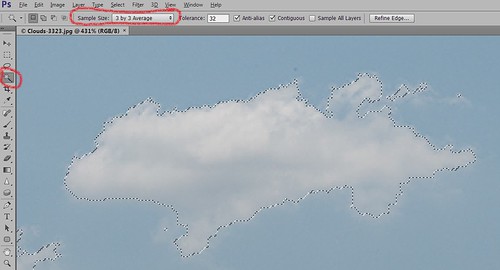
Adobe has come out with a Beta Version of Photoshop CS6 (Adobe download link) that is free to use for a couple months. While watching some of the videos on the new features, I came across an interesting comment by Deke McClelland, another Photoshop guru who does a lot of tutorials at Lynda.com and also does great Photoshop books. He has posted a series of short videos called Free Photoshop CS6 beta training at Lynda.com and in one called “Exploring the Wide World of Layer Enhancements,” he mentions that you can throw off how the Magic Wand Tool uses its Tolerance setting if the Eyedropper Tool is set to a very large Sample Size in its Options Bar – the two Tools are tied together! In previous versions of Photoshop, only in the Eyedropper Tool Options Bar could the Sample Size be set. If you had the Eyedropper Tool Sample Size field set incorrectly, the Magic Wand Tool would not function properly. I have always set mine to 3 pixels for more accurate color correction per Scott Kelby recommendations (head of NAPP and his Photoshop books are must-haves) – he says the larger sampling sizes are for “super-high-resolution” images. Now in the Magic Wand Tool’s Options Bar (see image above), it shows what the Sample Size setting is and now it can be changed without going back into the Eyedropper Tool options. Just remember if you change one tool, the other one automatically changes.
I do not know how important this is but it was a surprise these two tools had anything to do with each other! With higher resolution images now being shot with the new cameras, this might be a bigger issue. Thought I would pass this Tidbit along…..Digital Lady Syd


