
The Mighty Jaguar
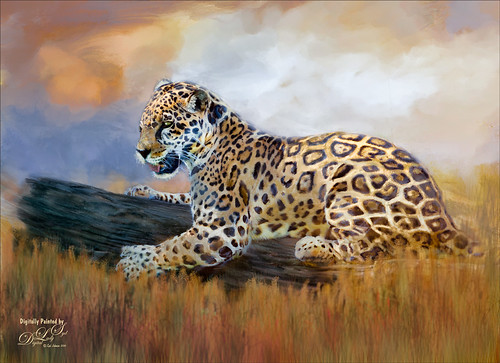
Took this image at the Jacksonville Zoo a couple days ago – the original is totally unremarkable and I did not think it would turn out nice at all. Just thought it would be a good challenge to see what I could do with it. I will actually post some much better pictures of these beautiful cats later. Normally I would give you step-by-step, but this was a pretty heavy workflow so I will just tell you what all it took. The biggest problem was the chain-length fence that went through his body. Since I could not get close enough to the fence to get rid of the distortion, I had to paint it away. The fence was selected and a Curves Adjustment Layer was used to reduce the effect. Then three more Curves Adjustment Layers before I was ready to paint him. Topaz (see sidebar for website link) Adjust using French Countryside (my favorite) preset and several slider adjustments to get the color in the cat that I liked. Then I went into Corel Painter and painted a background that matched his colors. Put the background on top of the cat and painted the cat in with a layer mask. Next painted using 7 layers and both mixers and regular brushes (my SJ Pastel 3 painting brush mainly – do a search at my Fun Photoshop Blog for settings). Used Nik Viveza 2 to emphasize his face. Used Blur Gallery to soften the foreground, Liquify Filter to make his eye a little larger, Topaz Lens Effects for some special reflector and graduated filter effects, and Camera Raw Filter to bring out the orange effect just a bit more. Last step, Topaz Restyle using the Tawny Tint. That about did it but it was a pretty big process. I just love painting the big cats!…..Digital Lady Syd


Leave a Reply
You must be logged in to post a comment.