
Painting in a Vector Pattern
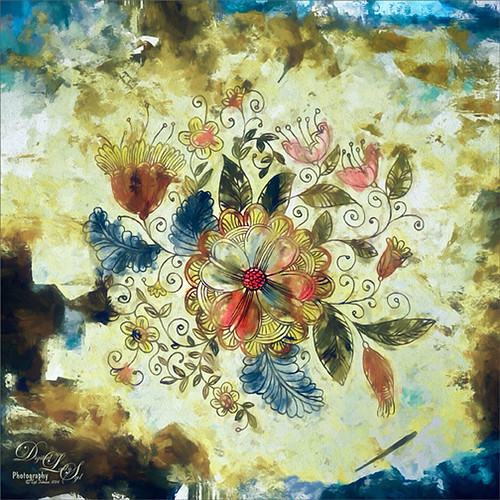
This is an image I was just having fun doing. Started with a layer that I placed a vector floral image on – Graphichive Floral vector flowers Swirls and Flowers 2 (there are some beautiful vectors on this site so check it out!). It was on a sheet with several other clip arts – had to open up the jpg, use the Rectangular Marquee Tool to select it and place on its own layer. Then select the background by going to Select -> Color Range – check Invert so that just the lines are selected and you now have transparent clip art that you can paint each flower and leaf the way you want. In this case I created a square file and copied the clip art layer over to this file. Used Free Transform (CTRL+T) and hold SHIFT key to adjust the size proportionately.
So to paint this, I used 6 different Pattern Fill Adjustment Layers – selected ones I liked, filled the Adjustment Layer masks with black (CTRL+I) inside the mask, and painted in white where I wanted that patterns to show up. If I did not like the color the pattern was, I just clipped a Solid Color Adjustment Layer set to Color Blend Mode to the Pattern Fill Adjustment Layer to change it. (ALT+Click between the layers to clip) I put all of the layers into a group by highlighting them and clicking on Create a New Group icon at the bottom of the Layers Panel. For a review of how to do this, see my Fun Photoshop Blog called How to Colorize an Old Photo. Next I placed a texture between the white background layer and the group – in this case it was Painted Textures Pilgrims’ Journey set to Pin Light blend mode. On top a Curves Adjustment Layer as added for contrast. Then because I could, Topaz (see sidebar for website link) Impression was applied using my SJ WC look on bldgs. (Settings used: started with Watercolor II preset and these were the final settings: Stroke Type 04, Brush Size 0.91, Paint Volume 0.42, Paint Opacity 0.87, Stroke Width 0.33, Stroke Length 0.89, Spill 0.23, Smudge 26, Coverage 1.00, Color Overall Hue 0.15, Saturation -0.20 and Lightness 0.06; Red Sat 0.47 and 0.14; Orange Sat 0.60 and Lightness -0.42; Yellow Sat -0.33 and Lightness 0.13; Green Sat 0.20 and Lightness -0.32; and Blue Sat 0.36; Lighting Brightness -0.04, Contrast 0.39, Vignette 0, and Light Direction X0.33 and Y0.06; and Texture Strength 0.78, Size 0.30, Canvas IV, Background Type solid white, and Background color used #d38967 – all other settings not listed at 0.) Next Topaz ReStyle using another one of my presets called SJ BW with greens – not sure how I got this one so I cannot give you the settings, but obviously I used some B&W setting in ReStyle. Last step involved Nik Viveza 2 to draw the eye to focal point, the main flower, in the image. It sounds like a lot of work, but it really was just experimenting and playing in Photoshop……Digital Lady Syd


Leave a Reply
You must be logged in to post a comment.