
New Impression of Octopus and Seahorse
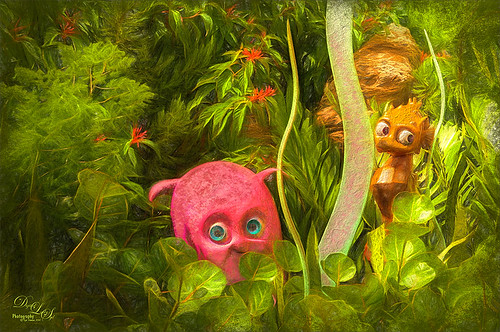
These cute octopus and seahorse were located at the The Seas with Nemo and Friends Pavilion in Epcot, Disney World Orlando. Been having fun trying out Topaz (see sidebar for website link) Impression so thought I would try the plug-in out on a different type of image. This turned out to be a lot of fun to do! In Lightroom Seim’s (see sidebar for website link) Power Workflow 4 Harsh Sun Fixer and Tint Golden Sepia presets were applied, then one by CV Delnea called Backlit Horizontal Right. In Photoshop a New Layer was added and some clean up was done. On a stamped layer (CTRL+ALT+SHIFT+E) Topaz Detail 3 was opened to apply just a little sharpening to the medium and large size details. A New Stamped Layer was created on top and duplicated (CTRL+J). The bottom new stamped layer was highlighted and Topaz Impression was opened. The Cave Dweller II preset was applied with no changes. On the top stamped layer, my SJ Colored Pencil preset was applied. (What’s in my SJ Colored Pencil preset? It was based on the Colored Pencil II preset and these are my settings: Stroke: Type 07, Brush Size 0.90, Paint Volume 0.77, Paint Opacity 0.20, Stroke Width -0.82, Stroke Length -0.25, Spill 0.26, Smudge 0.16, and Coverage 1.00; Color: Overall Saturation 0.37, Red Hue 0.70, Red Saturation 0.32, and Red Lightness 0.00 – this turns the reds cyan and gives the preset an ugly color so don’t change these sliders if it is not a look you need; Lighting Brightness 0.21, Contrast -0.40, and Light Direction x1.00 y1.00; and Texture: Strength 0.33 Size 0.00, Texture Paper I, and Background color white. For this image these changes were made my preset: only Color Section changes to Red sliders all set back to 0; Orange Saturation to 0.27; and Aqua Hue -0.37.) A layer mask was added to this layer and areas I wanted showing from the layer below were painted in with a soft round black brush set to 30% brush opacity (mainly the eyes and the seahorse needed some additional definition and extra texture to the leg in the air). Three New Layers were added above. With my regular chalk brush (Photoshop’s Chalk 60 with Shape Dynamics Angle Jitter at 19%), the octopus body was clean up with a pink color. Then on the next layer the same brush as a Mixer to add some color to the octopus head. (These settings were used in the Mixer to get the effect shown on the octopus head – in the Brush Panel the Scatter section was turned on and Scatter set to 133%, check both axis, and Count 1; Texture turned on and a Canvas texture set to 160% and inverted with Mode set to Color Burn, Depth 100 and Jitter Depth 59%; and Wet Edges turned on.) and on top layer painted in some color to the octopus leg in the air and reduced the layer opacity to 61%. A Sponged Edge border from French Kiss (see sidebar for website link) with a green Solid Color Adjustment Layer clipped to it (ALT+click between the layers) and a Curves Adjustment Layer were added. That was it and I really liked the results. I especially liked the way the background greenery came out. Give this plug-in a try if you have a minute……Digital Lady Syd
Digital Lady Syd Related Blogs:
Digital Lady Syd Speaks Out on Topaz Impression


Pingback: SOME EPCOT FUN! (AND MORE IMPRESSION) | Digital Lady Syd's Fun Photoshop Blog