
A Little More Painting with a Texture Brush from Your Image
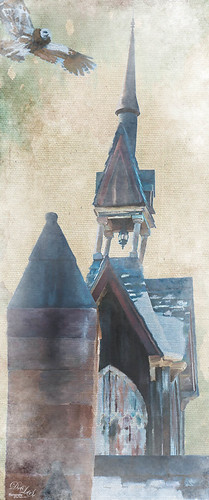
Wanted to show you how I completed the image that I began in my You Tube Texture Video for my Fun Photoshop Blog How to Paint with a Texture Brush from Your Image. By creating a different brush and changing up my technique just a little, a totally different feel was given to the same image. So what did I do to get this totally different result from the same image?
The brush I created in the video I did save down as a “New with my settings” brush – I forgot to remind everyone of this rather vital step. You need to resave and rename your brush to keep the additional slider changes made from the initial brush created. A New Layer was added above and this time it was converted to a Mixer Brush – in the Options Bar turn off the “Load the brush after each stroke” icon and in the drop down, choose Very Wet, Heavy Mix. Now just make sure Sample All Layers is checked and you are ready to paint using this same brush as a Mixer “Blender” brush (see my Photoshop Blog How to Easily Create a Photoshop Brush for Painting for more info on this.) On a couple of layers, I just smoothed out edges and dabbed and then would go back to the regular brush with the same settings. Just went back and forth smoothing and adding a little texture and color. By doing that on this brush, the texture effect is not so over-the-top as it looked in the video and the rough edges were softened with the Mixer Brush. A Curves Adjustment Layer was added to increase the brightness since the painting darkened it down some. If you look closely, the pattern is over the objects just like the background – by adding the Pattern Fill Adjustment Layer on top and choosing this same texture set to 60% Scale, it blended beautifully with the texture – the layer opacity was set to just 26% for the blend. Then a Levels Adjustment Layer was added and the in the Output Levels, set the first number to 24 to take out the total black pixels which often darkens an image too much in paintings. I thought I was done but I tried a layer style called BMU_SSStyles_UltArtist_Watercolor-Dark from Scrap Girls packet which added a Pattern Overlay that resulted in the rather foggy spooky feel on the whole image – it felt so Harry Potterish! (See my Fun Photoshop Blog How to Get Painting Effects from Actions-Part 2 for info on this.) I was thinking I could have just used a fog brush at a low opacity and painted on a New Layer to get the same effect. I really liked how this version turned out – love the triangular shapes and still like my owl! Anyway wanted to show you how using this different texture, crop, and brush gives a totally different result! Hope you give this a try!…..Digital Lady Syd


Leave a Reply
You must be logged in to post a comment.