
A Little Dreamy Auto FX
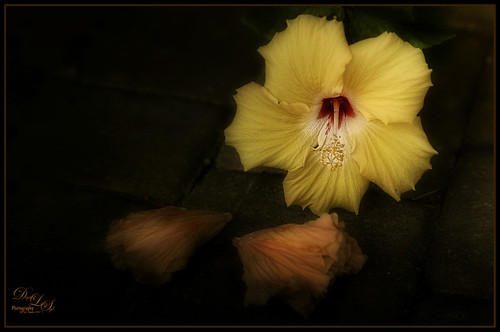
This simple yellow hibiscus flower image was taken on my back porch. When opened in Auto FX Software’s Free Sampler, I got a very nice sort of dreamy effect. (These were the settings used in the plug-in: First Layer – Mystical Tint Tone and Color – Soften Details – Used paintbrush and painted paver bkgd lines using Size 66, Opacity 70, Feather 100, and these Soften Details – Mode Brush On, Opacity 40, Vibrancy 20, Softness 20, Saturation -42, Brightness -18, and Contrast 0. Second Layer – Mystical Tint Tone and Color – Lighten and Sharpen – Used Mode Brush On and painted in center of yellow hibiscus to sharpen the stamen and red color using Size 65, Opacity 62, and Feather 69, and Lighten & Sharpen Opacity 84, Lighten 60, Tonal Range 84, Fuzziness 5 and Sharpen Details 76. Third Layer – Mystical Tint Tone and Color – Vitality Mode Global using these settings: Midtone Softness 71, MidTone Strength 40, Highlight Softness 52, Highlight Strength 17, Saturation 30, Brightness -1, and Contrast 20. Was able to brush on center to make white stand out more using Brush Palette Size 200, Opacity 97, and Feather 100. Fourth Layer – Dreamy Photo – Ghost Type Soft, Blur 10, Blend 70, Ghosting 2, Tint Color 25 (r229/g186/b160), Soften Mask 5, and Zoom offset 0.) Then Nik Viveza 2 was opened and four control points were used to get the correct brightness in each of the objects. Last step was added my free B&W Border Frame layer style – sampled the peach color for the Inner Glow color. Overall I think the image turned out to be very pretty!…..Digital Lady Syd


Leave a Reply
You must be logged in to post a comment.