Digital Lady Syd’s Favorite Preset for Nik’s Analog Efex Pro

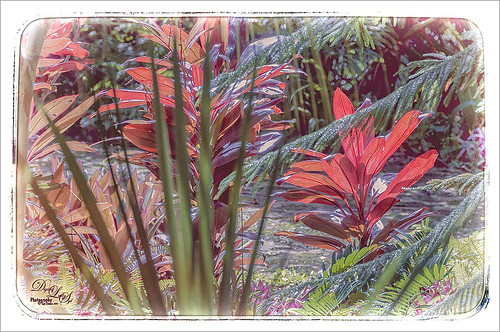
Just another example of what Nik’s Analog Efex Pro can do. Used Topaz (see sidebar for website link) ReStyle’s Shaded Subways preset (with these changes: Color Style Lum Secondary 0.07, Third -0.48, and Fourth 0.34; Texture Strength 1.00; and Sharpness 0.84.) Once again used my favorite settings for the plug-in. And that was it. I love the results – using ReStyle with Analog Efex Pro is a really nice combination. Since I am using this preset so much and find it really easy to adjust, I thought I would share the settings with anyone that would like to get a similar effect. Just tune out if you do not want them.
The preset was named SJ Favorite preset. The settings for each section used in the image above are as follows: Basic Adjustments – Detail Extraction 65%, Brightness 14%, Contrast -36%, and Saturation 13; Light Leaks – Strength slider 50%, set to Soft, and selected third row over and fifth row down (a reddish triangle coming from the left and the center point in the middle lower left (this can be adjusted depending on your image); Lens Vignette – Amount 78%, slider moved all the way right under Rectangle, and Size 44% with the center point in the middle of the image; Film Type – Subtle selected using the third row over and fourth row down film, Neutral to Faded slider placed just a little to right of middle, Strength 70%, Grain per pixel 400, and Soft to Hard slider in the middle; Frames – selected White in drop-down and used the first column fourth row down frame – I believe I clicked the Vary button a couple times here but not much difference occurred; and Levels & Curves – this is a little tricky but it makes all the difference in the preset. This is a 16 X 16 grid, so set the points where noted. For the Luminosity Channel, create a curve that starts with a point at 0,0, then one at 8.5, 8, and the last one goes up to the top with a small straight line to the top right corner so use this point 14, 16 – you may want to adjust this the way you want but it really pops my image by adjusting this curve – all other curve lines are left alone. You can go to the Camera Kit and add in other effects to get a little different look – I do this all the time.
The second image in my Photoshop With Corel Painter for Texture blog shows this same preset. Hope you will give it a try – Nik’s Analog Efex Pro is really a lot of fun!…..Digital Lady Syd


Leave a Reply
You must be logged in to post a comment.