
Happy New Year
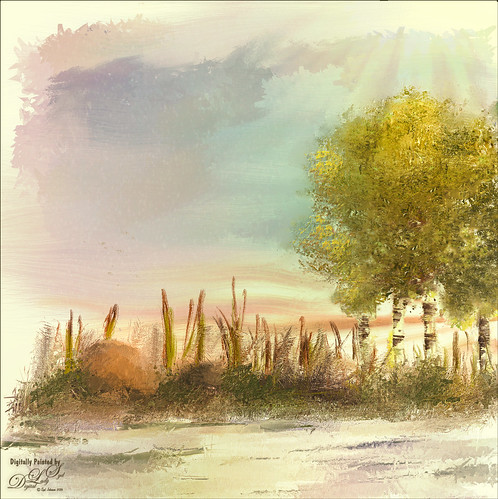
Wishing everyone a very Happy New Year and hope all your days are sunny as above in the coming year! I just created this image in Corel Painter – have not digitally painted in quite a while so it was fun to poen up Corel Painter and see what happened! Original painting used various brushes from Karen Bonaker, Melissa Gallo, John Lowther, and a few of my own. Then it was saved as a PSD file and brought into Photoshop where a few clean up layers were created using the Clone Stamp Tool and some regular brushes to even out the tones. The image was then taken into Topaz (see sidebar for website link) Texture Effects 2 to just give a nice overall effect to pull it all together. Last step, used Nik Viveza 2 to adjust the lighting to my liking. This was so much fun to create. Feels good to paint again!…..Digital Lady Syd
2017 January Calendar
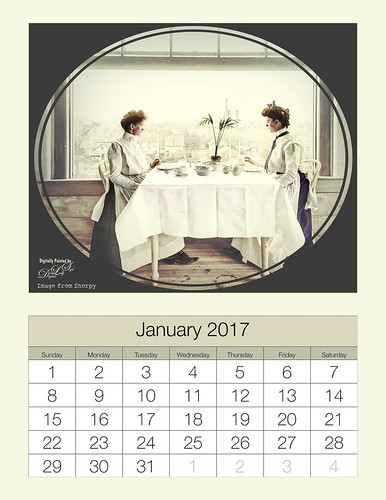
I just love this image of these two women eating by a window and it makes a perfect calendar image I think. This vintage image is from Shorpy.com, my favorite site for the old historical images, taken in 1902 at the National Cash Register Company‘s restaurant in Dayton, Ohio. In my How to Hand Tint a Vintage and Create a Brush To Do This blog, I show how I colorized this image. It was then put into the Calendar using the 8 1:2 X 11 1-month Lightroom template provided by Ed Weaver at Red Photographic – also used his January Calendar image. The calendar headers were set to matching colors in the Develop module so everything blends together nicely. Now that Lightroom 6 has a Reference Photo option in the Develop module, it is easier to compare the calendar color with the image being added. The Split Tone section works nicely for changing the header colors as well as the Adjustment Brush using a Color sampled from the image and then adjusting all the other sliders. Check out my How To Create 2017 Calendars in Both Lightroom and Photoshop blog for more info on using these templates. Just remember that if the templates do not look right, check out your Page Setup Printer properties – see if you have it set to Landscape instead of Portrait or vice versa. Also if the background color does not fit quite right, check out the Print Job section, set to Print to JPEG File and check Custom File Dimensions to fill out. These are mistakes I have made. Lightroom templates can be a bit tricky, so keep at it as eventually they will line up. Enjoy making your calendars!…..Digital Lady Syd
A Wintry Florida Holiday
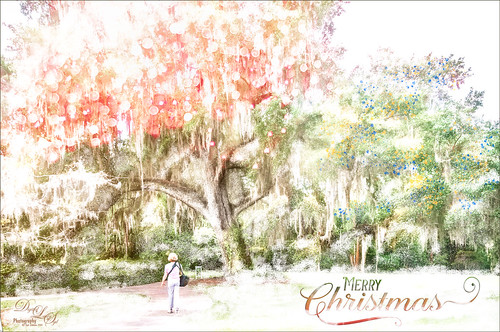
Having some Holiday fun here – spent a long time getting this beautiful entrance to the Henry P. Leu Gardens image to look like it was under the snowy spell of the Northern US. I would go over all the steps in detail, but it would end up pretty long. Just say that lots of layers were used which included: the Liquify Tool, the Clone Stamp Tool, Content-Aware Move, a couple Dodge Curve Adjustment Layers, Corel’s ParticalShop filter, Magic Dust Pretty Actions Brush layer, 100 Silver Lights Photo Overlays 16 and 17, Stroke and Spatter Dual Brush by John Derry layers, Topaz (see sidebar for website link) Impression 2 Chalk Smudge I preset, Alex Ducal’s Sketch Splatter brush layer, Pretty Actions Merry Christmas overlay, Grut’s FX Cloud Gumbo 01a brush layer, Topaz Lens Effect Reflector filter, and Nik Viveza 2 filter. Lots of fun! Have a Merry Christmas and Happy New Year!…..Digital Lady Syd
Red Hibiscus Holiday Cheer!

Thought I would post a little Holiday Cheer with this beautiful Chinese Hibiscus flower. Just had fun doing a little painting and playing to get this image. There was one really handy items that was used with this image – a Watercolor Mockup Template from Edimahendra – a set of wonderful watercolor splashes set up to use in Photoshop file as Smart Objects. I put these layers in a group and then added my own layers on top using different brushes – Magic Dust Pretty Actions Brush, Kyles Real Watercolor Spatter Dense brush, Melissa Gallo’s Scatter Brush, and Grut’s Inky FX Romato Brush. I put one of my Corel Painter textures on top and clipped a Hue/Saturation Adjustment Layer on top with Saturation set to -37. Then in a layer mask, used a soft round brush and painted out some of the texture over parts of the flower. Text layers were added to finish up. Merry Christmas Everyone!…..Digital Lady Syd
Tiger in Snooze Mode
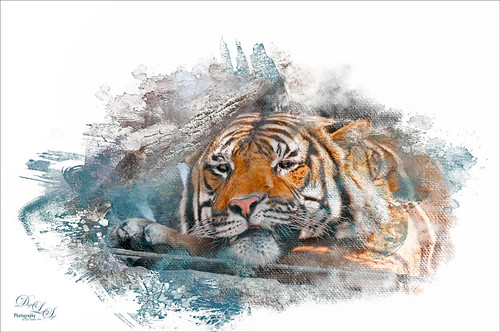
This Sumatran Tiger was trying to get a little snooze at the Jacksonville Zoo. What a cutie – guess he had to keep his eyes open a little just keep up with all the goings-on in his part of the zoo. Since he made an appearance in my 2016 Inexpensive Gifts for the Photoshop Lover on Your List Fun Photoshop Blog, I thought I would cover some of the things done to get this interesting effect. First the fencing in front of his face had to be removed and the very handy Spot Healing Brush worked wonders on this. A stamped layer (CTRL+ALT+SHIFT+E) was then placed on top. Lucis Pro 6.0.9 (no longer available) was applied. On another stamped layer, Topaz (see sidebar for website link) Lens Effects Reflector filter was used to even out only the parts of the face in the shadows. The eyes were brightened using an Exposure Adjustment Layer (see my How To Do a Quick Eye Sharpening In Photoshop blog.) All these tiger layers were grouped. Next Jai Johnson’s Unpredictable Collection Texture 25 was placed underneath this group. It was duplicated and the second one was set to Multiply blend mode at 82% layer opacity. Now, on the group on top, a black layer mask was added (CTRL+I in the mask to make it black). I just painted in white with a rough edged chalk brush the parts of the tiger I wanted to show up. A little of the free Nik Viveza 2 was added, and a canvas texture set to Soft Light blend mode at 42% layer opacity was placed on top. Love the effect of these textures by Jai…..Digital Lady Syd
A Bird Christmas Tree
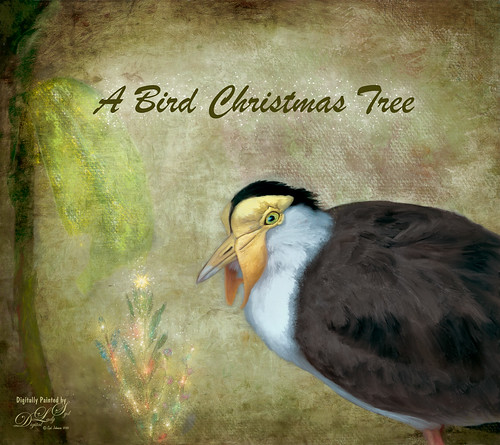
This bird is a Masked Lapwing that was photographed at the Palm Beach Zoo. I decided I needed to practice some painting so I picked this funny guy who sort of waltzed into my shot. Since the background was not too exciting, I decided to give him a little more holiday spirit by both painting and adding several filters. This image uses a lot of different filters and textures. The background texture is from Kim Klassen called Papertrio Paper and Paste (not sure it is still available but she has some beautiful textures) – applied twice, the second time set to Hard Light at 49% layer opacity. Topaz (see sidebar for website link) ReMask was used to select the bird and put him on his own layer – then used the Mixers to paint him. Used Grut’s MI Sues Hedge brush to soften and get the pretty edging between the brown and white feathers and am finding this to be a very useful mixer! Also used one of Fay Sirkis’s hair blenders. Have to find the right brushes to paint these guys! French Kiss (see sidebar for website link) Myrica Gale png was used for the plant – color was painted on a layer underneath it to add some colors. On a stamped layer (CTRL+ALT+SHIFT+E) Topaz Impression 2 was opened and Cezanne 2 preset was applied but masked out the bird to retain my painting strokes. On another stamped layer Topaz ReStyle’s Emerald preset was applied. Set the opacity to 69%. Corel’s Partical Shop was opened and used the Flame brush to paint a little color in the tree leaf and used Cluster brush to add some lights to the plant. Then used the Star brush to create the bright star on top and added a little color in by turning off the Glow and painting a little on the branches. Its Eraser brush was used to soften the effect a little. (See my Intro to Corel ParticleShop Brushes for Photoshop blog.) Back in PS, this layer looked pretty bright so lowered the opacity. Magic Dust Pretty Actions Brush was used to add a little white snow effect on tree and underneath text. Added some texture and clean up was done to finish up……Digital Lady Syd
Purring Tiger
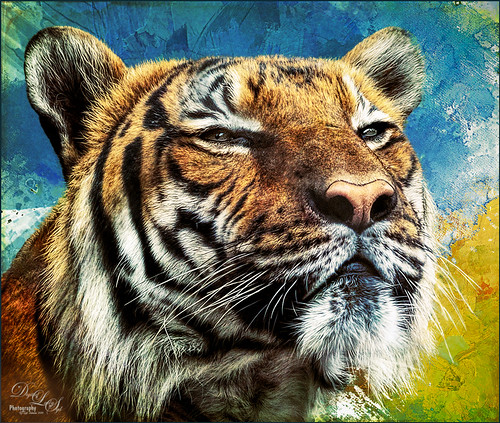
This image is of a Malaysian Tiger at the Palm Beach Zoo – I think he was actually purring – I sort of connected with him. I tried a couple different plug-ins on this guy. Started with Topaz (see sidebar for website link) Clarity, then Topaz Clean’s Cartoon preset where a black layer mask was added and just the whiskers were painted back to give the sharp effect. First time I have used this plug-in so it was really good to see the results. Used PS’s Select and Mask panel and then followed up with a Defringe of 1 px to get rid of the gray edging. Used two of Jai Johnson’s new Unpredictable Textures for the interesting painted look behind him. On a stamped layer (CTRL+ALT+SHIFT+E) and applied Topaz Texture Effects 2 – one of Blake Rudis’s from a while ago (check out his videos on Topaz Labs). On another stamped layer Nik Viveza 2 was applied and that was it. It has a bit of an engraved feeling to it and was a lot of fun to try…..Digital Lady Syd
Bird of Paradise
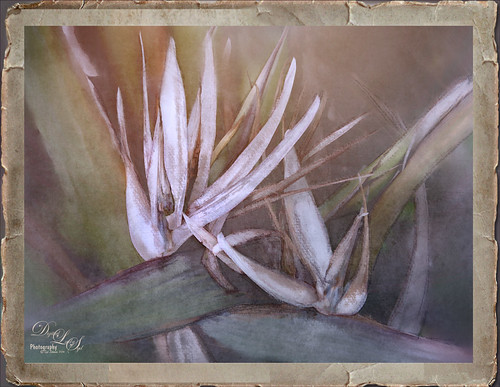
This beautiful white flowers in a Bird of Paradise in my front yard was fun to post-process. Used Topaz (see sidebar for website link) Clarity to sharpen overall, and Topaz Simplify with the Simplify Size slider set to 0.17 which removed some of the bad spots on the leaves. Painted on the flower stems and stalks to further remove bad areas and add a little texture to them. Used the Corel ParticleShop plug-in to remove the background area using Blend brush and the Blender Tool. This plug-in can be very handy! On a stamped layer (CTRL+ALT+SHIFT+E) Topaz Texture Effects 2 was used – used Fall Foliage Foggy Morning (downloaded from the Topaz Community) with a few adjustments to the Basic Adjustments section. In the Texture section, masked the texture off the focal point with the Brush tab set to a Strength of 0.66. Did some clean up and added the free Nik Viveza 2 to enhance the focal point. Added Sarah Gardner’s Frame Collection Paper Frame 05 on top that is a free download. That is all that was done for this nice vintage effect!…..Digital Lady Syd
Flowers Enjoying the Day
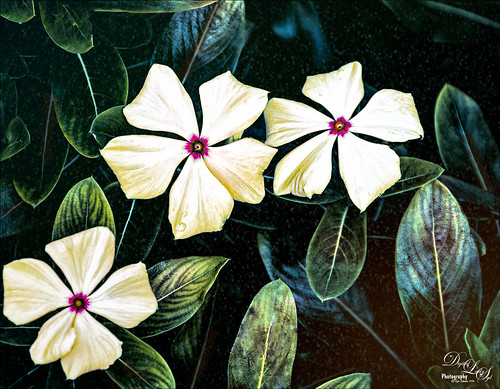
These cute little flowers are Crepe Jasmine, I believe, and are growing in my front yard. Not a whole lot post-processing on this image. Topaz (see sidebar for website link) Clarity was used to sharpen up the overall image. On a duplicate layer Lucis Pro (unfortunately no longer available) was set to Enhance (R161/G169/B67). Duplicated the layer again and applied Topaz Texture Effects’ Winter Wilderness preset. On yet another duplicated layer, Nik Viveza 2 (now free) was applied to darken the corners slightly and sharpen the focal point at the center of the flowers. Finally, a New Layer was opened on top. Used a soft round brush to paint with black at a very low opacity to reduce the brightness of the stems of the flowers and leaves. Applying the Lucis Pro plug-in gave the very well defined effect on the leaves and flowers. This image was a lot of fun to do!…..Digital Lady Syd


