
A Peaceful Place
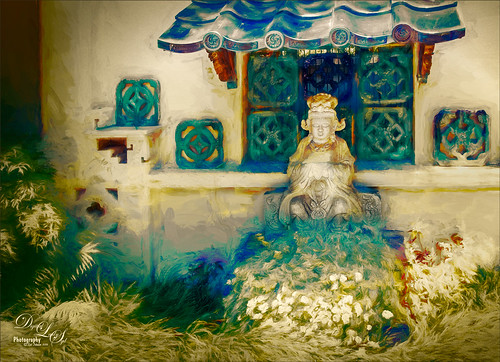
This image is a of a nice quite place at the Philip Hulitar Sculpture Garden in West Palm Beach, Florida. In Photoshop two layers were opened in Topaz (see sidebar for website link) Impression and different presets were used to get this effect. The first preset was one of mine that was based on a Colored Pencil preset. But I did not like the effect on the bottom foreground grassy area. Therefore one of Blake Rudis called Abstract Settings was used for this area by removing the effect from the top of the image in a layer mask. Then on two more different layers Topaz Lens Effects was opened using Toy Camera Soft and Dreamy preset with the Vignette and Camera Shake turned off, and a Selective Vignette using the Soft Olive Green preset. As a final step, Nik Viveza 2 was used to draw the focus to the statue a little more clearly. I really like the way the painterly effect turned out!…..Digital Lady Syd
Red-Winged Bug on a White Flower
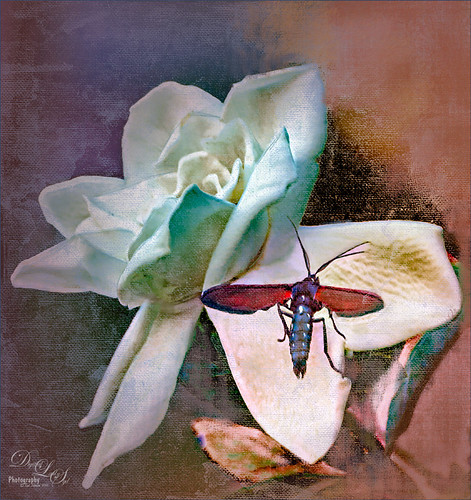
This was just a fun image to do – loved the colors in the bug. Just used my basic workflow – used Lucis Pro 6.0.9, Topaz (see sidebar for website link) Detail 3, Black and White Adjustment Layer, Topaz Lens Effects Reflector and Vignette filters, and Red Channel Curves Adjustment Layer along with lots of clean up. Used a Hatch Brush on lost of this image. Lots of fun to do!…..Digital Lady Syd
Texture Everywhere!
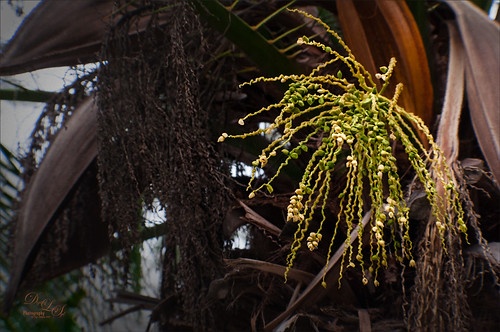
I love this image because of all the textures in it. These are symbiotic plants growing in the Palm, but I am not really sure what kind – the brown plant appears to be a type of Spanish Moss. The light was pretty nice on the green plant so it created a nice contrast in the image. In Lightroom just Seim’s (see sidebar for website link) Kodrachrome preset was applied to the image. In Photoshop Topaz (see sidebar for website link) Detail 3 was used to sharpen up the plant and the moss – a black mask was applied and just those areas were painted back. A Black and White Adjustment Layer was used to adjust the values in the image to emphasize the focal point, then switched its blend mode to Luminosity and kept the adjustment. (See my How To See if You Captured the Focal Point blog.) A Camera Raw filter was applied on a Composite Layer (CTRL+ALT+SHIFT+E) using the Radial Tool and adding just a little Exposure (+o.35) and Yellow Temperature (+70) to the image. This tip I learned from Matt Kloskowski Lightroom Tip: Relighting a Scene with the Radial Filter. On a new Composite Layer, Topaz Lens Effects Vignette Selective filter using the Medium Vignette preset with slider adjustments and Opacity set to 61.39 was applied. That was it. The texture is what I really like with these adjustments…..Digital Lady Syd
Get the Boy Something He Wants!
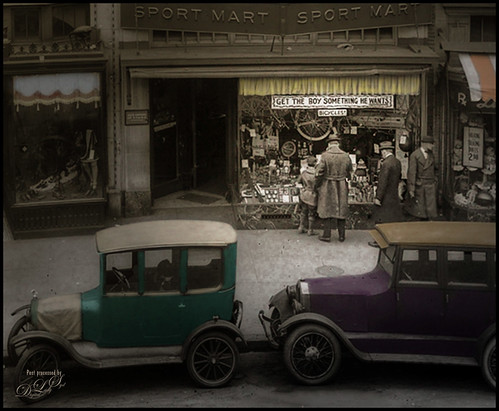
This image was downloaded from Shorpy.com of the Sport Mart on F Street NW in Washington. DC around 1922. I had originally started tinting the whole image as I thought the old cars were quite interesting. Once zoomed into the people, the image took on a whole different perspective! Therefore it was cropped tight to see the boy and his father and/or grandfather looking at the bicycles and other items in the store window. The sign sort of capped off what I consider a great story! All I could think about is what the little boy wanted.
The tinting was done using the technique and brush in my How to Hand Tint a Vintage Image and Create a Brush to Do This blog. After resizing and cleaning up the image a little, several layers were painted with the Tint Brush created in the linked blog. Then image was cropped as the cars looked good still in front of the store. On a stamped layer (CTRL+ALT+SHIFT+E), Nik Color Efex Pro 4 (now free) was used to create the rather dewy soft vintage feel in the image. (These filters were used: Glamour Glow, Midnight with Blur turned off and set to 52% opacity, Reflector Efex, Vignette Filter and Image Borders.) Nik Viveza 2 (also free) was used to focus on the store window a little more. On another stamped layer Photoshop’s Camera Raw filter was opened and using the Detail section, some color noise was removed in the coats of the people. Adding a black layer mask (CTLR+I in white mask) to the layer, just the coats and any colored noise areas were painted over with a white brush to remove the noise. On another stamped layer the Camera Raw Radial Filter was used to lighten just the people and sign using the Brush in the filter to pinpoint just them. This layer was set to 55% layer opacity. Next a Red Channel Curves Adjustment Layer was used to brighten up the luminous areas just slightly. (See my How to Use a Red Channel to Create a Nice Blended Imaged Effect blog.) That was all that was done. I am really enjoying this technique!…..Digital Lady Syd
Enjoying the Morning
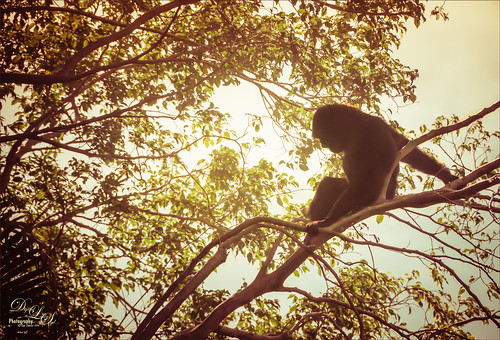
This is one of my favorite images of a Siamang Ape at the West Palm Beach Zoo – he was one of my favorite subjects at the zoo. Here he has run up to the very top of a tree where he had a view of the whole zoo. I started with a Trey Radcliff preset called Venice Canalman in Lightroom before opening in Photoshop. JixiPix Spectrel Art using preset Dark Edges was applied – layer was set to Color Burn and a black layer mask was applied and just the ape was painted back. (See my How to Use the the Free Spectrel Art Plug-In blog.) That was it! Pretty simple and I love the contemplative expression of his body in this image…..Digital Lady Syd
Let’s Hear It for the Mighty Fern!
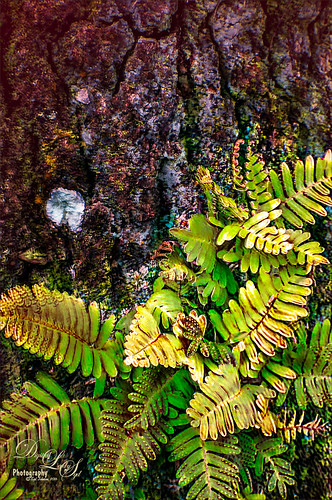
Took this image at the Harry P. Leu Gardens in Orlando, Florida, recently. These are Resurrection Ferns living in the bark of an Oak Tree. The bark was so detailed and colorful and competing with the ferns that both Lucis Pro (see my Digital Lady Syd Reviews Lucis Pro 6.0.9 (Now Affordable!) blog and Topaz ((see sidebar for website link)) Impression) were used to get a more pleasing effect. There were several adjustments layers used and lots of masking done to get the detail back into the leaves. Also used a Red Channel Curves Adjustment Layer to help blend total image. (See my How to Use a Red Channel to Create a Nice Blended Image Effect blog.) I really liked the darker colors in the bark – these filters embraced the color without overtaking the image with detail. These plants were so pretty in the sunlight……Digital Lady Syd
Sweet Alyssum Royal Carpet Flowers
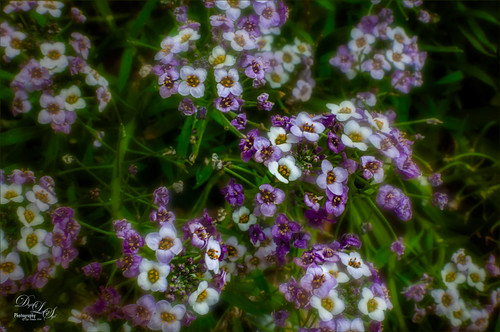
The beautiful little flowers called Sweet Alyssum Royal Carpet were found growing at the Harry P. Leu Gardens in Orlando, Florida this Spring. This background was duplicated (CTRL+J) in Photoshop and Lucis Pro 6.0.9 in Split Mode was applied (Settings: Mix With Original Image 45/55; Assign Original Image Color 0/100; Enhance Detail Red Channel 113/Green 233 with Smooth set to 19/Blue 199) – see my Digital Lady Syd Reviews Lucis Pro 6.0.9 (Now Affordable!) blog. Duplicated this layer and applied Topaz (see sidebar for website link) Lens Effects Generous Diffusion preset – a layer mask was added and the focal points were painted black to remove the softness in those areas. Duplicated layer again and added in Lens Effects the Soft Olive Green Vignette set to a Vignette Strength of -0.46 and a low opacity of 28.71. Last step was to add a Black and White Adjustment Layer to emphasize the focal points and set it to Luminosity – see my How To use a Black & White Adjustment Layer To See Contrast in an Image blog. These flowers look almost like little wildflowers growing along a road…..Digital Lady Syd
Looking Innocent!
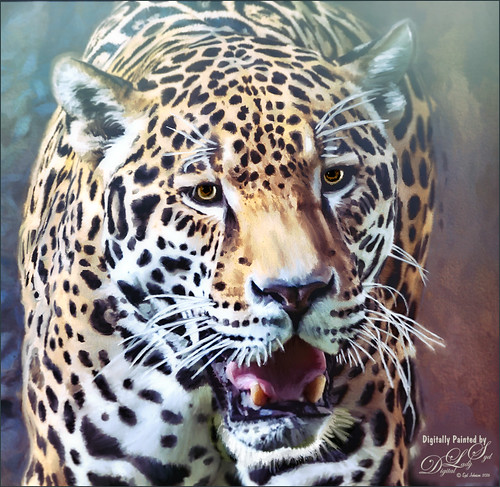
Loved how this beautiful Jaguar turned out taken at the Jacksonville Zoo in Florida. In Lightroom tried to really bring out the colors so image could be painted in Photoshop. This image was actually of the cat walking, but his face was so beautiful, I decided to crop close. First the image was painted on several different layers using mostly mixer brushes. Brightened eyes using an Exposure Adjustment Layer (see How To Do a Quick Eye Sharpening in Photoshop blog). Topaz (see sidebar for website link) Reflector filter’s Gold Left was used to lighten the left side of the face. On a composite layer (CTLR+ALT+SHIFT+E) Topaz Texture Effects’s Crisp Morning Run preset (with these changes: Basic Adjustment Brightness -0.27, Shadow -0.29, Highlight 0.17, Clarity -0.60, Sat 0.11, Temp -0.40, Tint 0.05, and Opacity 0.80). On a new Composite Layer, Nik Viveza 2 (now free) was applied to just the nose to brighten it up just a little more in the image. And as a final step, a Black and White Adjustment Layer was opened to just make sure my focal point stood out correctly (see How To See If you Captured the Focal Point). Really liked the final effect!…..Digital Lady Syd
Totally Stuffed!
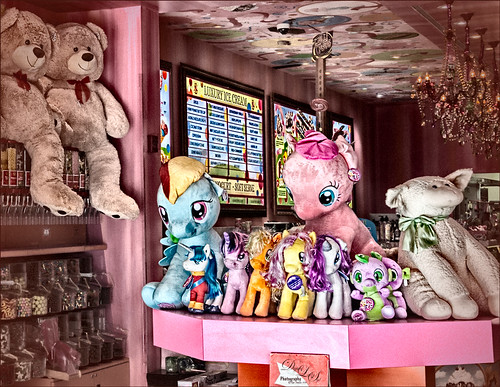
This image is of an Sloan’s Ice Cream at CityPlace in West Palm Beach, Florida – wish I knew the name of the store. In Lightroom just the Basic Panel adjustments were made. In Photoshop, a clean up layer was done to remove distracting sales tags, etc. Created a composite layer (CTRL+ALT+SHIFT+E) and Lucis Pro 6.0.9 was opened to apply the classic effect from this plug-in. (See my Digital Lady Syd Reviews Lucis Pro 6.0.9 (Now Affordable!) blog.) Settings for this plug-in were: Preview Scan Line 8 and Processing Scan Lines 50; Mix With Original Image 100%/0%; Assign Original Image Color 0%/100%; Red Enhance 53 and Smooth 23, Green 51, and Blue 39. Back in Photoshop the layer was duplicated and Topaz (see sidebar for website link) Lens Effects was opened where the Burnt Sienna preset was used with a few adjustments. That was it!…..Digital Lady Syd


