
Heron on Watch Duty
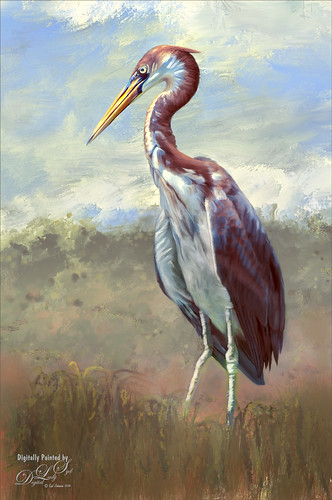
Just having fun painting yet another of my favorite subjects, the birds. This guy is a tri-colored heron taken at the St. Augustine Alligator Farm a few years ago and I just missed him. I loved all the beautiful colors of feathers he was displaying! This was done using my standard workflow where the bird is selected in Topaz (see sidebar for website link) ReMask 5, then the bird is painted on top of a new background texture, one I painted in Painter. Used Grut’s Photoshop mixer brush called Twig Scuffle for the fore grass plants. Topaz ReStyle’s Silver and Ivory Cloak preset was used to adjust the color palette a little. Last step was to apply Nik Viveza 2 to even out the focal point to his head. That was it – I just love to paint these birds!…..Digital Lady Syd
Painting the Town
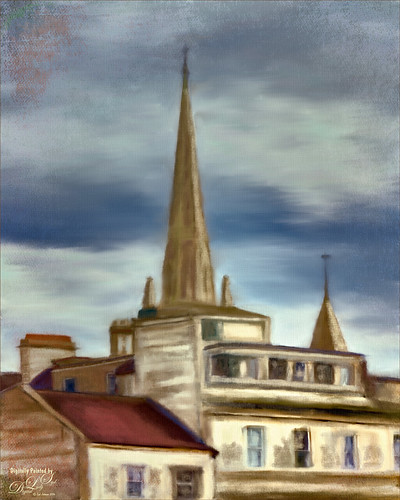
Just having some fun painting and seeing what effects I can achieve. Following Lori Jill’s Photoshop technique on Udemy. Used some of her brushes to do the underpainting and painting in some of the details. I decided it needed a little more of a painterly look, so a brush I created using my Pastel 3 brush and adding the Gauze texture to it to get the nice soft cross hatching brush effect to paint on the image. (See my How to Use Photoshop’s Brush Texture Section for Painting Clean-up to create basic brush – then change Texture to Gauze, Scale 123%, Brightness -75, Contrast 50, Mode Multiply, Depth 86%, Min Depth 100%, and Depth Jitter 50%.) A Bevel and Emboss layer style was added to the whole image and the Texture was also set to Gauze, Scale 221% and Depth +51 to get the same effect on the whole image. That was basically it. It is fun to try and paint different types of images. Last 3 Lil’ Owls (see sidebar for website link) overlay called Color Bokeh Grunge Set – #5 was added on top and set to Overlay blend mode. Still learning, but it is coming along…..Digital Lady Syd
Paintstorm Studio Purple Flowers
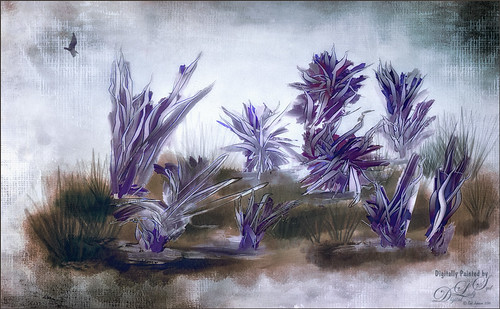
These flowers were painted in an inexpensive painting program I recently purchased called Paintstorm Studio. Just learning how to use all the various settings, but if you save down your images as a PSD file, you get nice layers with objects on them. That is how I created these flowers – just painted on a layer and saved down as a PSD file. This program has some incredible brushes and you can import PS brushes! Pretty cool! A couple textures were added in PS – 2 Lil’ Owls (see sidebar for website link) Mosaic Set’s Aveline set to Multiply blend mode and 56% layer opacity and Jai Johnson’s DT-Be My Valentine-12 set to Color Burn blend mode at 80% layer opacity. Topaz (see sidebar for website link) Restyle’s Lavender Gray preset was applied which make the image more purplish instead of pinkish. I tend to do a lot in pink so I liked the change here. Nik’s Color Efex Pro 4 was applied using the Warm Preset (Polarization, Sunlight, and Vignette Lens filters). Obsidian Dawn’s Birds Flying Single 3 brush was added to the image and a Pattern Fill was used to give the nice wing effect.
Taking a Cat Nap!

This was one of my favorite images when I went to the Jacksonville Zoo a while back. This guy just reminds me of any cat taking a little snooze during the day, but keeping one eye slightly opened just to make sure he doesn’t miss anything! And those paws! Anyway, not sure it is the best image, but loved it anyway. Not much was done in PS – Jai Johnson‘s DT-Emerald texture was applied first and set to 64% layer opacity and the cat was lightly brushed out on a layer mask. A Hue/Saturation Adjustment Layer was used to reduce the Saturation to -39 and Lightness to -8 so it was not so green. Then opened Topaz (see sidebar for website link) Impression set to Rembrandt II preset with a few settings adjusted which gives it the dreamy look. Used a layer mask to bring detail back to the tiger . This was a lot of fun to do!…..Digital Lady Syd
A Little Birdie Told Me So
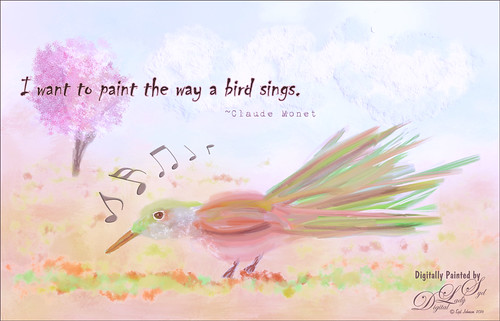
Just having some fun today creating this little bird. The bird, tree, and background were done in Painter. In Photoshop some Impasto effect was added to the some feathers, the music notes and clouds using a layer style. The free font is called Chiller and the wonderful Musical Note brushes are by Coby 17. It was fun to try out some different brushes in Painter ……Digital Lady Syd
Standing Guard
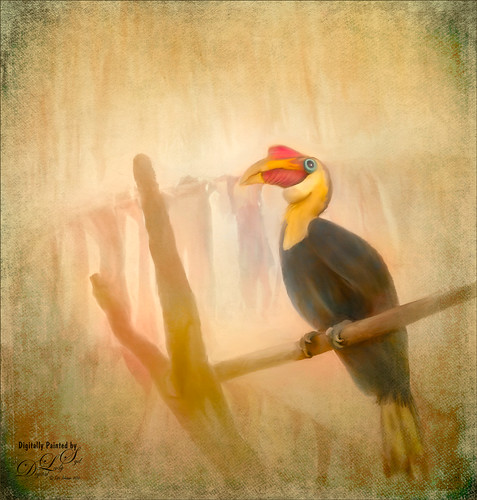
This Wrinkled Hornbill bird was taken at the Jacksonville Zoo. These birds looked like they were having so much fun flying across their enclosure and trading places on the various tree branches. Looked like a marvelous game from my childhood! This image took a long time to paint. Just followed my normal process of selecting the bird and in this case some branches in Topaz (see sidebar for website link) ReMask 5. Underneath he original background was actually kept, but one of my Corel Painter backgrounds was added above and set to Darken blend mode at 82% layer opacity. The background details are actually a large plant that was hanging across the back. The texture changed how they look. Lots of painting layers and Topaz Lens Effects was used to add some golden reflector effect. Nik Viveza 2 was used to adjust the focal point. 2 Lil’ Owls (see sidebar for website link) overlay texture Color Bokeh Grunge Set 3 was used on top and a layer mask was used to bring back the bird. That was it – pretty standard. These birds are so much fun to paint!…..Digital Lady Syd
A Spring Scene
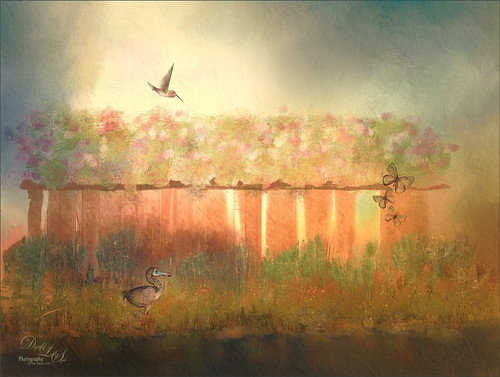
Just having some fun here. Created the original image in Corel Painter – got stuck and came into Photoshop to finish up the image. The basic structure, flowers and plants were created in Painter using various brushes. In Photoshop the DoDo bird Hummingbird were from a scrapbook set called HappyUnBday by Mischief Circus (this is one of my favorite sets) and the Butterflies are from a set called Intermixture Elements & Papers by Algera Designs. A texture called Clouds Over the Pasture from Jai Johnson was added underneath and set to Hard Light blend mode – it gives the beautiful light around the bird. Several layers were added where some texture was added in using plant brushes and texture brushes. Nik Viveza 2 was used twice and Topaz (see sidebar for website link) Lens Effects three times to get this final result. Also some Impasto layers were used on the plants to give a little 3-D effect to the image. This actually took quite a while as I just could not get the feel I liked. I think it is now complete!…..Digital Lady Syd
In the Country
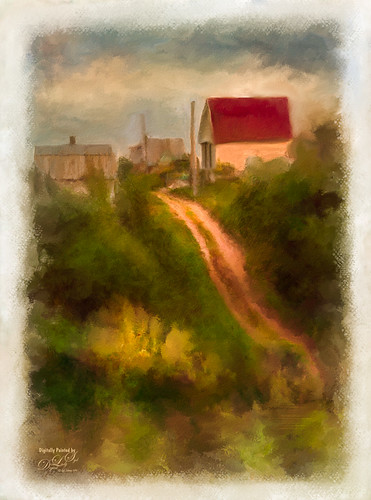
This is an image taken several years ago of the Belarusian countryside. I just watched on the Corel Painter website an older set of videos by John Derry (see Workflow 1, Workflow 2 and Workflow 3 videos) and decided to try his technique. It involves using several layers of auto-painting with different brush sizes and then adding layer masks to target your focus area. I had a little trouble following all the steps at the end, so I went into Photoshop to use my favorite brushes for cleaning up paintings. Overall I liked the final effect but I am not too sure if I liked the auto-paint results. This is definitely one you need to play with the different Painter brushes to get a pleasing effect. …..Digital Lady Syd
Looking Glamorous!
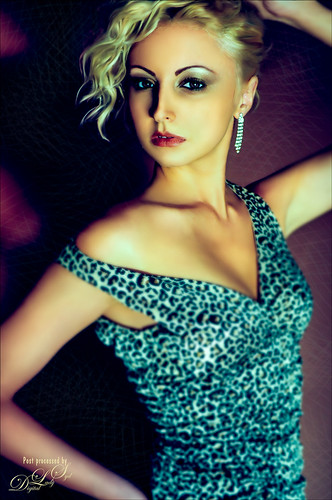
Just practicing a little light face painting – this time giving a bit of a glamour look to the image. Lots of liquify and dodging and burning to get the effect besides blending skin with mixer blenders in Photoshop. The original image had a brownish tone to it, but I changed it with a Color Balance Adjustment Layer to get this blue and pinkish effect. Not a whole lot to this, just some light painting fun…..Digital Lady Syd


