
Hogwarts at Halloween
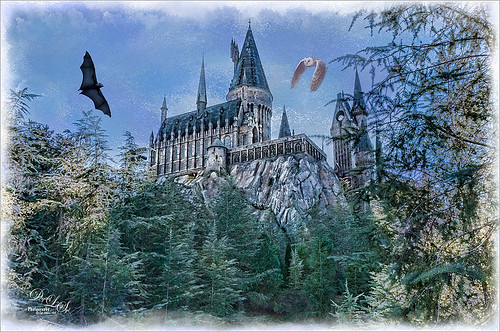
This image of Hogwarts School of Witchcraft and Wizardry at Universal Studios-Orlando was used to show how to get a bit of an illustrative look to an image using Topaz (see sidebar for website link) Adjust and Clarity and a Watercolor Texture for the sky. I actually just followed a really great tutorial by Leslie Nicole at French Kiss Textures (see sidebar for website link) that gave the exact steps and layers used. See her Before and After – Using a Watercolor Texture to see how it was done. (And check out her textures while visiting.) Both birds were by Midnights Touch – To the Bat Cave collection and Who Gives a Hoot collection to add a little holiday effect. I also added a watercolor border painted using my SJ WC Salt Brush set to 69 px to create. Lot of fun here and I really like the results!…..Digital Lady Syd
Red Fish Taking a Break from Universal Studios
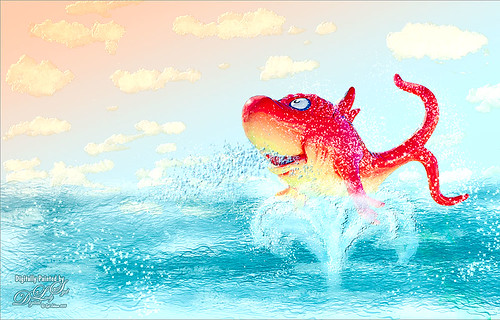
Just another image taken at the Universal Studios-Orlando, this time featuring the Red Fish at one of the Seuss Landing rides. Got a little carried here but it was a lot of fun! Basically all I did was extract the fish from the original image and paint in some elements to make him look like he was swimming in the water. Actually there were several paint layers to get the effect and Topaz (see sidebar for website link) Simplify’s Cartoon preset was applied to just the fish. Also, when done painting, a stamped layer was placed on top and Topaz Lens Effects was opened. The Toy Camera Awesomeness II was applied with the Toy Camera Aberrations sliders turned off. Adjusted some of the other sliders a little. That was it! Love how happy this guy looks!…..Digital Lady Syd
Rookery Security Guard
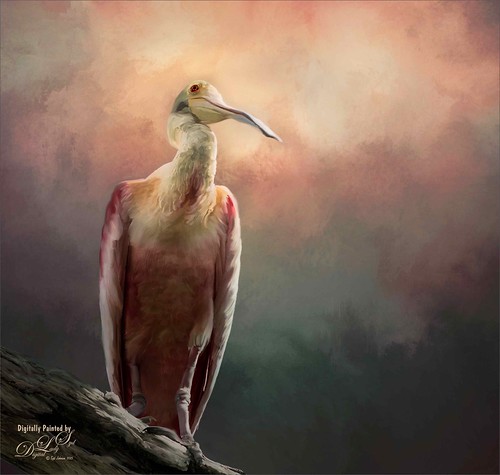
Just another one of the beautiful birds at the St. Augustine Alligator Farm Rookery – this time a rather elderly looking Roseate Spoonbill who seems to be keeping a careful watch over everything going on. I love the color in this type of bird. Pretty much my standard workflow – using Topaz (see sidebar for website link) ReMask to cut out the bird from its original surrounding; then placing a texture underneath; adding a New Layer on top and painting over the bird with a Mixer Brush; stacking more texture on top trying different blend modes; adding an Exposure Adjustment Layer to sharpen up the eye; applying Nik Viveza 2 to get the correct tone in the sky around his head; and finally adding a Curves Adjustment Layer for contrast. I never seem to get tired of painting my bird buddies!…..Digital Lady Syd
Beetle Bailey Taking a Snooze!
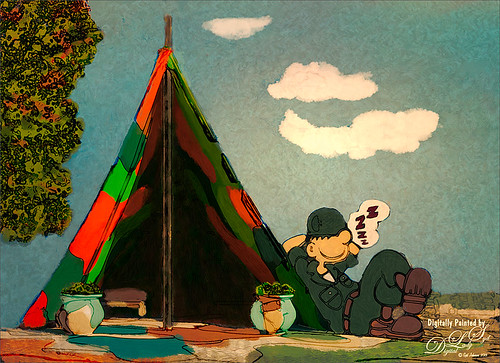
Just a loosely painted image of a photo I took at Universal Studios-Orlando a while back. One of the brushes had some great texture effects that can be painted right onto the sky instead of adding a texture and painting it away in a layer mask where you do not want it. There were several painted layers in a group underneath a sketch of the image. I did use one of my smooth Corel Painter textures set to Linear Light blend mode at 61% layer opacity to add a small spotlight on Beetle. That was it – lots of fun to paint!…..Digital Lady Syd
Beautiful Hole 4
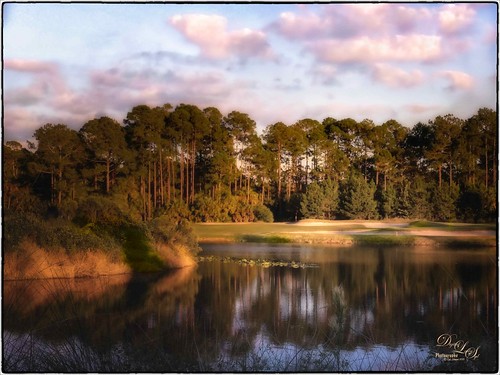 So this is why I play golf. It’s not because I play well but the views are fabulous. This course is one of the most natural looking and it feels like you are walking in a park! This image taken just before the gold hour in late afternoon was first corrected in Lightroom by just adjusting the Basic sliders. It was taken into Photoshop where Topaz (see sidebar for website link) DeNoise 5 was applied just to the sky where most of the noise appeared. On a duplicate layer, Nik Color Efex Pro 4 was used to get this overall effect – filter effects used were: Darken/Lighten Center, Glamour Glow, Monday Morning, and Image Borders. A Curves Adjustment Layer and a Color Balance Adjustment Layer were added and the masks filled with black. With a soft low opacity brush, the clouds were painted back just the cloud areas that were too vivid with the Nik filters applied to them. That is about it. Hope you all are enjoying your Fall season!…..Digital Lady Syd
Some Texturing Fun!
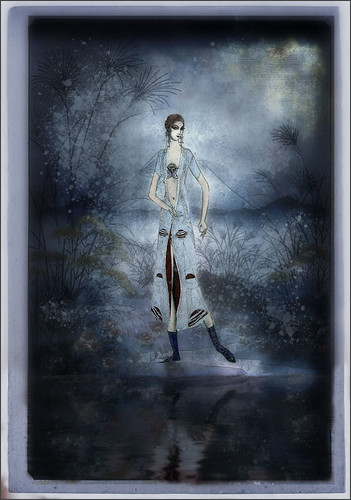
This image started out being what I thought would be just simple little layering image and instead turned into this rather complicated final image. I basically got the idea from reading one of my favorite blogs, First Night Design, where Sarah shared where she gets some of her images for doing her marvelous texturing – Ida Rubinstein as Istar by L. Bakst from 1924 and Kai Outsuki no hara from 1858. Basically cut out the lovely lady and put her in the oriental image. Used 2 Lil Owls (see sidebar for website link) Mosaic Sets Darcel Grunge texture twice – one set to Linear Light using the Blend If sliders to get the effect I wanted, and the second time set to Linear Burn at 67% layer opacity using Blend If sliders again. The elegant lady (extracted from her image using Topaz ReMask 5) was set on top. On a stamped layer Topaz Lens Effects (see sidebar for website link) Generous Diffusion preset was applied, and then Flaming Pear’s Flood plugin was applied to give the reflection. On a New Layer a speckle regular brush was used to create the painterly snow look on the image. That was the major work done on this image. I really liked the feel in the image……Digital Lady Syd
A Wintry Day
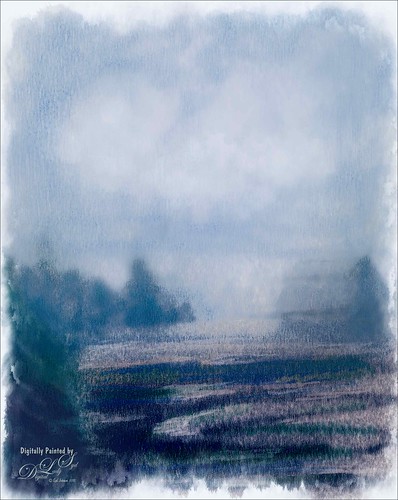
Just trying out the Watercolor category in Corel Painter. Usually use Photoshop to do the watercolor effects, but I finally got around to watching Jason Maranto’s videos on the Painter 2015 brush engine and learned how to use them. This image mainly used a Painter 2016 brush in the Watercolor category called Speckle Wash with the opacity changed for the various areas of the image. In Photoshop Topaz (see sidebar for website link) Lens Effects was opened and used the Graduated Neutral Density Filter, and Topaz ReStyle using the Tierra Frost preset. Really enjoyed doing this image!…..Digital Lady Syd
Hey Tiger!
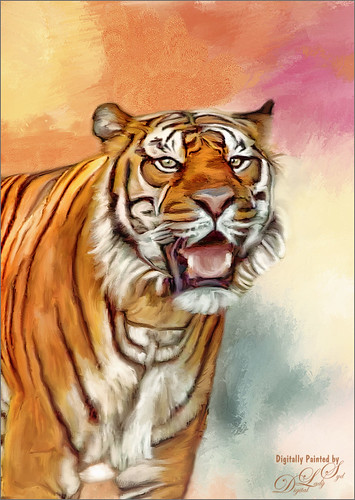
This beautiful image of a Bengal Tiger is a stock image from FreeImages.com. Wish I had taken the image. This image had lots of green leaves behind him. Topaz (see sidebar for website link) DeNoise 5 was used to remove lots of grain and color noise in this image. I used a texture I had created in Corel Painter with oil brushes. It was Free Transformed to make it fit the way I wanted it to look. Topaz Adjust and several mixer brush layers were used to paint the image. Nik Viveza 2 was used on just his face to get the nice sharp effect. That was it. This took probably around 4 hours to complete. Good thing I like to paint!…..Digital Lady Syd
So What Are You Looking At!
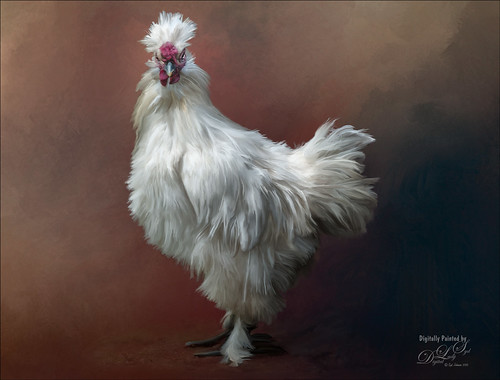
This image is of a White Silkie Rooster was photographed at The Old Village of Ayaymku in Belarus some time ago. (See my Center Stage – Introducing the Wild Turkey Tidbits Blog for another unusual bird image from the same place.) Used my regular Photoshop painting workflow. Selected the bird using Topaz (see sidebar for website link) ReMask 5, then placing Jai Johnson’s Filly in the Field texture underneath the bird. The edges were blended with one of Fay Sirkis’s Pet Mixer Brushes on a New Layer above. (Can download at KelbyOne if you are a member.) This image used a Topaz Lens Effects Neutral Density filter applied (Brightness -0.19, Amount 0.13, Transition 0.11, Angle 180.0, and Effect Position: (1824,2687) ) to even out the bottom and give him a defined area for standing. I also added two Exposure Adjustments Layers, one for the eyes and one for beak area. A Curves Adjustment Layer was used to add a little contrast back into the image. The workflow is pretty consistent but the results are always a surprise. These birds all have such personality!…..Digital Lady Syd


