
First Signs of Winter
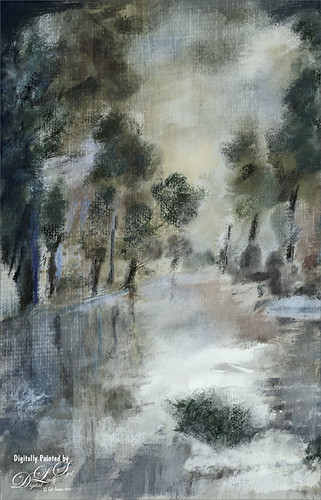
Totally enjoyed myself painting this little wintry scene. I think the recent hot weather in Florida has gotten to me! Used a very textured paper in Corel Painter 15 and mainly an Oil Brush and Blender that smeared some of the edges. In Photoshop used some of Grut’s brushes (these are a fabulous collection of brushes) to fill in where the trees did not look quite right. A texture was applied with no color (used a Hue/Saturation Adjustment Layer clipped to it and set Saturation slider to -100) to get even more texture. Last step was to add Topaz (see sidebar for website link) ReStyle Desaturated Warm III preset for the final color effect. It really is fun just to paint!…..Digital Lady Syd
Building a Home
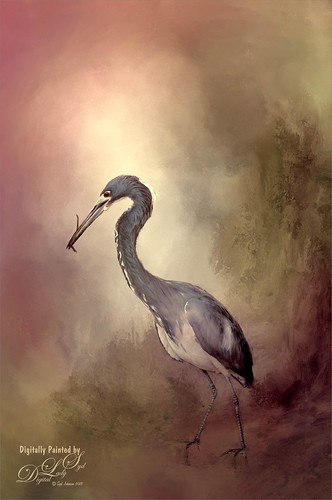
This beautiful Tri-Colored Heron was posing at the St. Augustine Alligator Farm Rookery, where he was actually building a nest as seen by the twig in his mouth. These birds are all over Florida and I probably see one at least once a day. This image used the same techniques from my recent blog called How to Get a Painterly Effect for Wildlife and Birds, especially as done with the Wood Stork image. This time two of my Painter textures were combined to get the sort of magical background effect. Topaz (see sidebar for website link) Adjust’s Summer preset was applied to a stamped (CTRL+ALT+SHIFT+E) version on top and on another stamped version Topaz Lens Effects Toy Camera Memories preset was applied. The Saturation was actually reduced a little in this section. It was pretty much the same workflow, just trying different textures and painting the bird on several layers. I really love my birds!…..Digital Lady Syd
A Victorian Visit
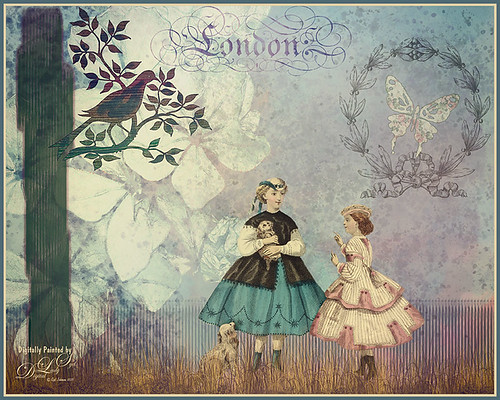
This is just a little composite of various elements that I put together for the fun of it. I love the little girl clip art that was from Mary Bailey, I believe as a magazine download – I could not find a link to her. Thought I would mention the use of Axeraider70 Edge Brushes to make the fence and tree trunk. Lots of splatters and one of my painted backgrounds were used. The butterfly shape was from Nicky Laatz and the wreath and London text were from Graphics Fairy. The bird was from the Old Design Shop. The flowers are from another one of my images. The foreground grass was from brushes by Aaron Blaise. Topaz (see sidebar for website info) Len Effects Toy Camera filter using the Memories preset with no vignette, than applying Polarization Filter set on High to brighten the image up. Nik Viveza 2 was used to direct focus to the girls. It was a lot of layers and step, but a lot of fun to do……Digital Lady Syd
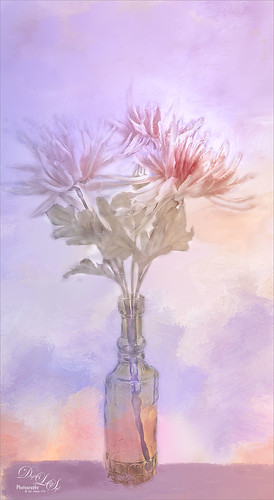
Summertime!
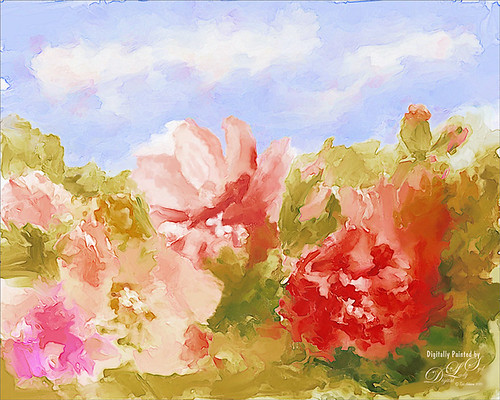
These are just some flowers I started painting in Corel Painter 2015. This used the Basic Paper with the default settings. Only an oil paint brush and a blender were used. Just a lot of fun to paint. I then brought the image into Photoshop and duplicated the background. Topaz (see sidebar for website link) Glow was opened and my SJ Mysterious II Water preset was applied. This mainly made the image more vivid. Once out of the plug-in, Grut’s O Rooster Suit brush was used in PS to smooth out uneven lines and do general clean up. Nik Viveza 2 was used to make sure the red flower was the focal point. I really enjoyed doing a little free-style painting……Digital Lady Syd
Still Life Fun
This is just a still life image I took a while ago of some flowers. Added one of my painted textures underneath, then with a black mask added to the flower layer, painted back in the flowers. The texture was copied twice and placed on top – one was set to Multiply blend mode at 54% and the other set to Color blend mode at 76%. A table and shadow were added using Grut Oil Rooster Suit brush. On a stamped layer (CTRL+ALT+SHIFT+E) Nik Viveza 2 was used to further bring out the color of the flowers. Several clean up layers were used and a few adjustment layers were added to create some contrast. I really love flowers….Digital Lady Syd
A Little Birdie Told Me So!
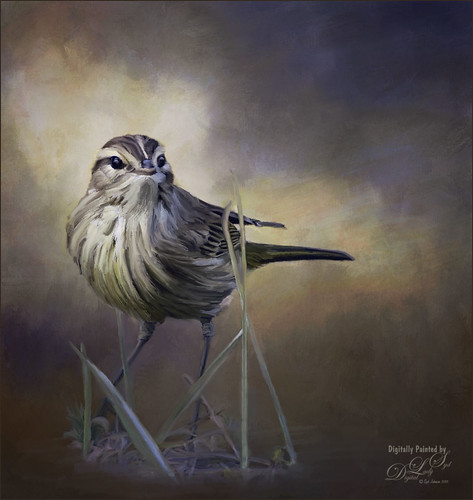
This was just a little bird I photographed near my home that was just walking around with a group of other little birds. He was placed under a couple painted textures, one I created in Painter and one by Jai Johnson called Clouds Over the Pasture. His eyes were brightened using the Exposure Adjustment Layer. Then on several different layers, the Mixer Brush was used to paint the bird. Finally on a stamped layer, Topaz (see sidebar for website link) ReStyle’s Smoke Gray Veil preset was used to give the different color effect. I love what this plug-in can do to an image! Next Nik Viveza 2 was used to direct the eye to the focal point. Another one of my textures was added on top and set to Overlay at 47% to add the really nice orange tones into the image. That was it – lot of fun here!…..Digital Lady syd
The Blushing Bride
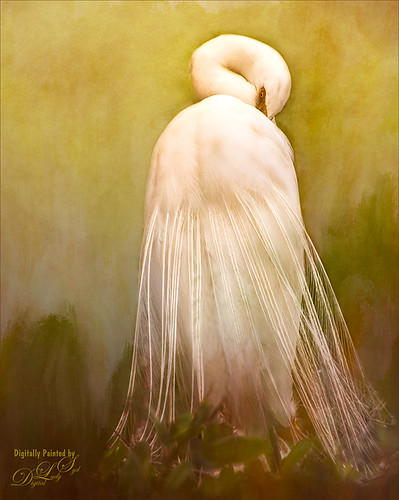
This lovely Snowy Egret with her magnificent plumage was another bird shot taken at the St. Augustine Alligator Farm rookery a few months ago. She was placed above Jai Johnson’s Emerald Green Canvas free texture (all her textures are fabulous) and with a black mask, was painted into the texture. This texture was chosen since the bird had lots of dark green foliage around her – the thin feathers could be seen better. Next a Corel Painter texture I created showing some soft plant-life in the background was placed on top and set to Hard Light blend mode at 39%. On a stamped layer (CTRL+ALT+SHIFT+E), Topaz (see sidebar for website link) Lens Effects was opened and two filters were applied: Reflector (Settings: Gold Top – Type Golden, Strength 0.65, Transition 0.37, Position 0.36, and Angle 176.4) and Add Vignette-Selective – Burnt Sienna (Settings: Placement Adjustments Focus Width 0.66, Focus Height 0.48 and Effect Center: (1751,806); Tonal Adjustment – used default sienna color, Vignette Strength 0.35, Transition 0.75, Contrast 1.63, Brightness 131.2, and Opacity 47.03). On a duplicate layer Nik Viveza 2 was used to bring out the sharpness of the eye a little more and the structure in the bird’s back. A black and white Adjustment Layer was used to adjust the focus just right and then set to Luminosity blend mode at 44% opacity. Then on another stamped layer, Topaz ReStyle’s Tuscany Memories was applied and set to Hard Light at 45% for the ReStyle section. That was it!…..Digital Lady Syd
Jumping Whales
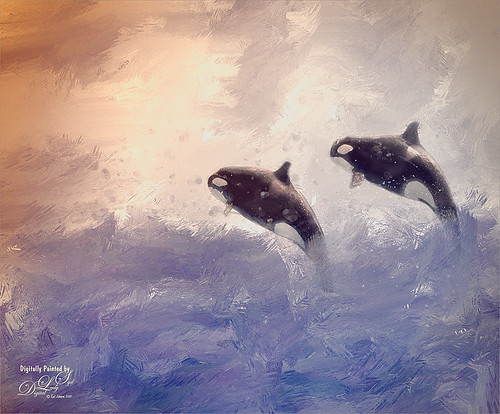
These Killer Whales were performing a few years ago at SeaWorld Orlando. I decided to place them in a water texture created in Corel Painter. I wanted them to look like they are in their natural environment. The biggest problem I had with this image was getting the lighting to look natural on the sharper whales. First the whales were painted through a black mask on top of my SJ Stormy Weather at Sea texture. Several adjustments layers were used to even out the tonal contrast and color. Then Topaz (see sidebar for website link) Lens Effects was used on a stamped layer (CTRL+ALT+SHIFT+E) and the Vignette Selective using the Golden Halo preset was used. Nik Viveza 2 was used the get rid of the color cast and turn the spots on the whale white. The texture was copied twice and placed on top of the layers – first set to Multiply blend mode at 49% layer opacity, and then set to Hard Light at 21% layer opacity. Some water splatter layers were created to get the water splashing effect using Aaron Blaise Water Splatter Brushes (all his brushes are fabulous!). On yet another stamped layer, Topaz Lens Effects was opened up again and the Toy Camera effect was chosen – used the preset Awesomeness for starters and tweaked it to get the correct sunlight effect. The last step was a Levels Adjustment Layer to even out the contrast. This was really a lot of fun to do!…..Digital Lady Syd


