
Happy Halloween!
 It seems like I always have to do a Halloween image every year – they are so much fun to do! This year was no exception. The background on this image was a totally blown image taken on one of the rides at Epcot but the colors were so striking, I kept it. Perfect for a Halloween creation! I just listened to Terry White’s video called Check Out 3 New Filters in Adobe Photoshop CC and applied a couple of his clever techniques. That is why there is a Tree in the image and some flames around my type layer of lettering – had to rasterize the lettering to get it line up right though, then added the Pen Path and Flames. I started my Halloween theme starting with my friend Carol at Graphix1’s Halloween Clipart PSD – these are really nice objects that can be moved into your document (check out her blog too – lots of nice free goodies there!) Lots of layer styles and some painting were added to image along with French Kiss’s (see sidebar for website link) Spatter 4-14 brush and 2 Lil’ Owls (see sidebar for website link) Texture called Sweet Musing 11 set to Color Dodge blend mode. The frame is from a new Photoshop plug-in I just got called Smart Photo Editor that does some very interesting things to an image beside making great borders! Happy Halloween everybody!…..Digital Lady Syd
Now Just How Do These Shoes Lace Up?

I found this image called Ballerina by Equador on DeviantArt and thought I would practice painting in Corel Painter using it. The original image is very beautiful so it is hard to top it. Just followed several of the videos from Melissa Gallo’s Painted Texture’s Painter for Photographers Workshop. In Photoshop applied her Garden Canvas texture set to Overlay blend mode at 74% layer opacity. Since I did not want the actual texture on the painting, a Gaussian Blur was applied (as a Smart Object) to the texture and set to Radius of 6.1 – just enough to keep the texture color tones but blur the texture effect. Since it was a Smart Object, the amount could be adjusted to just the right amount after changing the blend mode. That is all that was done. I am loving this type of painting!…..Digital Lady Syd
Painting People
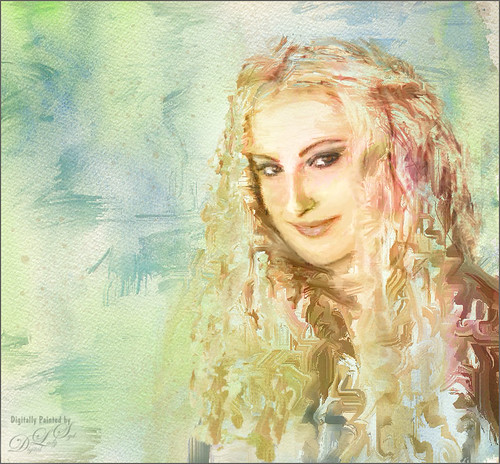
This image is my first Painter image of a person – my very pretty daughter-in-law – that I have tried to make it look realistic without looking too much like a photo. Not sure I completely succeeded, but it is fun to paint people for a change. In Painter Topaz (see sidebar for website link) Restyle’s Pale Salmon Pink preset was applied. Back in Photoshop, I did some clean up layers. Two textures were applied: Painted Textures June Party set to Hue blend mode at 80% layer opacity to give the hair that sort of “with-it” look that is popular right now, and French Kiss (see sidebar for website link) Morning Dew set to Multiply at 62% layer opacity to add to the background that was painted in Painter. Finally a Nik Viveza 2 layer was created to emphasize the face a little more….Digital Lady Syd
Romantic Venice
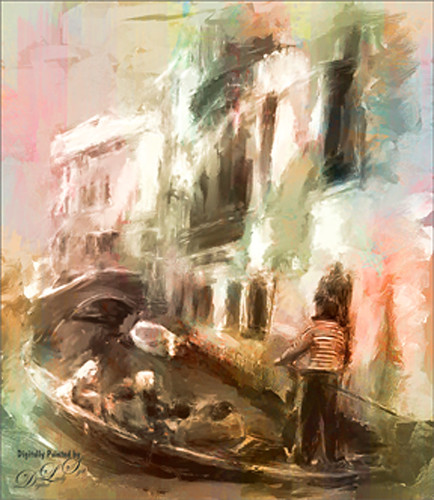
This is another image from Free Images that I downloaded and painted in Corel Painter. After painting some in Painter, the Modern Scheme was applied from the Underpainting Panel that really popped the colors. Painted Textures May Garden texture was added to the image and set to Color blend mode at 93% layer opacity. The Equalize plug-in was also added before taking the image into Photoshop. There Nik Viveza 2 was opened and the standing man was highlighted slightly. That is all that was done. I love the final soft painterly look of the image……Digital Lady Syd
Venetian Dreaming…..
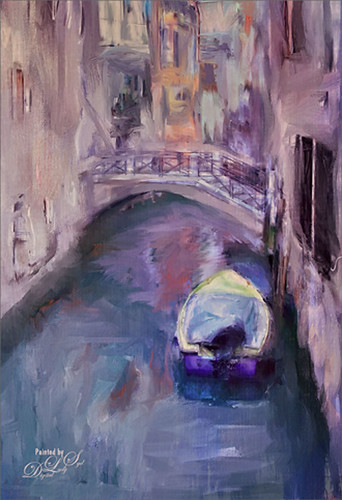
Just another Corel Painter image created following Melissa Gallo’s terrific Painter for Photographers instructions. Not exactly like Melissa’s beautiful images, but I think I am starting to get a style. Since I have not been to Venice in a long time, a free image from Free Images (used to be Stock.Xchng and image is linked) was selected to paint. The original colors were totally different to what is shown, but that is half the fun of painting! While in Painter I actually used Topaz (see sidebar for website link) ReStyle’s Cool and Clear preset with a few changes to get a different color scheme before painting the image. I will say that there were 13 iterative saves before I got to this final image. I am finding the Iterative saves are actually handy to have since I needed to go back to one due to some painting mistakes. The Painter image was saved as a psd file and taken into Photoshop where another Topaz ReStyle preset – my favorite Cream and Plum (you can really see the tones in this image) – was used along with Nik Viveza 2 to emphasize the boat a little more to finish up. Anyway, totally fun but it did take a little time to get it right.
Check out my Fun Photoshop blog this weekend for the same image but done totally with Topaz plug-ins in Photoshop…..Digital Lady Syd
Houses in Marsh Harbour
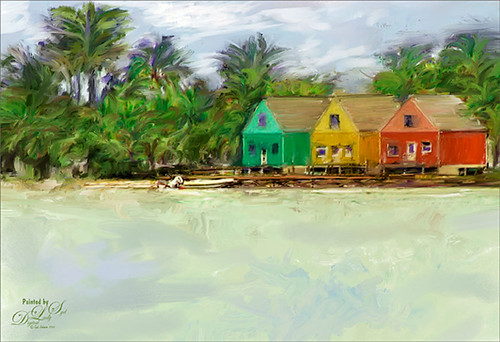
Just a quick post on this painting. The original photo was taken while actually leaving the channel at the small town of Marsh Harbour in The Bahamas. Still working on learning to use Corel Painter – Melissa Gallo’s Painter for Photographers Workshop is really helping me understand how to use this program. Lots to learn yet – this is really so much fun! I did do the final crop in Photoshop and used Viveza 2 to emphasize the focal point. Also a Curves Adjustment Layer and signature layers was added. Still not comfortable staying in Painter for this……Digital Lady Syd
Chef Mickey!

In honor of Epcot‘s International Food and Wine Festival, this Mickey Mouse topiary greets you at the entrance. I loved this image but it presented a real problem since the trees behind Mickey were essentially the same color as the topiary. That is when I decided to use Topaz (see sidebar for website link) Impression to get Mickey to stand out. In Lightroom used Seim’s (see sidebar for website link) PW4’s Magic Harsh Sun Flare Fixer preset and then his Radispot preset (radial filter was placed on Mickey’s head) to get as much contrast as possible between the colors. On a duplicate background layer in Photoshop Topaz Impression was opened where my SJ Watercolor Background preset (started with Watercolor II preset and these were the final settings: Stroke Type 09, Brush Size 0.50, Paint Volume 0.68, Paint Opacity 0.82, Stroke Width 0.44, Stroke Length 0.38, Spill 0.09, Smudge 0, Coverage 1.00, Color Overall Saturation -0.02 and Lightness -0.04; Red Sat 0.41, Orange Sat 0.43 and Yellow Sat 0.43; Lighting Brightness 0.17, Contrast -0.29, Vignette 0, and Light Direction X0.52 and Y1.00; and Texture Strength 0.16, Size -0.68, Angled Weave and white background color) was applied. Back in Photoshop on a layer mask Mickey and his salad were lightly painted back. This layer gave the colorful background effect. This layer was duplicated and it was now opened up in Topaz Simplify and my SJ Hawaiian Landscape preset was applied (my settings are Global Adjustments: Simplify Colorspace RGB, Simplify Size 0.29, Feature Boost 0, Detail Strength 0.66, Details Boost 1.00, Details Size 0.27, Remove Small 0.06, and Remove Weak 0.10; Adjust Brightness 0, Contrast 1.00, Saturation 1.04, Saturation Boost 1.32, Dynamics 0, Structure 1.00, Structure Boost 1.00; Edges Edge Type Color Edge-Normal, Edge Strength 1.89, Simplify Edge 0.58, Reduce Weak 33.00, Reduce Small 0.20, and Fatten Edge 0.00; Did not use the Structure slider – too busy and the Dynamics slider works like Clarity and it brought the background out too much). Simplify added some extra contrast to Mickey – a black layer mask was added (hold down ALT key while clicking on the Mask icon at bottom of Layers Panel). Some clean up was done but basically this was all that was done. As I keep saying, “Got to love Mickey!”…..Digital Lady Syd
Some Painter Magic!
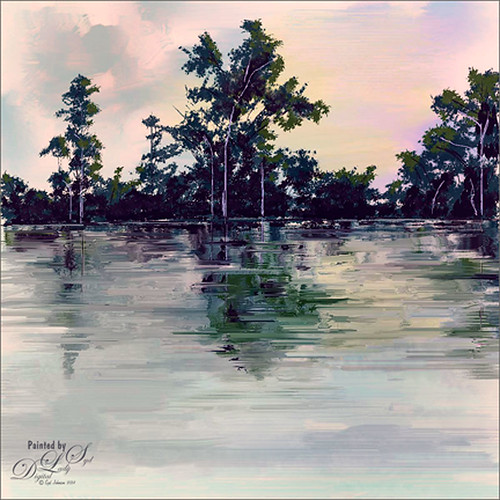
I will be honest and say this is a totally “Bob Ross” Joy of Painting type of image I created in Corel Painter 2015. This was done by following the painting instruction of Corel Master Melissa Gallo’s videos in her Painter for Photographers Workshop. Am really enjoying her artistic teachings and brushes. Also in Photoshop used Nik Viveza 2 to enhance parts of this image to get the color saturation I liked. That was it! Fun! Fun! Fun!……Digital Lady Syd
Some Mums for Fall
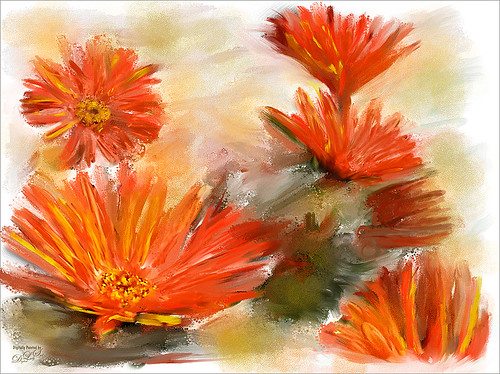
Just some mums taken at Orlando Airport recently and painted in the new Corel Painter 2015 update. This image was cloned in Painter using painted following the video Painter Cloning tools with professional photographer and digital painter Melissa Gallo. All the brushes she used in this short video along with one from Fay Sirkis called Background Edge Bubbles were used to paint it. Then in Photoshop Nik’s Viveza 2 was used to push the eye toward the lower left flower. A Levels Adjustment Layer was added and that was it. This was totally fun and pretty quick! Oh yes, Melissa just released her new Painter for Photographers Workshop – hope to show everyone some new paintings soon!…..Digital Lady Syd


