
A Little Vintage Dr. Seuss
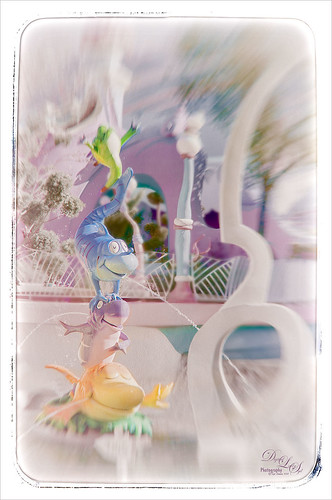
Just another fun shot from Universal Studios-Orlando in Orlando. Apparently I got a lot of what I call “fun” shots and they are fun to process! This image has 2 Lil’ Owl Studios (see sidebar for website link) Transfer Texture 10 added and the main characters painted by on a white layer mask. It was set to Saturation Blend Mode at 100% layer opacity. On a stamped layer (CTRL+ALT+SHIFT+E) above, one of my favorite creative plug-ins, Nik’s Analog Efex Pro 2, was applied – the Zoom feature was used to get the cool blurred background effect. Back in Photoshop on a New Layer, the Sharpen Tool was used to sharpen the faces just a little. That was basically all that was done but I think it turned out really cute!……Digital Lady Syd
A Little Brush Fun!
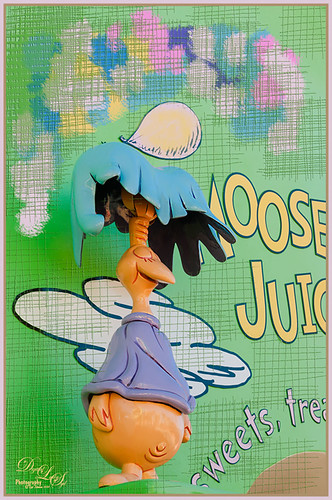
This funny character was part of a sign on a candy store in Dr. Seuss Land at Universal Studios-Orlando and looked like it would be fun to just play with it. Since he was on such an overwhelming green background, I added a new layer and just started using a Mixer Brush to add different blotches of paint to the image. Then on a New Layer above, a brush that I had created was used for the cross hatching effect- just liked the look of it once I added a Bevel and Emboss Layer style to it and set the layer opacity to 55%. To get the hatching off the lettering, a layer mask was added, but first the “Layer Mask Hides Effects” check box was checked in the Layer Style dialog. That way the hatching could be carefully removed from the figure and lettering. The Sharpen Tool was used on the character’s face. A stamped layer (CTRL+ALT+SHIFT+E) was created on top and my free SJ Mid Size Double Edge Frame was added – colors were sampled from the image. This a really cute image was jazzed up a bit by just adding some creative brush strokes!……Digital Lady Syd
More St. Augustine – What a Beautiful City!
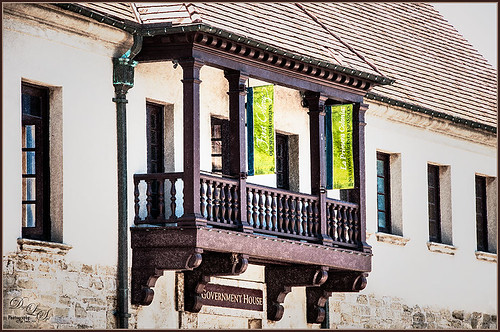
This is an image of the Government House Museum in St. Augustine, Florida – it was the original Courthouse that governed Florida when it was just a territory. Wow – I just realized this image is an optical illusion – it does not look like a rectangle although it is one! In Lightroom Seim’s Power 4 Workflow (see sidebar for website link) Magic Flat Light Fixer preset was applied with some basic changes. In Photoshop Alien Skin Snap Art 4 plug-in was opened and Pencil Sketch was applied with two masks to bring out more detail on the balcony and the stone. Just a Curves Adjustment Level for overall contrast and a Levels Adjustment Layer to add even more contrast but with a black filled mask – just the stones and some parts of the windows were painted back. The last step involved adding the Camera Raw filter and two radial filters to draw focus to the flags and balcony even more. I really love visiting St. Augustine and seeing all the beautiful architecture!…..Digital Lady Syd
A Dr. Seuss Topiary

This image is another one of the adorable topiaries growing at Universal Studios-Orlando in Dr. Seuss Land. This photo was just a fun image to work on – loved the colors. An an old Trey Radcliff preset called Cross-Into the Sky from his Lightroom Presets Volume 1was applied first – liked the slightly vintage look it had. In Photoshop Topaz (see sidebar for website link) Detail 3 was selectively applied where the Highlights were emphasized and shadows were weakened. A black layer mask was added and only the edges of the topiary and the eyes were left sharpened. A Curves Adjustment Layer with the mask converted to black (CTRL+I in mask) was placed on top to the lower part of the topiary. Next Topaz DeNoise 5 set to Overall 73 and Highlights 69 (these are the highest settings I have ever used in this program) were set and on a white layer mask only the lower topiary and the eyes were painted out to keep them sharp. On a New Layer the Sharpen Tool was used again on just the eyes. A Levels Adjustment Layer was added and applied to lower part of the topiary by painting in a black layer mask. Finished up created a stamped (CTRL+ALT+SHIFT+E) layer and added my free SJ Double Edge Frame layer style – sampled an outside color from the image for the frame. Really love this part of the park – very colorful and fun!…..Digital Lady Syd
Digital Lady Syd’s Rule No. 11: Keep Practicing!
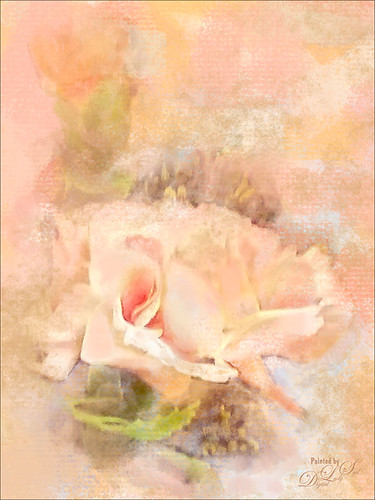
Just wanted to practice a little more painting so I found this image taken with my phone at the local grocery store recently. I have found that if I do not keep practicing on images, I lose some of my creative ability. That’s because I have to keep looking up how to do so things I forgot how to do! So this image was just one I decided to practice using my Photoshop skills to add a lovely painterly look to these flowers. Used Topaz (see sidebar for website link) Detail 3 to sharpen the total image a little – I wanted the center of the flower, the focal point, to be as sharp as I could get it. I added a texture I created in Corel Painter using three brushes including a nice chalk brush to get some interesting texture. Added a New Layer on top and used in Blur’s Good Brush 5.1 Pro set (a wonderful huge free download of all kinds of Photoshop brushes including several really nice Mixer brushes!) Circles 混凝土 – 1 brush. On another New Layer added some color into the image using a Pastel Mixer Brush – be sure you are set to add color in your options bar to get this to work. Next the Sharpen Tool was used in another layer. The last step was adding a Color Balance Adjustment Layer and a Levels Adjustment Layer. I just love painting in Photoshop and I do not even mind practicing this!…..Digital Lady Syd
The Old and the New
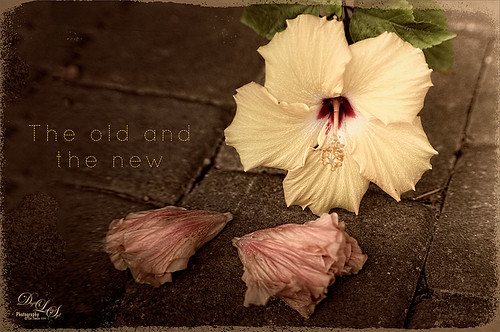
Just a set up image of my beautiful yellow hibiscus blossom and two spent Painted Lady pink blossoms. In Lightroom using Seim’s Power 4 Workflow (see sidebar for website link) Dreamscape preset and Dave Delnea’s LR Develop Custom Tone 002 preset were applied before going into Photoshop. The image size was extended using the Crop Tool: then the Magic Wand Tool to select extra canvas: then Select -> Modify -> Expand 4 pixels; and finally Edit -> Content Aware Fill. Got pretty good results! Used Topaz (see sidebar for website link) Detail 3 to overall sharpen the image, and then OnOne (see sidebar for website link) Perfect Effects 8 and Nicol S. Young’s Daydream preset set to 68% layer opacity. The text font is Quicksand. Just a little grunge frame added on top. I love the soft pastel colors of the blooms……Digital Lady Syd
Love the Tryptych in Nik Analog Efex Pro 2!
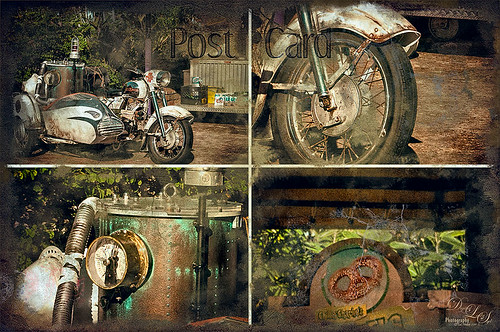
Universal Studios Orlando has so many interesting shooting places – this would have looked great with a person sitting on the bike too. Used the new updated Nik Analog Efex Pro 2 to get this great four image triptych effect. It uses the same image but each section can be manipulated individually. This is a lot of fun to do with an image that has a lot of areas to look at closely. The filters used in this plug-in were the Basic Adjustments with Detail Extraction at 66% and Brightness at -17%; Film Type Bolton 3 at 91% Strength; and Multilens with Variation Strength set to 73% and Variation Type 5. Back in Photoshop Shadowhouse Creations Old Post Set PCB texture (a free download) was added on top. A white layer mask was added and with my Charcoal Brush (Adobe’s Charcoal Brush 60 with an added 19% Angle Jitter in Shape Dynamics section of the Brush Panel to get a different angle with each stroke), the areas I wanted showing were painted back in leaving an interesting border effect. A Curves Adjustment Layer was added to bring back some contrast and a New Layer was used to paint in a little grunge for more vintage feel. On a New Layer, the Sharpen Tool was used to just sharpen up the focal areas in each section. The last step involved added Topaz (see sidebar for website link) ReStyle using the Peat and Rock Preset at 74% opacity. This really popped the image. This was lots of fun to work on!…..Digital Lady Syd
Digital Lady Syd Related Blogs:
How About That Update to Nik Analog Efex Pro 2?
“But we can have lots of good fun that is funny!”
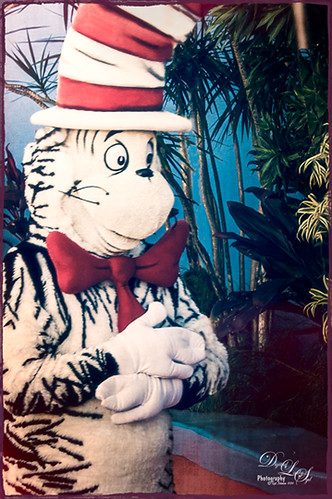
This fun shot is of the Cat in the Hat character in Dr. Seuss Land at Universal Studios Orlando. (Title quote from The Cat in the Hat book.) In Lightroom Seim Effects (see sidebar for website link) Super HDR X and Dave Delnea‘s Backlit Vertical Left presets were applied – these are probably the best sets of Lightroom presets I own! In Photoshop some basic clean up was done before OnOne’s (see sidebar for website link) Perfect Effects 8 plug-in was opened and Jacob Lucas Old Mans Chair preset (supplied by OnOne and one of my favorite Perfect Effects presets) was applied. Back in Photoshop the Sharpen Tool was used on the eyes and hands. Last a basic thin grunge border was applied using a dark purple Color Fill Adjustment Layer clipped to it (ALT+click between the layers to clip). That was it! Such a cute character in this fun part of the theme park……Digital Lady Syd


