
My Turtle Friend

Been enjoying my turtle pictures from the Ormond Beach Memorial Art Museum and Garden in Ormond Beach, Florida. This guy was just minding his own business and enjoying the Florida sun when I snapped him. Just basic adjustments were done in Lightroom. In Photoshop I used Nik Viveza 2 to sharpen his turtle lines and to draw focus to his face, and then the Camera Raw filter was applied using the Radial filter for a vignette effect. Really liked how this guy turned – just fun to do!…..Digital Lady Syd
Pretty Hats
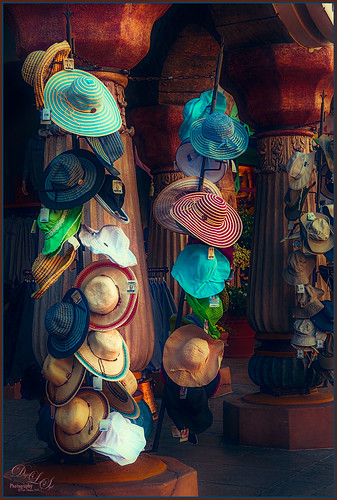
Had to take this image of these really cute hats. Topaz (see sidebar for website link) Detail 3 was applied first in Photoshop to add some general sharpness to the image. Then Topaz Restyle’s Waterloo and Mint preset was added – loved the resulting rich colors that were achieved. The last step was added three Camera Raw Filter Radial Filters to bring the focus of the image on the hats to the left. Add my SJ Thin Double Edge Frame using sampled colors from the image to match. I really enjoyed seeing these hats – so pretty!…..Digital Lady Syd
Soft Pink Calla Lilies!
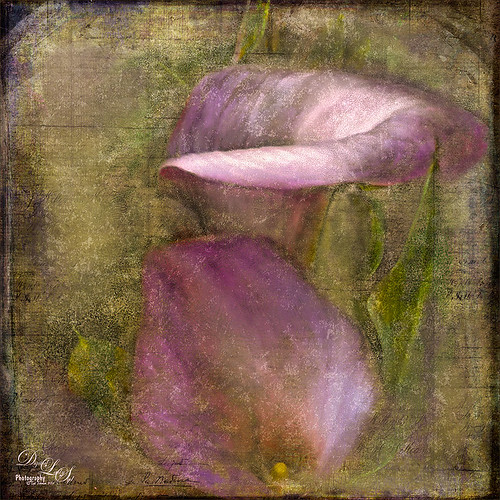
Just wanted to play with this beautiful image of soft pink calla lilies – love their color! Took them with my Android phone in the grocery and loved the result. Did nothing special to them in Lightroom – just the basics, then did a little clean up on the image in Photoshop before adding 2 Lil’ Owls (see sidebar for website link) Carnavale texture. Painted back the flowers in a layers mask attached to the texture and topped it off with Kim Klassen‘s Cloth & Paper Collection’s Magicfilm set to Soft Light blend mode at 45% layer opacity. This completed the vintage feel. The colors just did not look quite right to me and I had a hard time figuring out what to do to get the final look I liked. Then it hit me – go to my favorite plug-in – Nik’s Viveza 2 – and sure enough, with just two control points on the flower petals, I got just the color effect I wanted. Once again, lots of fun to do on boring Monday!…..Digital Lady Syd
Adding Snapseed to a Regular Photo
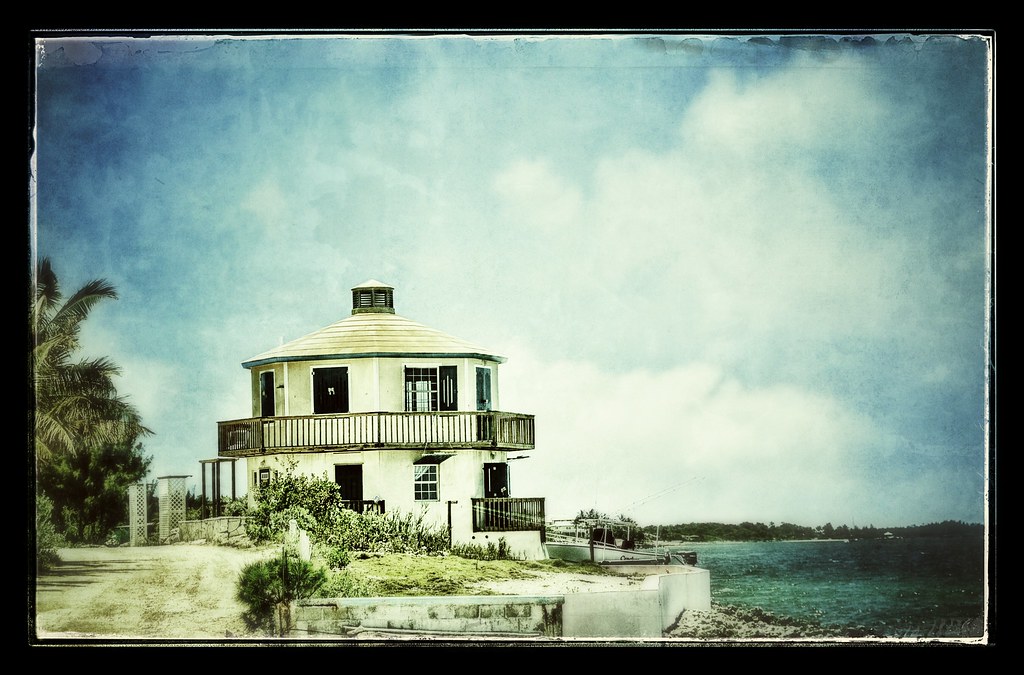 Another example of what Nik’s Snapseed phone app can do to an image. This is an image I took in Marsh Harbour in the Bahamas several years ago and put in my photo gallery on my Android phone. Since I have been learning how to use Snapseed (see How to Use Nik’s Snapseed Photo App on Your Smart Phone), I decided to try it on one of my already processed images just to see what would happen. Wow – I loved the results. These are the settings I used to get this result: Tune Image Brightness -9, Ambience +79, Contrast +9, Saturation +37, Shadows +16, and Warmth +35; Vintage Style 3 and Texture 1, Brightness +23, Saturation +15, Texture Strength +70, Center Size +19, and Style Strength +60; Grunge Style 292, Texture 1, Brightness +48, Contrast 0, Texture Strength +17, and Selection control point covering the whole image; Focus Center Bur +97, Outer Brightness -14, and Inner Brightness -44; and Frames – Frame 19. This app is great fun to play with on your phone and you can get some really surprising results!…..Digital Lady Syd
Total Eclipse of the Moon!
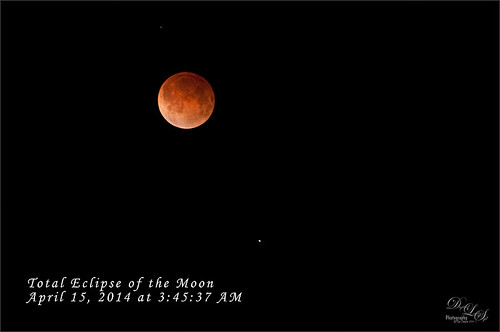
Image of lunar eclipse taken on April 15, 2014 at 03:45:37 AM from northeastern Florida showing what was considered totality according to Astronomy Magazine. Image was shot with my AF-S Nikkor 70-300 mm 1:4.5-5.6 G lens set to aperture priority mode at F/5.6, 300 mm focal length (with crop factor 450 mm), and ISO 1600, with a resulting shutter speed of 2.0 sec. My Nikon D300 was set up on a tripod with a shutter release cord to get the sharpest results. Unfortunately the sky was not all that clear when the photos were being shot and my equipment is not the latest, but all in all, I think it did a fair job of getting a beautiful lunar eclipse shot. No post-processing in Lightroom – just did not help. Took image into Photoshop and used Topaz (see sidebar for website link) DeNoise (Overall 10, Shadows 34), then applied a black layer mask and just painted in a few areas that really needed it – really not too much adjustment here even though my camera does not handle ISO 1600 real well. Topaz Detail 3 was applied (here are the settings: Small Details 0.28, Small Details Boost -0.02, Medium Details 0.55, Medium Details Boost 0.15, Large Details 0.61, and Large Details Boost -0.29 – best plug-in around for this type of detail work) and once again a black layer mask was applied and just a few areas were added back to get more detail in the moon surface. The text font is Monotype Corsive at 38 points. That was it! It was so much fun to go out and shoot at night. Also check out my blog of a lunar eclipse taken on 12/21/10 called Shooting a Lunar Eclipse for more info. Have a great day!…..Digital Lady Syd
Painting Scotland!
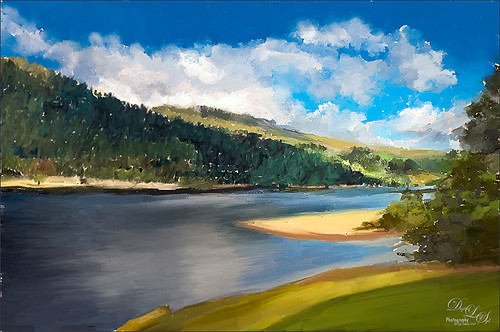
This image was painted from a shot I took while in Scotland several years ago – just can’t get enough of this beautiful country! This is where I am at with my painting journey. The basic image was painted in Corel Painter with some brushes I created after reading an older book by David Cole called Complete Digital Painting Techniques. Even though it uses an older software edition, I was able to follow his workflow for creating an oil painting and to create the brushes he was using in his example. I still had to supplement with a couple oil brushes from Fay Sirtis, a Corel Master who makes wonderful Painter and Photoshop brushes. After completing what I could in Painter, the image was brought into Photoshop and a Solid Fill Layer was added under the painted layer to add just a little different color in the areas that were not covered with paint, just to give a little interest. Come clean up was done to smooth out some rough edges, and a couple Radial Filters were applied using the Camera Raw filter. That was it and is where I am with my Painter journey, and oh yes, it was lots of fun to do!…..Digital Lady Syd
Lantern at Stetson
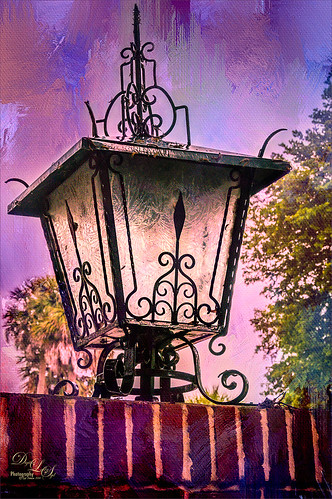
This beautiful large lantern was sitting on top of a large brick wall introducing Stetson University in DeLand, Florida, where my son goes to school. This was an easy image to post-process – just a little detail sharpening using Topaz (see sidebar for website link) Detail 3 so the glass etching could be seen better. Used a black layer mask and just painted back the glass areas. Next I used Mellisa Gallo (one of my favorite texture people) of Painted Textures November Twilight texture set to Linear Light blend mode at 100% layer opacity and April Impasto texture set to Multiply at 52% layer opacity – these were both from great deals she runs on her website each month. The lantern was painted back softly in a layer mask on each texture so the etchings still show up nicely. Now to get the lantern to light up just a little, I tried several different things and it just did not look right. My last attempt was using Nik’s Viveza 2 and setting a Control Point in the lantern. Then the Warmth was set to 44%, Brightness 36%, Contrast -32%, Saturation 52%, and Shadow Adjustments 100% to get the soft glow in the lantern. This filter never lets me down! Anyway, this image is just the way I wanted it!…..Digital Lady Syd
Smudging Those Petals!
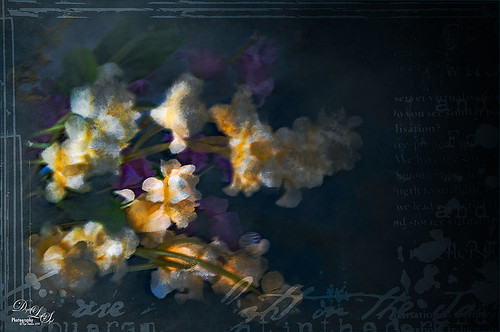
Last week I did a blog on using the smudge tool on my Fun Photoshop Blog (see How to Use the Smudge Tool). Thought I would post another example of the some of the nice results you can get when using it. In Lightroom Jared Platt‘s Pops Image preset was applied from one of his Presets, Presets, Presets! CreativeLive classes – this particular preset uses a Linear Tone Curve. In Photoshop some clean up was done, and Topaz (see sidebar for image website) Detail 3 was used to sharpen my focal point area. Next Topaz Simplify 4 was set to BuzSim preset with the Edge Strength set to 1.54. Once applied, a layer mask was used so just the center of the focal point has the plug-in applied. On a New Layer the Smudge Brush was used at 80% Strength to give the painterly effect to the petals. Just painted to give different opacities to each petal. Jai Johnson‘s Intenseblue-Canvas texture was applied and the flowers painted back softly in a layer mask using my chalk brush. On a stamped layer (CTRL+ALT+SHIFT+E) the Camera Raw filter was applied as a Smart Object and the Radial Filter was used to create the soft vignette. The last step involved using a mask created by Studio Viva Artistry on Studio Girls Scrapbookgraphics called Viva_Pennmanship_mask3 to add some additional interest. I really like the effect the Smudge Brush gives!…..Digital Lady Syd
The Red-Roofed Barn

Here is a good example of what not to do – I have no real idea how I post-processed this image of a red-roofed barn in Jackson, Mississippi, last week on my laptop, as it got saved accidentally as a flattened .psd file. I really like the results so I am going to guess. I believe that I placed a sepia version on top of a regular version by bring in two versions from Lightroom. With the sepia layer on top, I lowered the opacity a little on the sepia toned layer, and then back more of the the beautiful red roof and light green foreground. Usually I w0uld have removed all the wires, signs, and telephone lines, but in this case, it seems to really be how to the image actually looked. A stamped version (CTRL+ALT+SHIFT+E) was created on top of the layers, and a fairly strong vignette was added in OnOne (see sidebar for website link) Perfect Effects 8 along with some sharpening. This software does a really nice job on landscapes like this. Anyway, I liked the photo so I thought I would post it……Digital Lady Syd


